The escape continues outside the fortress
Breaking prisoners out of the Citadel was not the same as removing them from Lola Sayu. The escaped Jedi, clone troopers and Republic officers still had to cross inhospitable volcanic terrain while the Separatists pursued them. The official episode guides describe lava, caverns, harsh cliffs and hazards that made this stage of the operation dangerous even after the prison's internal defenses had been breached.
The archive treats the landscape as its own scene rather than merely presenting a second view of the Citadel's exterior. Its on-image controls identify threats and participants, but do not create a trail with invented distances or precise checkpoint markers. A viewer can distinguish documented terrain features from an artist's interpretation of how the group moved between them.
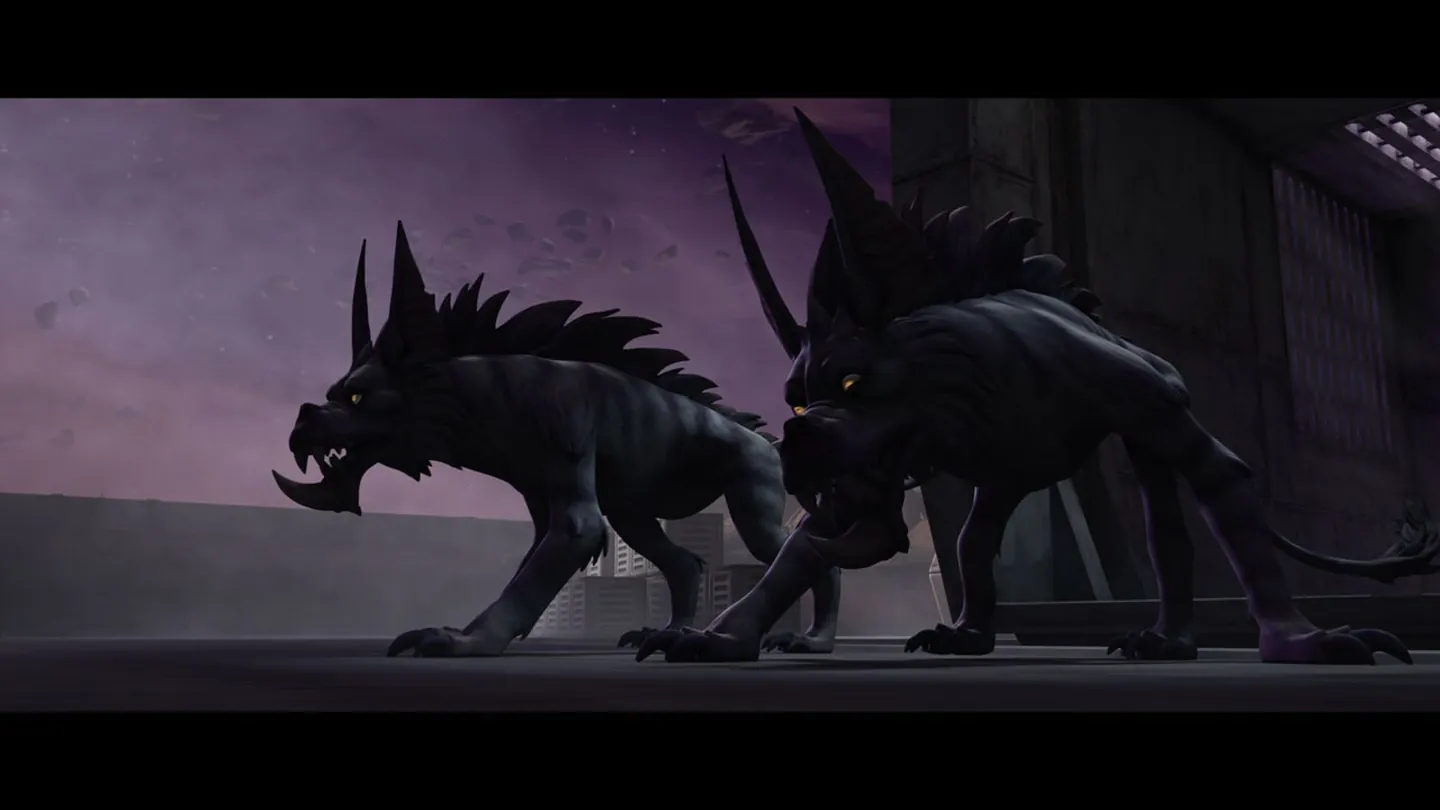
The threat from anooba tracking beasts
Osi Sobeck deployed forces to track and recover the escaping prisoners, including dangerous tracking animals called anoobas. These predatory beasts became particularly consequential when they attacked the small Jedi Master Even Piell. He was fatally wounded during the pursuit. The animal reference on the page connects to the official Databank, not an invented encounter site along a fabricated road.
The threat was different from the battle droids and automated systems of the prison itself. It turned the landscape outside the facility into another hostile environment. The creatures' appearance and role are documented in the series. Their precise habitats, exact numbers and the coordinate of the final attack are not established, so the page avoids claiming more.
Piell's final transfer of intelligence
Even Piell carried part of the secret coordinates for the Nexus Routes. Knowing he might die, Piell entrusted his knowledge to Ahsoka Tano. His decision preserved information that the Republic needed, but did not eliminate the separate responsibilities of Captain Tarkin, who still possessed the other portion. The handover is an important event in the escape narrative and deserves more than a short caption beneath an image of the injured Jedi.
Ahsoka insisted that her knowledge be delivered to the Jedi Council. Tarkin maintained that he would report his portion to Chancellor Palpatine. That disagreement was not simply a quarrel over personal pride. It reflected competing understandings of which institution should control sensitive military intelligence and foreshadowed Tarkin's admiration for strong centralized authority.
A rescue force fights its way through
Plo Koon commanded a task force of Republic cruisers and starfighters sent to extract the survivors. The official Citadel Rescue account describes a significant engagement against the Separatist forces defending the planet. The rescue required the fleet to reach the correct opportunity while the ground party remained mobile under pursuit. The fighters were not simply landing in an unguarded open field.
Neither the episode guide nor the Databank supplies a verified landing coordinate or a continuous map connecting every cavern to the extraction site. The navigator uses Plo Koon's official portrait as a subject for the fleet action rather than drawing a false orbital line across a planetary panorama. The escape can be followed as a documented sequence without pretending to recreate military navigation data.
Different philosophies among the survivors
The extraction did not erase divisions among the people rescued. Captain Tarkin argued for military decisions unburdened by what he viewed as restrictive Jedi principles. Anakin Skywalker found elements of that criticism persuasive. In contrast, Ahsoka maintained that the intelligence entrusted to her should be presented to the Jedi Council. The group could cooperate under immediate threat without agreeing about the moral and political basis for conducting the war.
Those disagreements help explain why the rescue is significant beyond its tactical outcome. The eventual split of information between the Chancellor and Jedi Council reflected real institutional tensions during the final years of the Republic. The archive does not invent a later meeting outcome or suggest that everyone involved already understood the full Sith conspiracy.
A verified escape, not a fictional route map
The Lola Sayu, Citadel and Citadel Rescue references identify the planet, fortress, pursuit, fatal injury and fleet intervention. They do not justify assigning labels to arbitrary mountains or inventing an exact escape path. Where a visual does not show a feature that can be identified reliably, the page uses contextual investigation controls within the image instead of fake location dots.
The six chapters and changing scenes allow the reader to examine the ground escape, the intelligence handoff and the fleet response as related but different developments. Distinct galleries and direct links return visitors to the prison, the planet and the involved people. The official timeline is preserved without conflating the Republic-built Citadel's historical purpose with its later Separatist operation.