
LEGENDS · 137 ABY · THE VECTOR CONFRONTATION
Battle on Had Abbadon: the trap that nearly destroys Darth Krayt
Cade Skywalker, Imperial Knights and Celeste Morne confront Krayt while an ancient Sith spirit threatens to seize his body.
Principal figures: Cade Skywalker · Celeste Morne · Azlyn Rae · Darth Krayt
← Back to the full timeline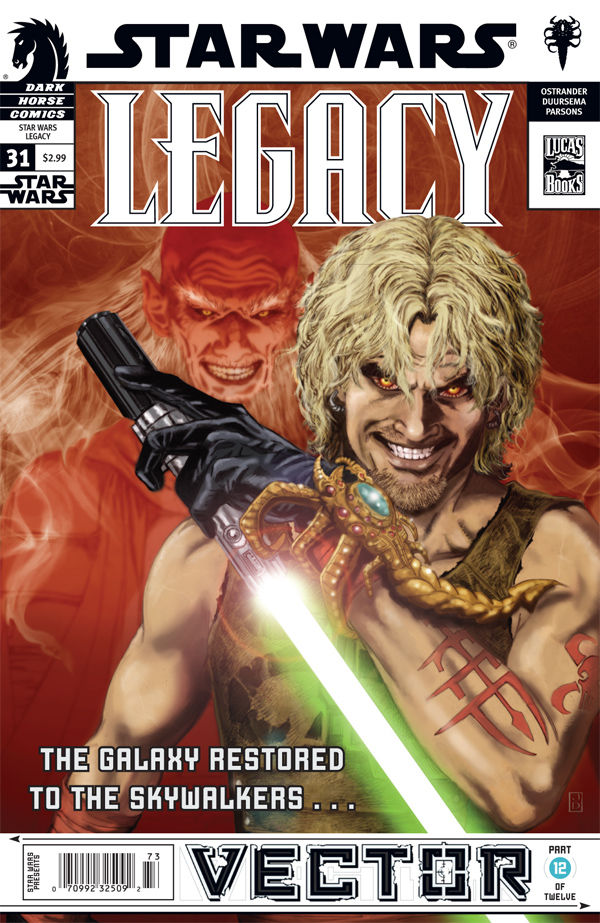
An unlikely alliance sets a trap
By 137 ABY, Darth Krayt ruled the Empire but feared that the Yuuzhan Vong implants in his body would kill him. Jedi Cade Skywalker and his allies sought a way to stop the Sith ruler. They joined Imperial Knights despite political tensions and turned the ancient Sith spirit Karness Muur into bait. Celeste Morne, who had carried Muur's talisman for centuries, became central to the plan. The proposed exchange was terrifying: Muur offered healing in return for the chance to inhabit Krayt's body. The group hoped the prospect would lure the Dark Lord away from his ordinary defenses.
Arrival on Had Abbadon
Krayt reached the Deep Core world accompanied by Darth Talon, Darth Stryfe and Darth Maladi, refusing the demand that he come alone. Darth Wyyrlok stayed aboard their vessel to investigate. Cade, Shado Vao and Imperial Knights Antares Draco, Ganner Krieg and Azlyn Rae waited with their Force presences concealed. The meeting became open battle when Cade attacked. The scene united different factions against one Sith ruler without erasing the fact that the alliance was temporary and ethically fraught.
Morne's struggle against Muur
Karness Muur had used his ancient talisman to control Morne and the rakghouls associated with his plague. Her participation was therefore marked by compromised autonomy as well as personal resolve. During the battle she wielded great power against Krayt, but the intervention injured allies, including Azlyn Rae. It is misleading to describe this only as the unleashing of a convenient superweapon; the weapon was also a sentient person held captive by a predatory spirit.
Krayt's apparent death
Azlyn struck Krayt a severe blow, and Morne's Force lightning compounded his injuries. The Dark Lord appeared defeated. Morne then asked Cade to end her life to free her from Muur's control; Cade complied, and Muur's spirit and the talisman were destroyed. The Jedi and Imperial Knights withdrew with their wounded. Those outcomes were decisive for Morne, but not for Krayt. The later fate of the Sith leader is often distorted when this clash is retold as his final defeat.
Wyyrlok's betrayal
Wyyrlok discovered that Krayt had survived the battle. Instead of providing aid, he attacked his master and left him for dead. He went on to control the One Sith in Krayt's name, disguising the change in leadership. Krayt later returned, destroyed Wyyrlok and recovered the throne before his final confrontation with Cade at Coruscant in 138 ABY. These are distinct events; the timeline should not collapse a failed assassination, internal succession and final death into one date.
Anthropological assessment: coalition, control and bodily autonomy
The battle illustrates the difference between a common enemy and a shared political program. Jedi, Imperial Knights and a person carrying an ancient Sith spirit collaborated because each judged Krayt dangerous, but their commitments were not identical. Control of Morne's body was itself a form of domination: Muur exploited the person who preserved his existence, while Krayt sought to escape bodily decline by borrowing another power. The conflict is more complex than a duel between good and evil because its participants contested who could make decisions for other people's lives and bodies.
Sources, art and chronology
The main narrative unfolds through the Vector crossover in Star Wars: Legacy (2006) #29–31. The cover displayed here is real published art from issue #31, not an illustration generated for the archive. Secondary chronologies date Had Abbadon to 137 ABY. Krayt's permanent defeat belongs to 138 ABY and is covered separately.
Interactive evidence lab
Check your understanding of the sources and their limits. Select two answers and review the explanations at the bottom.
Source record and further reading
Published comic issues establish the principal actions. Supplementary Legends summaries help locate chronology and connect issues; they are not treated as eyewitness accounts of imaginary undocumented events.