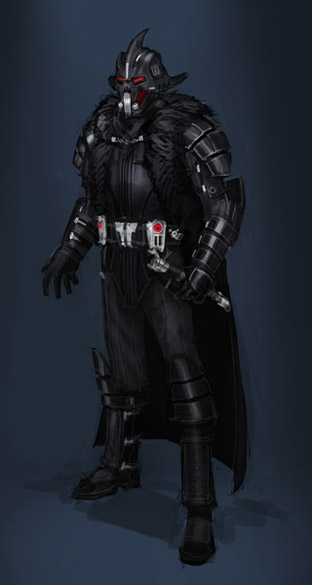
Knights of the Fallen Empire: All 16 Chapters: navigation-first Imperial campaign for Sith Warrior, Sith Inquisitor, Imperial Agent and Bounty Hunter, including named entrances, major objectives and mission handoffs.
16 main story entries139 numbered stepsImperial route7.9-era story order
LOST OR STUCK? · MAP AND FLOOR CHECK
Before chasing the quest marker, check the route
Choose the active story mission.Press L to open the mission log and track the named Sith Warrior objective. A purple mission symbol marks important story content, but not necessarily YOUR class mission. Follow the exact title and task shown in this walkthrough.
Open the full map.Default M opens the main map. Alt + M toggles the overlay map and minimap. If your shortcuts differ, check your assigned keybinds. Start with the WORLD region, then switch to the current AREA or interior floor map.
A marker behind a wall is not a doorway.On the world map find the correct district or zone; on the local map look for the named cave, station, building entrance, lift, security door or staircase. When the target is on another floor, find a connecting passage before heading toward its map symbol.
Know which travel option is available.Quick Travel opens a world map with available travel-point filters. Choose an unlocked destination on your current planet and pay attention to any restrictions or costs shown in-game. For a new planet, use your Fury's Galaxy Map and the orbital station surface shuttle instead.
If the marker does not advance, check the VERB.Talk, use, loot, disable, exit and return to your ship are separate mandatory interactions. Read the mission's “If you are stuck” note below before fighting more unrelated enemies.
A sixteen-chapter cinematic campaign. Chapters automatically follow each other. Start from the ship Mission Console after Ziost; beginning early can lock unfinished class and companion quests.
Use the full map (default M), confirm the tracked purple mission in the log (default L), and switch to the current floor after a door or lift. Your chosen Combat Style determines combat abilities, but the Imperial campaign route applies to Sith Warrior, Sith Inquisitor, Imperial Agent and Bounty Hunter, with class-specific dialogue or scenes where applicable.
Evidence boundary: This guide verifies the named mission sequence and broad entrances from quest records. It does not claim to have personally tested every interior turn, lift or coordinate. Where exact navigation has not been verified, follow the named phase and the current in-game mission breadcrumb.
Important routing and progression notes
From Chapter IX onward you can access Alliance Alerts, but they are not needed to complete the next story chapter.
Each chapter takes you into a controlled phase. Use its specific objective, door, lift or console, rather than following an unrelated planetary marker.
Story Mode is the appropriate walkthrough difficulty. A replayed chapter does not always advance a character's first-time story progress.
Combat: use a healing companion when available, interrupt dangerous enemy channels and use the defensive abilities suitable for your Combat Style in boss encounters. Some scripted chapters temporarily change companions or playable characters.
TRUE IN-GAME VISUAL REFERENCES
Published maps and screenshots
These links open the original publishers’ in-game maps and screenshots. IDS does not copy those images or present schematic directions as screenshots. Story-phase floors can differ from the exterior or daily-area map.
Follow the chapter's flagship and boarding sequence, staying with the displayed story path rather than attempting normal Galaxy Map travel.
Start
Start Chapter I from the Fury's blue Mission Console after the Ziost prelude and speak with Darth Marr.
Finish
Complete the Valkorion confrontation on Zakuul to advance automatically to Chapter II.
The route to follow
Active purple story mission→Fury; Darth Marr's fleet; Wild Space→Chapter I: The Hunt→Next story handoff
Find the starting contact or mission
Start Chapter I from the Fury's blue Mission Console after the Ziost prelude and speak with Darth Marr.
Identify the correct destination and entrance
Area: Fury; Darth Marr's fleet; Wild Space. Track 'Chapter I: The Hunt' in the Mission Log. Inspect the world or region map first, then use the named interior doorway, phase entrance or lift indicated by the active mission.
Locate the next landmark 1
Start on your Fury using the blue mission console and launch The Hunt. Inside Darth Marr's flagship, speak to Captain Fora, then meet Marr on the BRIDGE; this is not a Fleet mission.
Locate the next landmark 2
When boarders appear, move from the SHIELD GENERATOR to the Port Section and HANGAR. Defeat the Elite Skytrooper and talk to Sergeant Dol; continue through Turbolaser Control and the STARBOARD compartment.
Locate the next landmark 3
Reach the DOCKING CLAMP, defeat its Elite Skytrooper, and interact with the clamp to repair it. Enter MAIN ENGINEERING, defeat its defender and use the control to RESTORE MAIN POWER before continuing to Arcann.
Finish the chapter's required interaction
Follow the chapter's flagship and boarding sequence, staying with the displayed story path rather than attempting normal Galaxy Map travel.
Complete the handoff to the next mission
Complete the Valkorion confrontation on Zakuul to advance automatically to Chapter II.
Confirm progression before departing
Check the Mission Log for a completion or the next story title. If the objective is still active, read the stuck guidance below; repeatable Flashpoint runs and bonus tasks can differ from the story-linked version.
Cannot find the objective?
The mission changes between the ship's Bridge, Hangar, Turbolaser Control, Docking Clamp and Main Engineering. Do not keep searching the hangar after Sergeant Dol's conversation: the next panel is at the docking clamp or power station.
Other activities: Starting this chapter can close unfinished original companion conversations and earlier stories. Finish those before accepting The Hunt.
Mission or chapter sequence and named settings are researched from the cited mission task record where provided. Descriptions identify real task names and phase changes; unverified left-right turns are deliberately not invented.
Follow the surreal interior path and interact with the chapter targets during the carbonite-recovery vision.
Start
Continue after The Hunt as the chapter loads into the dreamscape rather than a normal planet.
Finish
Complete the dream confrontation so the story transitions to Chapter III: Outlander.
The route to follow
Active purple story mission→Dreams and Visions→Chapter II: A Dream of Empire→Next story handoff
Find the starting contact or mission
Continue after The Hunt as the chapter loads into the dreamscape rather than a normal planet.
Identify the correct destination and entrance
Area: Dreams and Visions. Track 'Chapter II: A Dream of Empire' in the Mission Log. Inspect the world or region map first, then use the named interior doorway, phase entrance or lift indicated by the active mission.
Locate the next landmark 1
Chapter II launches inside DREAMS AND VISIONS. Speak with Valkorion and reach your companions; defeat the hostile visions blocking them. This is a scripted dream and does not require regular planet travel.
Locate the next landmark 2
If the vision takes you to destroyed Dromund Kaas, reach the CENTRAL TAXI PAD and USE ITS TAXI to reach the Citadel. Other dream branches send you toward Coruscant's SENATE TOWER instead.
Locate the next landmark 3
Defeat the class-dependent figures from your past, speaking to Valkorion between scenes. The final Ziost dream has a MONOLITH encounter; defeat it and finish Valkorion's dialogue to reach Outlander.
Finish the chapter's required interaction
Follow the surreal interior path and interact with the chapter targets during the carbonite-recovery vision.
Complete the handoff to the next mission
Complete the dream confrontation so the story transitions to Chapter III: Outlander.
Confirm progression before departing
Check the Mission Log for a completion or the next story title. If the objective is still active, read the stuck guidance below; repeatable Flashpoint runs and bonus tasks can differ from the story-linked version.
Cannot find the objective?
Do not try to take an ordinary taxi or ship to the ruined Citadel: use the DREAM INSTANCE'S Central Taxi Pad when the objective calls for it. The historical enemies are class-dependent; the Sith Warrior sees a different selection from other Origin Stories.
Other activities: Reviving ten fallen citizens appears as the optional Too Little Too Late bonus task, not the chapter completion gate.
Mission or chapter sequence and named settings are researched from the cited mission task record where provided. Descriptions identify real task names and phase changes; unverified left-right turns are deliberately not invented.
Fight through the facility and follow the escape route marked by the chapter, accompanying Lana and the story companions as the stage requires.
Start
Begin in the carbonite detention facility after Chapter II.
Finish
Exit the prison sequence and continue to Chapter IV: The Gravestone.
The route to follow
Active purple story mission→Zakuul carbonite storage facility→Chapter III: Outlander→Next story handoff
Find the starting contact or mission
Begin in the carbonite detention facility after Chapter II.
Identify the correct destination and entrance
Area: Zakuul carbonite storage facility. Track 'Chapter III: Outlander' in the Mission Log. Inspect the world or region map first, then use the named interior doorway, phase entrance or lift indicated by the active mission.
Locate the next landmark 1
After speaking with Lana, go through the CARBONITE FACILITY Security Checkpoint and use the SECURITY DOOR INTERACTION rather than circling the cell blocks.
Locate the next landmark 2
Reach the EXTRACTION LIFT and USE IT; cross the SKYBRIDGE after defeating the Alert Response Team. In the SKYTROOPER FACTORY, choose the Emergency Lift or Service Lift when the active objective points to one.
Locate the next landmark 3
At the FACTORY REACTOR, use the Reactor Access Console, DISABLE THE WEST AND EAST CONDUIT TOWERS, then disable the MASTER POWER JUNCTION. Exit the catwalks using the Emergency Lift or Maintenance Lift Panel as directed.
Locate the next landmark 4
At extraction, BYPASS THE FENCE DOOR, clear the area, USE THE EXTRACTION BEACON and finish the Tanek/Novo encounter.
Finish the chapter's required interaction
Fight through the facility and follow the escape route marked by the chapter, accompanying Lana and the story companions as the stage requires.
Complete the handoff to the next mission
Exit the prison sequence and continue to Chapter IV: The Gravestone.
Confirm progression before departing
Check the Mission Log for a completion or the next story title. If the objective is still active, read the stuck guidance below; repeatable Flashpoint runs and bonus tasks can differ from the story-linked version.
Cannot find the objective?
Reactor markers occupy an INTERIOR CATWALK level; do not hunt for their consoles outdoors. If stuck after the conduits, the required additional interactable is the Master Power Junction, then the designated lift.
Other activities: The active chapter objective is mandatory; mission bonuses and extra enemy counts are optional unless named in the primary mission log.
Mission or chapter sequence and named settings are researched from the cited mission task record where provided. Descriptions identify real task names and phase changes; unverified left-right turns are deliberately not invented.
Travel through the Zakuul swamp, use the chapter's wilderness crossings and enter the derelict ship when HK-55 identifies it.
Start
Track the Gravestone mission once Chapter III ends.
Finish
Finish searching the vessel and move into Chapter V: From the Grave.
The route to follow
Active purple story mission→Zakuul swamp and buried warship→Chapter IV: The Gravestone→Next story handoff
Find the starting contact or mission
Track the Gravestone mission once Chapter III ends.
Identify the correct destination and entrance
Area: Zakuul swamp and buried warship. Track 'Chapter IV: The Gravestone' in the Mission Log. Inspect the world or region map first, then use the named interior doorway, phase entrance or lift indicated by the active mission.
Locate the next landmark 1
On the Zakuul swamp route, speak to Koth and investigate the unidentified TECHNOLOGICAL OBJECT. Defeat the SWAMP RANCOR and report to HK-55 as the mission advances into the buried ship.
Locate the next landmark 2
Inside the GRAVESTONE defeat six infesting beasts and the ANCIENT IKNAYID GUARDIAN, then use the AIRLOCK to reach the remaining ship sections. Speak to Koth ON THE GRAVESTONE when his branch becomes available.
Locate the next landmark 3
The repair branches require three GROUNDWATER READINGS for Lana and FOUR SCATTERED STARSHIP PARTS for Koth, followed by the FUEL CELL after the Iknayid. Return to the Gravestone once those tasks are complete.
Locate the next landmark 4
When strange sounds appear as your tracker, descend to the ship's LOWER DECKS and investigate the ANCIENT MONOLITH; do not exit to the swamp looking for it.
Finish the chapter's required interaction
Travel through the Zakuul swamp, use the chapter's wilderness crossings and enter the derelict ship when HK-55 identifies it.
Complete the handoff to the next mission
Finish searching the vessel and move into Chapter V: From the Grave.
Confirm progression before departing
Check the Mission Log for a completion or the next story title. If the objective is still active, read the stuck guidance below; repeatable Flashpoint runs and bonus tasks can differ from the story-linked version.
Cannot find the objective?
The Gravestone story alternates between ship INTERIOR (including lower decks) and swamp EXTERIOR. If the objective says Ancient Monolith, search the ship's lower deck after power restoration, not the original swamp entrance.
Other activities: The active chapter objective is mandatory; mission bonuses and extra enemy counts are optional unless named in the primary mission log.
Mission or chapter sequence and named settings are researched from the cited mission task record where provided. Descriptions identify real task names and phase changes; unverified left-right turns are deliberately not invented.
Defend the Gravestone against skytroopers, perform the mandatory ship systems interactions and proceed through the escape sequence.
Start
Start from the ship interior where Chapter IV ended.
Finish
Finish the departure to the Asylum refuge for Chapter VI.
The route to follow
Active purple story mission→The Gravestone and escape route→Chapter V: From the Grave→Next story handoff
Find the starting contact or mission
Start from the ship interior where Chapter IV ended.
Identify the correct destination and entrance
Area: The Gravestone and escape route. Track 'Chapter V: From the Grave' in the Mission Log. Inspect the world or region map first, then use the named interior doorway, phase entrance or lift indicated by the active mission.
Locate the next landmark 1
Speak to Valkorion and return to the Gravestone's BRIDGE. Interact with the LOCKED DOOR when the way to the entrance is blocked.
Locate the next landmark 2
Fight through the ship to its ENTRANCE, defeat the EMPTRONIC BATTLE DROID, then defend Lana against multiple Skytrooper waves and CAPTAIN DRAYNON ATRUS.
Locate the next landmark 3
After speaking to Lana, move to the GRAVESTONE'S CANNON and OPERATE IT. The sequence also sends you to Koth on the HANGAR DECK and to Senya and HK-55 in the ship interior.
Locate the next landmark 4
Follow HK-55 to the DARK SANCTUARY inside the Gravestone and finish the relevant conversations to reach Asylum.
Finish the chapter's required interaction
Defend the Gravestone against skytroopers, perform the mandatory ship systems interactions and proceed through the escape sequence.
Complete the handoff to the next mission
Finish the departure to the Asylum refuge for Chapter VI.
Confirm progression before departing
Check the Mission Log for a completion or the next story title. If the objective is still active, read the stuck guidance below; repeatable Flashpoint runs and bonus tasks can differ from the story-linked version.
Cannot find the objective?
A player who defeats all Skytrooper waves but stays in the same room may have missed the objective to OPERATE THE CANNON, speak to Koth on the HANGAR DECK, or investigate the Dark Sanctuary; check the current tracker verb.
Other activities: The active chapter objective is mandatory; mission bonuses and extra enemy counts are optional unless named in the primary mission log.
Mission or chapter sequence and named settings are researched from the cited mission task record where provided. Descriptions identify real task names and phase changes; unverified left-right turns are deliberately not invented.
Use the inhabited station's interior passages and meet the contacts in the Free Zone. Find the mission target Tora when requested.
Start
Continue the chapter on Asylum after escaping Zakuul.
Finish
Finish the recruitment and transition to Chapter VII: The Lady of Sorrows.
The route to follow
Active purple story mission→Asylum station→Chapter VI: Asylum→Next story handoff
Find the starting contact or mission
Continue the chapter on Asylum after escaping Zakuul.
Identify the correct destination and entrance
Area: Asylum station. Track 'Chapter VI: Asylum' in the Mission Log. Inspect the world or region map first, then use the named interior doorway, phase entrance or lift indicated by the active mission.
Locate the next landmark 1
Speak to Koth on Asylum, then head to the FREE ZONE and locate TORA. An enemy named OGGO interrupts the search; defeat him before resuming the locate-Tora objective.
Locate the next landmark 2
Find SENYA and enter the Scions' trials. Defeat MARAL and TERSU, then move into the NEXT TRAINING CHAMBER to fight VANAT and BERUSAL.
Locate the next landmark 3
Use the doorway to the MEDITATION CHAMBER, defeat HESKAL and complete the confrontation. The Free Zone underbosses are not the story objective.
Finish the chapter's required interaction
Use the inhabited station's interior passages and meet the contacts in the Free Zone. Find the mission target Tora when requested.
Complete the handoff to the next mission
Finish the recruitment and transition to Chapter VII: The Lady of Sorrows.
Confirm progression before departing
Check the Mission Log for a completion or the next story title. If the objective is still active, read the stuck guidance below; repeatable Flashpoint runs and bonus tasks can differ from the story-linked version.
Cannot find the objective?
When the quest moves from Find Tora to Locate Senya and the SCION TRIALS, stop combing the Free Zone streets. The required movement is between Training Chambers and the Meditation Chamber.
Other activities: Peace in the Free Zone, defeating four underbosses, is an optional bonus.
Mission or chapter sequence and named settings are researched from the cited mission task record where provided. Descriptions identify real task names and phase changes; unverified left-right turns are deliberately not invented.
Return to Zakuul through the story phase, use the marked Maintenance Access route and find the Lady of Sorrows for her requested meeting.
Start
Accept the automatically started chapter and respond to the contact for the Lady of Sorrows.
Finish
Finish the encounter and return to Asylum for Chapter VIII.
The route to follow
Active purple story mission→Gravestone; Zakuul Maintenance Access→Chapter VII: The Lady of Sorrows→Next story handoff
Find the starting contact or mission
Accept the automatically started chapter and respond to the contact for the Lady of Sorrows.
Identify the correct destination and entrance
Area: Gravestone; Zakuul Maintenance Access. Track 'Chapter VII: The Lady of Sorrows' in the Mission Log. Inspect the world or region map first, then use the named interior doorway, phase entrance or lift indicated by the active mission.
Locate the next landmark 1
Start on the GRAVESTONE BRIDGE by talking to Senya. Before leaving, go to the GENERATOR ROOM, check the POWER GENERATOR and PRIMARY FUSE BOX, locate and repair the needed fuse. Then take the Zakuul shuttle.
Locate the next landmark 2
On Zakuul, follow the UNDERCITY RESOURCE NETWORK into TRAM SERVICE TUNNELS. Use the CITY DIRECTORY; direct T7 at Surveillance Feeds 1, 2, 3 and the final feed, using the ACCESS TERMINAL and LOCAL PASSCODE TERMINAL as the mission requests.
Locate the next landmark 3
Help Senya at the CANTINA, then travel to the TRAM MARKET and take the TRAM TO BREAKTOWN. Enter the Heralds' STRONGHOLD at the Gate Entrance and defeat the Exalted's Heralds.
Locate the next landmark 4
Take the LIFT TO MIDTOWN, bypass the SECURITY GRID, enter THE RAZOR and destroy the EAST SIDE GENERATOR to deactivate its laser grid. After the Xon encounter take the PENTHOUSE LIFT, defeat Novo and Balisk, then use the lift again to reach the Lady of Sorrows.
Finish the chapter's required interaction
Return to Zakuul through the story phase, use the marked Maintenance Access route and find the Lady of Sorrows for her requested meeting.
Complete the handoff to the next mission
Finish the encounter and return to Asylum for Chapter VIII.
Confirm progression before departing
Check the Mission Log for a completion or the next story title. If the objective is still active, read the stuck guidance below; repeatable Flashpoint runs and bonus tasks can differ from the story-linked version.
Cannot find the objective?
The chapter changes levels repeatedly: Gravestone generator room, Undercity, Tram Market, Breaktown, Midtown and penthouse. At the Razor gate DESTROY THE EAST SIDE GENERATOR, not more Heralds. At the end USE THE PENTHOUSE LIFT a second time.
Other activities: The optional Clean-up Detail fuse count, seven security cameras and 25 Heralds are separate from the required single fuse repair and T7 surveillance tasks.
Mission or chapter sequence and named settings are researched from the cited mission task record where provided. Descriptions identify real task names and phase changes; unverified left-right turns are deliberately not invented.
Follow the mission route through station defense and the Gravestone departure sequence, completing ship and dialogue tasks in order.
Start
Return to the Asylum station after Chapter VII.
Finish
The story transitions from Asylum to Odessen and Chapter IX: The Alliance.
The route to follow
Active purple story mission→Asylum; Gravestone→Chapter VIII: Taking Flight→Next story handoff
Find the starting contact or mission
Return to the Asylum station after Chapter VII.
Identify the correct destination and entrance
Area: Asylum; Gravestone. Track 'Chapter VIII: Taking Flight' in the Mission Log. Inspect the world or region map first, then use the named interior doorway, phase entrance or lift indicated by the active mission.
Locate the next landmark 1
After speaking with Lana, go into the secret SCION ENCLAVE on Asylum to meet HESKAL. After the first Arcann confrontation, escape the ENCLAVE RUINS and fight the Knights of Zakuul.
Locate the next landmark 2
Continue to the GRAVESTONE, speak with Lana and meet Koth. Take the SHUTTLE TO THE CONTROL SPAR; there is a WALKER encounter on this approach.
Locate the next landmark 3
Meet HK-55, defeat the Zakuul invaders, reach the CONTROL SPAR and USE THE DOCKING CONTROLS TO RELEASE THE GRAVESTONE. The mission has another Arcann confrontation before the chapter ends.
Finish the chapter's required interaction
Follow the mission route through station defense and the Gravestone departure sequence, completing ship and dialogue tasks in order.
Complete the handoff to the next mission
The story transitions from Asylum to Odessen and Chapter IX: The Alliance.
Confirm progression before departing
Check the Mission Log for a completion or the next story title. If the objective is still active, read the stuck guidance below; repeatable Flashpoint runs and bonus tasks can differ from the story-linked version.
Cannot find the objective?
The Control Spar is reached by a SHUTTLE, not an Asylum street route. After the walker and HK-55 sections, the key interaction is the DOCKING CONTROLS that release the Gravestone.
Other activities: The active chapter objective is mandatory; mission bonuses and extra enemy counts are optional unless named in the primary mission log.
Mission or chapter sequence and named settings are researched from the cited mission task record where provided. Descriptions identify real task names and phase changes; unverified left-right turns are deliberately not invented.
Follow the base interior route to meet Lana and Alliance specialists: Sana-Rae, Bey'wan Aygo and Hylo Visz, as the chapter requests.
Start
Begin at Odessen when Chapter VIII concludes.
Finish
Finish establishing the Alliance to unlock Chapter X, Anarchy in Paradise.
The route to follow
Active purple story mission→Odessen Alliance base→Chapter IX: The Alliance→Next story handoff
Find the starting contact or mission
Begin at Odessen when Chapter VIII concludes.
Identify the correct destination and entrance
Area: Odessen Alliance base. Track 'Chapter IX: The Alliance' in the Mission Log. Inspect the world or region map first, then use the named interior doorway, phase entrance or lift indicated by the active mission.
Locate the next landmark 1
Arriving at ODESSEN, speak with THERON SHAN and go to the ALLIANCE WAR ROOM. Talk to BEY'WAN AYGO, then leave the War Room for DOCTOR OGGUROBB'S LAB.
Locate the next landmark 2
Visit all required department specialists: BEY'WAN AYGO (Military Affairs), HYLO VISZ (Underworld Logistics) and SANA-RAE (the Force Enclave). These contacts occupy different Alliance-base areas.
Locate the next landmark 3
Join the CANTINA celebration, then FIND SENYA and talk to her. RETURN TO THE WAR ROOM and SPEAK TO LANA to close the chapter.
Finish the chapter's required interaction
Follow the base interior route to meet Lana and Alliance specialists: Sana-Rae, Bey'wan Aygo and Hylo Visz, as the chapter requests.
Complete the handoff to the next mission
Finish establishing the Alliance to unlock Chapter X, Anarchy in Paradise.
Confirm progression before departing
Check the Mission Log for a completion or the next story title. If the objective is still active, read the stuck guidance below; repeatable Flashpoint runs and bonus tasks can differ from the story-linked version.
Cannot find the objective?
If the chapter seems stalled after the first War Room briefing, you probably still need OGGUROBB'S LAB or one of the three department specialists. Return to Lana in the War Room only after the cantina and Senya sequence.
Other activities: Alliance Alerts unlock during this era but do not need to be cleared before the chapter finale.
Mission or chapter sequence and named settings are researched from the cited mission task record where provided. Descriptions identify real task names and phase changes; unverified left-right turns are deliberately not invented.
Reach the active Zakuul phase and locate Firebrand. Follow the Overwatch and sabotage passages shown by the mission tracker.
Start
Take Chapter X from the chapter journal or automatic prompt.
Finish
Finish Firebrand's operation to advance to Chapter XI: Disavowed.
The route to follow
Active purple story mission→Zakuul; Firebrand / Overwatch→Chapter X: Anarchy in Paradise→Next story handoff
Find the starting contact or mission
Take Chapter X from the chapter journal or automatic prompt.
Identify the correct destination and entrance
Area: Zakuul; Firebrand / Overwatch. Track 'Chapter X: Anarchy in Paradise' in the Mission Log. Inspect the world or region map first, then use the named interior doorway, phase entrance or lift indicated by the active mission.
Locate the next landmark 1
Follow Theron's assignment to the ABANDONED STATION on Zakuul. In the Undercity USE THE ABANDONED TURBOLIFT to reach the meeting with Firebrand.
Locate the next landmark 2
At the ABANDONED TRAM STATION defeat the Security Commander and Skytroopers, talk to Firebrand and USE THE MAINTENANCE LIFT.
Locate the next landmark 3
Travel to POWER JUNCTION 353 via the Maintenance Turbolift, place explosive material, and destroy four named SECURITY HUBS: 771, 62-B, 1Y-33 and S-52U.
Locate the next landmark 4
Proceed toward POWER JUNCTION 754 as the objective changes, finish the Overwatch sabotage story, then USE THE WAR ROOM CONSOLE back on Odessen.
Finish the chapter's required interaction
Reach the active Zakuul phase and locate Firebrand. Follow the Overwatch and sabotage passages shown by the mission tracker.
Complete the handoff to the next mission
Finish Firebrand's operation to advance to Chapter XI: Disavowed.
Confirm progression before departing
Check the Mission Log for a completion or the next story title. If the objective is still active, read the stuck guidance below; repeatable Flashpoint runs and bonus tasks can differ from the story-linked version.
Cannot find the objective?
The way from the Undercity to Firebrand uses an ABANDONED TURBOLIFT; after meeting her, use a different MAINTENANCE LIFT to Power Junction 353. Four security hubs are required, not optional enemy waves.
Other activities: The active chapter objective is mandatory; mission bonuses and extra enemy counts are optional unless named in the primary mission log.
Mission or chapter sequence and named settings are researched from the cited mission task record where provided. Descriptions identify real task names and phase changes; unverified left-right turns are deliberately not invented.
Travel by the story instance to meet and operate with Havoc Squad on Zakuul, following the military facility's named entry and interior passages.
Start
Launch Chapter XI after Anarchy in Paradise.
Finish
Complete the Havoc Squad chapter, then take Chapter XII: Visions in the Dark.
The route to follow
Active purple story mission→Zakuul; Havoc Squad→Chapter XI: Disavowed→Next story handoff
Find the starting contact or mission
Launch Chapter XI after Anarchy in Paradise.
Identify the correct destination and entrance
Area: Zakuul; Havoc Squad. Track 'Chapter XI: Disavowed' in the Mission Log. Inspect the world or region map first, then use the named interior doorway, phase entrance or lift indicated by the active mission.
Locate the next landmark 1
Begin on ODESSEN: speak to TORA, then THERON SHAN in the WAR ROOM. The Zakuul insertion meets the SIS contact ARIC JORGAN in the SWAMP.
Locate the next landmark 2
Follow Jorgan through Skytrooper patrols and walkers. Find the EXILE HOMES and EVACUATE SIX before meeting Pashna Veyaad and moving to the HAVOC SQUAD CAMP.
Locate the next landmark 3
At the enemy OUTPOST, find a way PAST THE FORCEFIELD and PLANT THE WIRETAP. When the Security Droid interrupts, defeat it and return to plant the wiretap.
Locate the next landmark 4
Defeat automated defenses, DEACTIVATE THE BLAST DOOR and face BATTLE DROID ATHERNA. ESCAPE THE OUTPOST and return to Theron; the mission eventually sends you back to the WAR ROOM.
Finish the chapter's required interaction
Travel by the story instance to meet and operate with Havoc Squad on Zakuul, following the military facility's named entry and interior passages.
Complete the handoff to the next mission
Complete the Havoc Squad chapter, then take Chapter XII: Visions in the Dark.
Confirm progression before departing
Check the Mission Log for a completion or the next story title. If the objective is still active, read the stuck guidance below; repeatable Flashpoint runs and bonus tasks can differ from the story-linked version.
Cannot find the objective?
At the outpost, DEFEAT SECURITY DROID is a temporary interruption to PLANT THE WIRETAP. The new room opens only after deactivating the BLAST DOOR; don't repeatedly try the forcefield entrance.
Other activities: The active chapter objective is mandatory; mission bonuses and extra enemy counts are optional unless named in the primary mission log.
Mission or chapter sequence and named settings are researched from the cited mission task record where provided. Descriptions identify real task names and phase changes; unverified left-right turns are deliberately not invented.
Meet Valkorion at the directed site, then follow the vision and training sequences using the chapter map.
Start
From Odessen, follow the Chapter XII quest marker OUTSIDE the Alliance headquarters into the wilderness.
Finish
Complete the wilderness episode and return toward Odessen for Chapter XIII.
The route to follow
Active purple story mission→Odessen wilderness→Chapter XII: Visions in the Dark→Next story handoff
Find the starting contact or mission
From Odessen, follow the Chapter XII quest marker OUTSIDE the Alliance headquarters into the wilderness.
Identify the correct destination and entrance
Area: Odessen wilderness. Track 'Chapter XII: Visions in the Dark' in the Mission Log. Inspect the world or region map first, then use the named interior doorway, phase entrance or lift indicated by the active mission.
Locate the next landmark 1
Leave the Odessen ALLIANCE BASE for the SECLUDED WILDERNESS AREA. Obtain WILDERNESS SURVIVAL GEAR, speak to Valkorion and check the SOUTHWEST PASSAGE when your return path is blocked.
Locate the next landmark 2
Find the isolated camp and LIGHT SEVEN BEACONS along the wilderness path. Meet SATELE SHAN and continue toward the DARK CAVE.
Locate the next landmark 3
In the DARK CAVE defeat the Vaylin vision and USE THE WEAPON FORGE. Enter the OASIS CAVE and fight its Cave Jurgoran.
Locate the next landmark 4
Return by USING THE CLIMBING LEDGE, then the ELEVATOR AT ALLIANCE BASE ENTRANCE. Complete the WAR ROOM CONSOLE debrief.
Finish the chapter's required interaction
Meet Valkorion at the directed site, then follow the vision and training sequences using the chapter map.
Complete the handoff to the next mission
Complete the wilderness episode and return toward Odessen for Chapter XIII.
Confirm progression before departing
Check the Mission Log for a completion or the next story title. If the objective is still active, read the stuck guidance below; repeatable Flashpoint runs and bonus tasks can differ from the story-linked version.
Cannot find the objective?
The way back is NOT a map teleport: use the CLIMBING LEDGE, then the ALLIANCE BASE ENTRANCE ELEVATOR, then the WAR ROOM CONSOLE. The seven path beacons are actual chapter tasks.
Other activities: Lost Knowledge's three holocrons and Clear Cut's 15 shade stalkers are optional bonus missions.
Mission or chapter sequence and named settings are researched from the cited mission task record where provided. Descriptions identify real task names and phase changes; unverified left-right turns are deliberately not invented.
Follow the scripted travel to Vandin and complete the heist through its facility entries and interaction objectives.
Start
Begin at Alliance headquarters by speaking with Hylo Visz about the new job.
Finish
Return to the Alliance storyline for Chapter XIV: Mandalore's Revenge.
The route to follow
Active purple story mission→Odessen; Vandin→Chapter XIII: Profit and Plunder→Next story handoff
Find the starting contact or mission
Begin at Alliance headquarters by speaking with Hylo Visz about the new job.
Identify the correct destination and entrance
Area: Odessen; Vandin. Track 'Chapter XIII: Profit and Plunder' in the Mission Log. Inspect the world or region map first, then use the named interior doorway, phase entrance or lift indicated by the active mission.
Locate the next landmark 1
Begin in the ODESSEN WAR ROOM with LANA, then visit HYLO VISZ. Travel to VANDIN and meet GAULT and the remaining heist team.
Locate the next landmark 2
Recover THREE SECURITY SPIKES from security droids to cancel the Docks lockdown and then repeat the SECURITY-SPIKE task to cancel the CENTRAL DISTRICT lockdown.
Locate the next landmark 3
Meet GAULT NEAR THE SKYHOOK and ENTER THE SKYHOOK. Recover a SECURITY ACCESS CARD, deactivate the alert, then TAKE THE ELEVATOR TO THE DOCKING RING.
Locate the next landmark 4
BOARD THE GILDED STAR; use the DUCTWORKS PANEL to reach the VAULT. During the escape, TAKE THE SKYHOOK DOWN, reach the EXTERIOR and the EDGE OF THE GILDED STAR, defeat its Elite Skytrooper and return to GAULT ON ODESSEN.
Finish the chapter's required interaction
Follow the scripted travel to Vandin and complete the heist through its facility entries and interaction objectives.
Complete the handoff to the next mission
Return to the Alliance storyline for Chapter XIV: Mandalore's Revenge.
Confirm progression before departing
Check the Mission Log for a completion or the next story title. If the objective is still active, read the stuck guidance below; repeatable Flashpoint runs and bonus tasks can differ from the story-linked version.
Cannot find the objective?
The skyhook and Gilded Star use separate transitions. The ELEVATOR TO THE DOCKING RING is required before boarding; later the DUCTWORKS PANEL is the way into the vault, not the regular hangar passage.
Other activities: The Conned Strike Back bonus for Brekken Gang members does not open the Gilded Star.
Mission or chapter sequence and named settings are researched from the cited mission task record where provided. Descriptions identify real task names and phase changes; unverified left-right turns are deliberately not invented.
Travel through the Mandalorian infiltration of the Darvannis factory, then enter the facility that manufactures GEMINI technology.
Start
Take Shae Vizla's assignment after Chapter XIII.
Finish
Secure the GEMINI Prime operation and continue to Chapter XV.
The route to follow
Active purple story mission→Odessen; Darvannis factory→Chapter XIV: Mandalore's Revenge→Next story handoff
Find the starting contact or mission
Take Shae Vizla's assignment after Chapter XIII.
Identify the correct destination and entrance
Area: Odessen; Darvannis factory. Track 'Chapter XIV: Mandalore's Revenge' in the Mission Log. Inspect the world or region map first, then use the named interior doorway, phase entrance or lift indicated by the active mission.
Locate the next landmark 1
Talk to SCORPIO in the ODESSEN WAR ROOM, then travel to DARVANNIS and meet the commanders in the MANDALORIAN COMMAND TENT.
Locate the next landmark 2
Speak to SHAE VIZLA, REPROGRAM THREE PERIMETER GUNS and FIRE them. Return to the camp for the next assignment.
Locate the next landmark 3
Enter the ZAKUUL TACTICAL POST. At the ARMORY, destroy the droids and SEAL THE ARMORY; defeat the SKYTROOPER BASE COMMANDER and DEACTIVATE THE PERIMETER SENSOR.
Locate the next landmark 4
Return to camp, then LOCATE GEMINI PRIME inside the FACTORY, defeat ZT-001D and report to TORIAN and SHAE. Return to THERON in the ODESSEN WAR ROOM for the next chapter.
Finish the chapter's required interaction
Travel through the Mandalorian infiltration of the Darvannis factory, then enter the facility that manufactures GEMINI technology.
Complete the handoff to the next mission
Secure the GEMINI Prime operation and continue to Chapter XV.
Confirm progression before departing
Check the Mission Log for a completion or the next story title. If the objective is still active, read the stuck guidance below; repeatable Flashpoint runs and bonus tasks can differ from the story-linked version.
Cannot find the objective?
If the tracker still shows the tactical post, check whether you have FIREd all three perimeter guns and SEALED the armory after the droid encounter. The Factory Recall counts are bonus objectives, not the GEMINI Prime finale.
Other activities: Factory Recall's manufactured-skytrooper kills and factory-line shutdown are bonus tasks.
Mission or chapter sequence and named settings are researched from the cited mission task record where provided. Descriptions identify real task names and phase changes; unverified left-right turns are deliberately not invented.
Board the Eternal Fleet battlecruiser and use its corridors and control stations to replace the GEMINI captain with GEMINI Prime.
Start
Launch the mission aboard the Gravestone after Mandalore's Revenge.
Finish
Complete the shipboard operation and begin the Chapter XVI defense.
The route to follow
Active purple story mission→Gravestone; Eternal Fleet battlecruiser→Chapter XV: The GEMINI Deception→Next story handoff
Find the starting contact or mission
Launch the mission aboard the Gravestone after Mandalore's Revenge.
Identify the correct destination and entrance
Area: Gravestone; Eternal Fleet battlecruiser. Track 'Chapter XV: The GEMINI Deception' in the Mission Log. Inspect the world or region map first, then use the named interior doorway, phase entrance or lift indicated by the active mission.
Locate the next landmark 1
On the GRAVESTONE BRIDGE speak to SENYA. Go to the HANGAR and BOARD THE MARK II for the mission to the Eternal Fleet battlecruiser.
Locate the next landmark 2
Fight toward the BATTLECRUISER BRIDGE. After the Skytrooper ambush talk with SCORPIO, and regroup with SENYA and LANA as the chapter instructs.
Locate the next landmark 3
Escape the SUN GENERATOR, destroy the SKYTROOPER CONSTRUCTOR and continue through the ship to CONFRONT and DEFEAT THE GEMINI CAPTAIN.
Locate the next landmark 4
After the captain's defeat, return toward the BATTLECRUISER HANGAR and ESCAPE IN THE SHUTTLE. The ship is self-destructing; use the hangar exit instead of returning to the bridge.
Finish the chapter's required interaction
Board the Eternal Fleet battlecruiser and use its corridors and control stations to replace the GEMINI captain with GEMINI Prime.
Complete the handoff to the next mission
Complete the shipboard operation and begin the Chapter XVI defense.
Confirm progression before departing
Check the Mission Log for a completion or the next story title. If the objective is still active, read the stuck guidance below; repeatable Flashpoint runs and bonus tasks can differ from the story-linked version.
Cannot find the objective?
At the end, the objective changes from the captain's BRIDGE location to the HANGAR ESCAPE. Reopen the ship interior map and follow the exit corridor; returning to the Gravestone by Galaxy Map is not the chapter exit.
Other activities: The active chapter objective is mandatory; mission bonuses and extra enemy counts are optional unless named in the primary mission log.
Mission or chapter sequence and named settings are researched from the cited mission task record where provided. Descriptions identify real task names and phase changes; unverified left-right turns are deliberately not invented.
Defend Alliance positions and complete the scripted assault on Arcann following the local battle objectives.
Start
Begin the chapter at Odessen after The GEMINI Deception.
Finish
Finish the confrontation to complete all sixteen Fallen Empire chapters and start Eternal Throne Chapter I.
The route to follow
Active purple story mission→Odessen; Eternal Fleet→Chapter XVI: The Battle of Odessen→Next story handoff
Find the starting contact or mission
Begin the chapter at Odessen after The GEMINI Deception.
Identify the correct destination and entrance
Area: Odessen; Eternal Fleet. Track 'Chapter XVI: The Battle of Odessen' in the Mission Log. Inspect the world or region map first, then use the named interior doorway, phase entrance or lift indicated by the active mission.
Locate the next landmark 1
On ODESSEN speak to LANA IN THE WAR ROOM and use the GRAVESTONE SHUTTLE ACCESS. On the Gravestone speak to the BRIDGE CREW, then go down to the HANGAR.
Locate the next landmark 2
Clear hostiles in the hangar and INFILTRATE ARCANN'S FLAGSHIP. USE THE FORCEFIELD OR TURRET CONTROL OVERRIDE to get past the first obstruction and use the subsequent FORCEFIELD CONSOLE.
Locate the next landmark 3
Defeat KJ-931, reach the BRIDGE DECK, fight DARA NADAL, then move through the remaining forcefield transition to the ARCANN confrontation.
Locate the next landmark 4
After Arcann, ESCAPE THE FLAGSHIP via the REROUTING CONSOLE and OPEN THE HANGAR DOOR. Return to the ODESSEN WAR ROOM and speak to Lana.
Finish the chapter's required interaction
Defend Alliance positions and complete the scripted assault on Arcann following the local battle objectives.
Complete the handoff to the next mission
Finish the confrontation to complete all sixteen Fallen Empire chapters and start Eternal Throne Chapter I.
Confirm progression before departing
Check the Mission Log for a completion or the next story title. If the objective is still active, read the stuck guidance below; repeatable Flashpoint runs and bonus tasks can differ from the story-linked version.
Cannot find the objective?
Arcann's ship has multiple forcefield controls. After the boss the exit is not automatic: USE THE REROUTING CONSOLE, OPEN THE HANGAR DOOR, and finish the ODESSEN WAR ROOM debrief.
Other activities: The active chapter objective is mandatory; mission bonuses and extra enemy counts are optional unless named in the primary mission log.
Mission or chapter sequence and named settings are researched from the cited mission task record where provided. Descriptions identify real task names and phase changes; unverified left-right turns are deliberately not invented.