Sith Warrior: Vengeance — Voss and the Transponder Vessel
SWTOR Sith Warrior Vengeance Juggernaut Voss Chapter 3 walkthrough: light south, north and east signal pyres; receive the Blessing of Oneness; negotiate the Pendant of Bone; reach the Dark Heart's Hall of the Unforgotten; face the possessed Voice of the Emperor; and survive Quinn's transponder-vessel betrayal.
Choose the active story mission.Press L to open the mission log and track the named Sith Warrior objective. A purple mission symbol marks important story content, but not necessarily YOUR class mission. Follow the exact title and task shown in this walkthrough.
Open the full map.Default M opens the main map. Alt + M toggles the overlay map and minimap. If your shortcuts differ, check your assigned keybinds. Start with the WORLD region, then switch to the current AREA or interior floor map.
A marker behind a wall is not a doorway.On the world map find the correct district or zone; on the local map look for the named cave, station, building entrance, lift, security door or staircase. When the target is on another floor, find a connecting passage before heading toward its map symbol.
Know which travel option is available.Quick Travel opens a world map with available travel-point filters. Choose an unlocked destination on your current planet and pay attention to any restrictions or costs shown in-game. For a new planet, use your Fury's Galaxy Map and the orbital station surface shuttle instead.
If the marker does not advance, check the VERB.Talk, use, loot, disable, exit and return to your ship are separate mandatory interactions. Read the mission's “If you are stuck” note below before fighting more unrelated enemies.
Voss: find the right ritual site, then the Dark Heart
These missions jump across three Voss regions and several nested interiors. The Old Paths contains Madaga-Ru and the Shrine of Healing. The Gormak Lands contains Biddeck-Va's Base. The Nightmare Lands contains the Dark Heart, with a specific entrance to the Galleries of Knowledge and Hall of the Unforgotten. Do not follow a straight marker line across impassable Voss cliffs.
Original levels are about 44–47 on Voss, and 48 for the Transponder Vessel. Modern SWTOR experience rewards may put your character above these levels. This is the Sith Warrior Origin Story; Juggernaut Vengeance changes your combat rather than the missions you are assigned.
The correct sequence of regions and entrances
Request An Audience: Fury → Voss-Ka → The Old Paths → SOUTH, NORTH, EAST pyres → Madaga-Ru's Cave.
The Pain of Healing: The Old Paths → Shrine of Healing → speak with Vana-Xo TWICE.
Pendant of Bone: The Gormak Lands → Biddeck-Va's Base → Ono-Mi → THREE Gormak chieftains → return to Biddeck-Va → branch encounter or Warmaster.
The Voice of Darkness: Nightmare Lands → Dark Heart → Galleries of Knowledge → Hall of the Unforgotten → unlock gateway → Voice → Fury AIRLOCK → ship holoterminal.
The Transponder Station: Fury Galaxy Map Hutt Space → special Transponder Vessel → elevator → transponder room → Quinn and TWO augmented droids.
Quest branches are shown side by side where applicable. The original game region maps below are not interior room-by-room directions, and unrelated achievement symbols do not mark quest doors.
Real game maps and sourced images
Voss original game maps: three mission regions and Dark Heart approaches
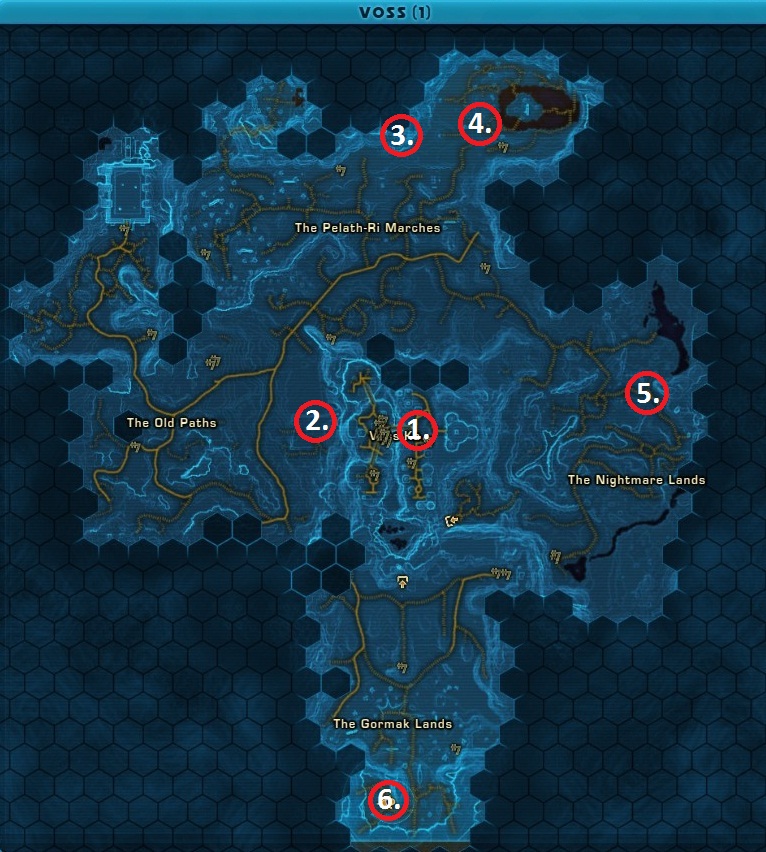
These images are published player or forum references, not newly generated maps. Use them to recognize the area names and relative locations. An external world map cannot replace the mission-specific floor map once inside a building.
Voss world map: Old Paths, Gormak Lands and Nightmare Lands
Real Voss zone labels: Old Paths by Voss-Ka, Gormak Lands to the south, Nightmare Lands to the east. The six red numbered circles are for an unrelated MCR-99 droid ACHIEVEMENT, not the Sith Warrior quest locations.
Map image unavailable. Use the linked original source and the landmark list below.
Locations to recognize
Old Paths: SOUTH/NORTH/EAST pyres, Madaga-Ru's cave, Shrine of Healing
Gormak Lands: Biddeck-Va's Base and the chieftains
Nightmare Lands: Dark Heart entrance and inner Hall of the Unforgotten
Red numbered MCR-99 circles: NOT class mission markers
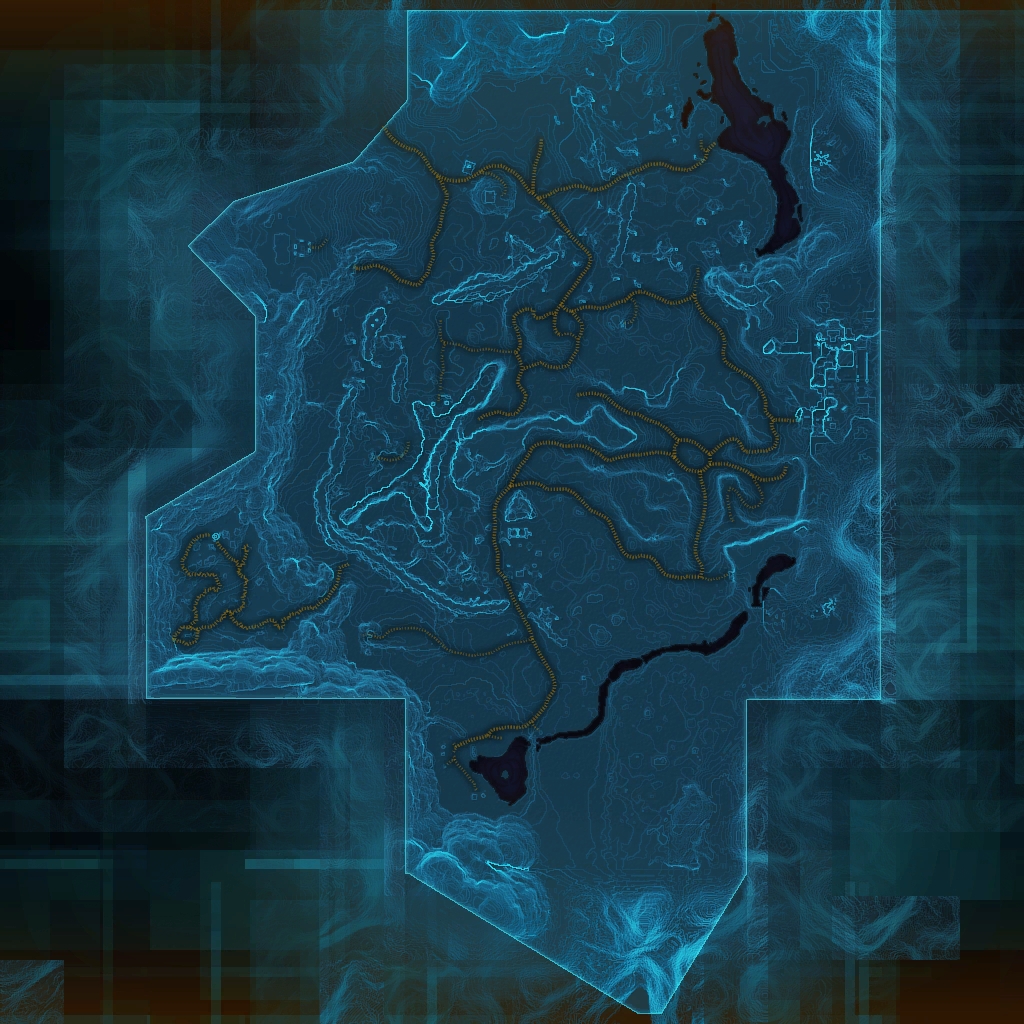
Nightmare Lands: roads and the Dark Heart approaches
Unmarked original region map. The Dark Heart instance contains multiple nested maps; use the active class marker to find The Galleries of Knowledge and Hall of the Unforgotten, not an unrelated cave.
Vengeance Juggernaut: preparation before the Dark Heart
Check your active companion and healing role before the longer boss battles. Use current-level Vengeance damage abilities and defensive cooldowns against Gormak defenders, Sel-Makor's minions and the possessed Voice. For the Transponder Vessel, Quinn himself becomes an opponent; plan to use a different healing companion if Quinn is normally your healer. The two Augmented Executioner Droids must also be defeated.
Before going to the Shrine of Healing, light three separate signal pyres in the Old Paths in their story order: South, North, East. Only then will Madaga-Ru receive you in his cave.
Start
Fury holoterminal after Reallocation on Hoth
Finish
Madaga-Ru in his cave in The Old Paths
The route to follow
Fury: Voss Galaxy Map→Ship holoterminal: Servant One→Voss-Ka arrival→The Old Paths→South Signal Pyre→North Signal Pyre→East Signal Pyre→Madaga-Ru's Cave→Speak to Madaga-Ru
Travel to Voss on the Fury Galaxy Map
After completing Reallocation and surviving the three Draahg fights on Hoth, use the Fury Galaxy Map to travel to Voss. The current quest should read Request An Audience.
Use the Fury holoterminal on arrival
Do not disembark before completing the ship holoterminal briefing from Servant One. You are pursuing the missing Voice of the Emperor through the Voss mystics.
Reach Voss-Ka from the Imperial orbital arrival
Leave your personal hangar and use the available shuttle connections to reach Voss-Ka, the main city. Open the full Voss world map to find The Old Paths region.
Travel into The Old Paths region
Use the unlocked Imperial travel point and connecting roads toward The Old Paths. Do not head south into The Gormak Lands yet; their mission starts after the Shrine of Healing.
Find and light the SOUTH Signal Pyre first
Track Request An Audience and locate the class-marked South Signal Pyre in The Old Paths. Interact to ignite it; visiting the nearest arbitrary campfire does not count.
Find and light the NORTH Signal Pyre next
Open the local map and follow the new objective marker to the North Signal Pyre. These pyres are separate objects, so do not return to the first fire.
Find and light the EAST Signal Pyre third
Travel to the East Signal Pyre within The Old Paths and interact with it. The next step will not unlock by lighting random pyres out of the stated order.
Follow the final marker to Madaga-Ru's Cave
After all three signals burn, make for the specific Madaga-Ru's Cave entrance on the Old Paths map. OotiniMaps labels this interior separately from Shrine of Healing.
Enter the cave and speak with Madaga-Ru
Approach the Voss Mystic Madaga-Ru and finish the conversation. He directs you to the Blessing of Oneness and the Pendant of Bone, beginning The Pain of Healing.
Cannot find the objective?
Three distinct pyres in this order: SOUTH → NORTH → EAST. Madaga-Ru is in MADAGA-RU'S CAVE in the Old Paths, not the Shrine of Healing. If your marker still says Light the East Signal Pyre, do not search his cave yet.
Other activities: The Old Hunt, which asks you to defeat eight nexu and a mawvorr, is an optional bonus and does not unlock the signal pyres.
Mission objectives and zone names are sourced from TORCommunity, Swtorista, and OotiniMaps. The map illustrations are region references, not invented GPS traces; exact interior left/right turns are not asserted without an in-game source.
MISSION 02 / 05 · Chapter 3 · Shrine of Healing · Original level 45
The Pain of Healing
The story's blessing is not a dungeon boss: go to the Shrine of Healing in The Old Paths and talk to Vana-Xo TWICE. Her second conversation resolves the painful ritual and provides the Blessing of Oneness.
Start
Madaga-Ru's cave after Request An Audience
Finish
Vana-Xo at the Shrine of Healing; Pendant of Bone begins
The route to follow
Old Paths from Madaga-Ru cave→Shrine of Healing entrance→Find Vana-Xo→Speak to Vana-Xo→Complete ritual/second conversation→Speak to Vana-Xo again→Pendant of Bone from Vana-Xo
Accept The Pain of Healing from Madaga-Ru
Complete Madaga-Ru's cave conversation first. Your next mission should specifically say Speak to Vana-Xo in the Shrine of Healing, not find the Dark Heart.
Remain in The Old Paths and find Shrine of Healing
Open the region map and travel to the named Shrine of Healing. Although both this shrine and Madaga-Ru's Cave are in The Old Paths, they are separate interiors.
Enter the actual Shrine of Healing
Follow the mission marker inside the shrine through its accessible doors. OotiniMaps also distinguishes Shrine of Healing Upper Level and Lower Level, so use the active map floor.
Locate Vana-Xo and speak to her
Approach Vana-Xo, the Voss mystic treating others through her own suffering. Initiate the first required conversation and follow its ritual dialogue.
Allow the ritual and mission dialogue to complete
Stay near Vana-Xo when the conversation or ritual sequence ends. The quest does not send you to collect a healing herb or defeat guards to gain the Blessing of Oneness.
Speak to Vana-Xo a SECOND time if the marker remains
The original mission contains two sequential Speak to Vana-Xo objectives. Interact with her again if the journal still shows this task instead of leaving the Shrine of Healing.
Confirm Pendant of Bone is now active
After the second dialogue, you receive the Blessing of Oneness and are directed to acquire the Pendant of Bone from the Voss commando Biddeck-Va in The Gormak Lands.
Cannot find the objective?
The quest database explicitly lists TWO consecutive 'Speak to Vana-Xo' objectives. If it doesn't finish after the initial scene, talk to her again. The Shrine of Healing is not Madaga-Ru's Cave.
Other activities: Voss planetary healing trials and the Spirit World stories belong to other quest chains; this Sith Warrior class step is Vana-Xo's dialogue.
Mission objectives and zone names are sourced from TORCommunity, Swtorista, and OotiniMaps. The map illustrations are region references, not invented GPS traces; exact interior left/right turns are not asserted without an in-game source.
MISSION 03 / 05 · Chapter 3 · The Gormak Lands · Original level 46
Pendant of Bone
Biddeck-Va is absent when you first visit his base. Speak to Ono-Mi, defeat THREE Gormak chieftains, return and negotiate with Biddeck-Va. There are two resolution branches: fight his guards or defeat a warmaster behind TWO force fields.
Start
Vana-Xo after receiving the Blessing of Oneness
Finish
Biddeck-Va at his base; The Voice of Darkness begins
The route to follow
The Gormak Lands→Biddeck-Va's Base→Speak to Ono-Mi→Gormak Chieftain 1→Gormak Chieftain 2→Gormak Chieftain 3→Return to Base→Speak to Biddeck-Va→Branch: Biddeck-Va's defenders OR Warmaster→Return and receive Pendant
Travel south to The Gormak Lands
Leave the Shrine of Healing and navigate toward The Gormak Lands on the world map, south of the city and Old Paths. Use unlocked outposts and follow roads where cliffs prevent a straight line.
Locate Biddeck-Va's Base, not a random Gormak fortress
Open The Gormak Lands local map and track Pendant of Bone to Biddeck-Va's Base. OotiniMaps identifies this specific interior on the Empire version of the region.
Speak with Ono-Mi because Biddeck-Va is away
Enter the base and find Ono-Mi when the quest says Speak to Ono-Mi. Biddeck-Va is not initially there, so searching deeper rooms for him will not advance the story.
Find and defeat the FIRST Gormak Chieftain
Travel into the nearby Gormak lands and follow one of the mission's chieftain markers. Defeat the first of the THREE named chieftains to force Biddeck-Va's return.
Find and defeat the SECOND Gormak Chieftain
Use the local map again for the second required chieftain. Killing random Gormak scouts or ordinary guards will not replace the named chieftain objective.
Find and defeat the THIRD Gormak Chieftain
Defeat the third named chieftain and confirm the count shows 3/3. The next objective sends you back to Biddeck-Va's headquarters.
Return to the same Biddeck-Va base and talk to him
Use quick travel or your unlocked routes back to the base, and speak with Biddeck-Va. He now has the Pendant of Bone but demands a further favor.
Choose whether to fight Biddeck-Va or hunt the Warmaster
This is a story choice. The hostile branch makes Biddeck-Va, Ono-Mi and Voss Commandos enemies. The cooperative branch sends you after the Gormak Warmaster.
HOSTILE branch: defeat the Voss defenders and talk to Biddeck-Va
If you attack him, defeat Biddeck-Va, Ono-Mi and the required Voss Commandos, then speak to the defeated Biddeck-Va again to resolve the pendant encounter.
COOPERATIVE branch: locate the Warmaster's cave
If you accept Biddeck-Va's demand, follow the active marker to the Gormak Warmaster. Do not search the Biddeck-Va compound for him; the target is at a separate location.
COOPERATIVE branch: destroy TWO force-field generators
At the warmaster's location, disable the First Force Field Generator and the Second Force Field Generator. Both are separate interactions needed to access the enemy.
COOPERATIVE branch: defeat the Warmaster and Guardians
Enter the now-accessible area and defeat the Gormak Warmaster and accompanying guardians. Extra Gormak outside the objective are not required.
Return to Biddeck-Va and finish the trade
For the cooperative branch, return to Biddeck-Va's Base and speak to him again to claim the Pendant of Bone. Both routes lead into The Voice of Darkness.
Cannot find the objective?
You MUST talk to Ono-Mi first, kill THREE Gormak Chieftains, then return to Biddeck-Va. A later fight against Biddeck-Va is OPTIONAL by dialogue; the alternate route requires TWO force-field generators and the Warmaster. Follow the branch in your journal.
Other activities: Do not force every reader to kill Voss commandos or a Warmaster: these are alternatives, not two required fights. The Pendant of Bone story does not require Gormak planetary heroics.
Mission objectives and zone names are sourced from TORCommunity, Swtorista, and OotiniMaps. The map illustrations are region references, not invented GPS traces; exact interior left/right turns are not asserted without an in-game source.
MISSION 04 / 05 · Chapter 3 · The Nightmare Lands · Original level 47
The Voice of Darkness
Carry both the Blessing of Oneness AND Pendant of Bone before going into the Dark Heart. Follow the specific Hall of the Unforgotten route, unlock its gateway, and defeat Sel-Makor's minions before fighting the possessed Voice.
Start
Biddeck-Va after acquiring the Pendant of Bone
Finish
Fury ship holoterminal after meeting Madaga-Ru's apparition
The route to follow
Nightmare Lands→Dark Heart entrance→Galleries of Knowledge→Hall of the Unforgotten→Unlock Gateway→Investigate Growing Dark Energy→Defeat Deformed Creatures→Enter Main Room→Talk to Voice→Defeat Sel-Makor's Minions→Fight Possessed Voice→Speak to Voice→Fury airlock apparition→Ship holoterminal
Verify both ritual items are ready
The class sequence requires the Blessing of Oneness from Vana-Xo and the Pendant of Bone from Biddeck-Va. If you skipped either mission's final dialogue, complete it before searching the Dark Heart.
Travel into The Nightmare Lands
Leave The Gormak Lands for The Nightmare Lands via the accessible regional roads and unlocked taxis. The Dark Heart is in this zone, not the Old Paths or the Pelath-Ri Marches.
Find the named Dark Heart story entrance
Within the Nightmare Lands, follow the class marker to Dark Heart and enter its actual accessible interior. Do not confuse nearby caves such as the Cave of Reflection with the mission's gateway.
Navigate toward Dark Heart: The Galleries of Knowledge
OotiniMaps separates Dark Heart into specific nested interiors. Find the Galleries of Knowledge and then the Hall of the Unforgotten rather than wandering unrelated Dark Heart corridors.
Unlock the gateway with your completed ritual preparation
Locate the mission-marked Gateway inside the Hall of the Unforgotten, and interact when the tracker reads Unlock the Gateway. The story uses your blessing and pendant to access the inner chamber.
Investigate the Growing Dark Energy
Move into the newly opened area and interact at the growing dark energy objective. This is a separate step from merely opening the outer gateway.
Defeat the Deformed Creatures
When the objective advances, eliminate the deformed creatures inside the Hall. Their defeat is required before you can reach the final chamber and speak with the Emperor's Voice.
Enter the Main Room of the Hall
Proceed through the accessible inner passage to the Main Room. The next person is in this deeper chamber, not outside the Dark Heart entrance.
Speak to the Voice of the Emperor
Approach the Voice and finish the conversation. Sel-Makor's influence manifests during the confrontation, leading to the next combat sequence.
Defeat Sel-Makor's Minions
Kill the minions as directed. The mission next signals that Sel-Makor's hold is diminishing, indicating a new phase of the encounter.
Defeat the possessed Voice of the Emperor
Fight the Voice of the Emperor after the minions, with a healing companion and defensive cooldowns as appropriate. This battle frees the Voice from Sel-Makor's control.
Speak to the freed Voice after the fight
Do not simply exit. Interact with the Voice of the Emperor for the required post-battle conversation and instructions from the Emperor's Hand.
Return to the Fury's airlock, not directly to the terminal
Leave the Dark Heart using the available route, return to the orbital station, and go to YOUR SHIP'S AIRLOCK. Madaga-Ru's apparition appears there before the ship holoterminal dialogue.
Speak with Madaga-Ru's apparition and use the Fury holoterminal
Complete the apparition conversation at the airlock, board the Fury and use its holoterminal. The next mission is The Transponder Station, setting up the Corellian blockade.
Cannot find the objective?
Hall of the Unforgotten is an INNER Dark Heart location reached through the Galleries of Knowledge, not a surface quest marker. If the gateway is locked, you need BOTH the Blessing of Oneness and Pendant of Bone. After the boss, return to the SHIP AIRLOCK for Madaga-Ru's apparition before the holoterminal.
Other activities: Combating Darkness, defeating fifteen Dark Heart forces, is a bonus and does not substitute for the named Deformed Creatures, Sel-Makor's Minions or the Voice confrontation.
Mission objectives and zone names are sourced from TORCommunity, Swtorista, and OotiniMaps. The map illustrations are region references, not invented GPS traces; exact interior left/right turns are not asserted without an in-game source.
MISSION 05 / 05 · Chapter 3 · Hutt Space interlude · Original level 48
The Transponder Station
To bypass the Imperial blockade around Corellia, board a transponder vessel in Hutt Space. This mission includes Malavai Quinn's betrayal: fight him AND two Augmented Executioner Droids, then speak to Quinn again.
Start
Fury holoterminal after The Voice of Darkness
Finish
Conversation with Quinn in the Transponder Room; Protect Vowrawn follows
The route to follow
Fury Galaxy Map: Hutt Space→Transponder Vessel→Explore corridors→Defeat Imperial Security Team→Disable Elevator→Transponder Room→Talk to Quinn→Defeat Quinn and 2 Augmented Executioner Droids→Talk to Quinn again→Corellia handoff
Receive the Corellia blockade problem aboard the Fury
Finish the post-Voss ship holoterminal exchange after meeting Madaga-Ru's apparition. The Hand directs you to obtain Imperial clearance codes from a transponder vessel.
Open the Fury Galaxy Map and choose the special vessel
Select Hutt Space on the Galaxy Map and find the Transponder Vessel as a special space destination. You cannot solve this part by taking a Corellia planetary taxi.
Dock and board the Transponder Vessel
Travel to the vessel and leave your Fury through the accessible boarding passage. Explore the mission phase rather than searching for the clearance codes in your cargo hold.
Explore the vessel until the Imperial Security Team stops you
The current objective is Explore the Transponder Ship. Continue through its accessible mission corridors until the Imperial Security Team blocks the route. You cannot take a Corellia shuttle, reach the transponder room early or complete this encounter by defeating unrelated shipboard crew.
Defeat the Imperial Security Team
Fight the named security team assigned by the mission. Do not waste time on unrelated enemies elsewhere aboard the vessel.
DISABLE the elevator bringing Imperial reinforcements
After the Imperial Security Team falls, its reinforcements are using an elevator to reach your deck. Find the objective-labeled elevator control and DISABLE it to stop those troops arriving. Do not simply ride the elevator: the quest asks you to shut it down, then find the transponder room.
After disabling the elevator, locate the Transponder Room
Confirm Disable the Elevator has cleared from your mission tracker. The NEXT task is Locate the Transponder Room, reached through the vessel's remaining accessible interior passages. If your marker appears behind a wall, check the local deck plan for a corridor or doorway, not the disabled lift.
Talk with Malavai Quinn in the room
Speak to Quinn to trigger his betrayal scene. Do not leave the room after the dialogue, because combat begins when the tracker advances.
Defeat Quinn AND the TWO Augmented Executioner Droids
Fight Quinn and destroy both augmented executioner droids. You may need another available healing companion depending on your loadout, since Quinn is the opponent here.
Speak to Quinn after the battle
Interact with Malavai Quinn again once the combat finishes. The follow-up conversation resolves the encounter and provides the Corellia access handoff.
Continue toward Protect Vowrawn on Corellia
After the transponder ship dialogue and clearance, follow the next mission, Protect Vowrawn, for the Corellia assault. There is no reason to search the old Voss Dark Heart again.
Cannot find the objective?
The exact sequence is EXPLORE ship → defeat Imperial Security Team → DISABLE the reinforcement ELEVATOR (do not ride it) → Locate the Transponder Room → speak to Quinn → defeat Quinn AND two Augmented Executioner Droids → speak to Quinn again. This is a Hutt Space ship phase, not a Corellia ground facility.
Other activities: Boarding all compartments or clearing extra crew is optional. This is a mandatory story betrayal; switch companions if Quinn is currently your healer.
Mission objectives and zone names are sourced from TORCommunity, Swtorista, and OotiniMaps. The map illustrations are region references, not invented GPS traces; exact interior left/right turns are not asserted without an in-game source.
The Transponder Station resolves the clearance required to pass the Imperial blockade around Corellia. After Quinn's confrontation, the mission continues as Protect Vowrawn, starting the final planetary phase of the original class story.