Chapter 1 · A Padawan's Fall · Exact named places and objectives
Sith Warrior: Vengeance — Alderaan
Complete the Sith Warrior Vengeance Juggernaut Alderaan story: House Thul and Duke Kendoh, House Alde and Windredd, General Gesselle's generator, conditional Dassel Pass defense, Castle Organa Central Tower upper level, and the return to your Fury holoterminal.
Choose the active story mission.Press L to open the mission log and track the named Sith Warrior objective. A purple mission symbol marks important story content, but not necessarily YOUR class mission. Follow the exact title and task shown in this walkthrough.
Open the full map.Default M opens the main map. Alt + M toggles the overlay map and minimap. If your shortcuts differ, check your assigned keybinds. Start with the WORLD region, then switch to the current AREA or interior floor map.
A marker behind a wall is not a doorway.On the world map find the correct district or zone; on the local map look for the named cave, station, building entrance, lift, security door or staircase. When the target is on another floor, find a connecting passage before heading toward its map symbol.
Know which travel option is available.Quick Travel opens a world map with available travel-point filters. Choose an unlocked destination on your current planet and pay attention to any restrictions or costs shown in-game. For a new planet, use your Fury's Galaxy Map and the orbital station surface shuttle instead.
If the marker does not advance, check the VERB.Talk, use, loot, disable, exit and return to your ship are separate mandatory interactions. Read the mission's “If you are stuck” note below before fighting more unrelated enemies.
Do not confuse the three houses or the castle tower
The story moves between separate noble estates, compounds and regional maps. A circle shown across a wall or on another floor is not a shortcut. Each mission below starts with the currently named objective and directs you to the documented building, subzone, interaction and return point. We have not fabricated left/right turns or false map coordinates where the quest source only establishes a named place.
The game makes Choke Point conditional. If you agree to help General Gesselle, defend Dassel Pass before Castle Organa. If you did not receive Choke Point, skip it and follow Battle Organa immediately. Both routes are written out and nothing is hidden.
Identify the correct place before leaving your current area
House Thul / Thul Chamber of Politics: Duke Kendoh for Shake Down, the return from Knock Knock, and Deal with Kendoh.
House Alde, Juran Mountains: Lady Renata estate and Windredd for Knock Knock. This is not House Thul.
Juran Mountains: Planetary Power Generator followed by General Gesselle's Encampment for Front Lines. Two separate objectives.
Glarus Valley, Dassel Pass: Lieutenant Dargus for the Choke Point mission, only if your dialogue unlocked it.
Glarus Valley, Castle Organa: Central Tower, then Upper Level to find Parvin Willsaam during Battle Organa.
Use the Imperial speeder or Quick Travel connections unlocked on your character, then follow the LOCAL area map. These region routes do not claim a direct taxi exists for every pair of places.
Real game maps and sourced images
Alderaan: authentic world, Juran Mountains and Glarus Valley maps
These images are published player or forum references, not newly generated maps. Use them to recognize the area names and relative locations. An external world map cannot replace the mission-specific floor map once inside a building.
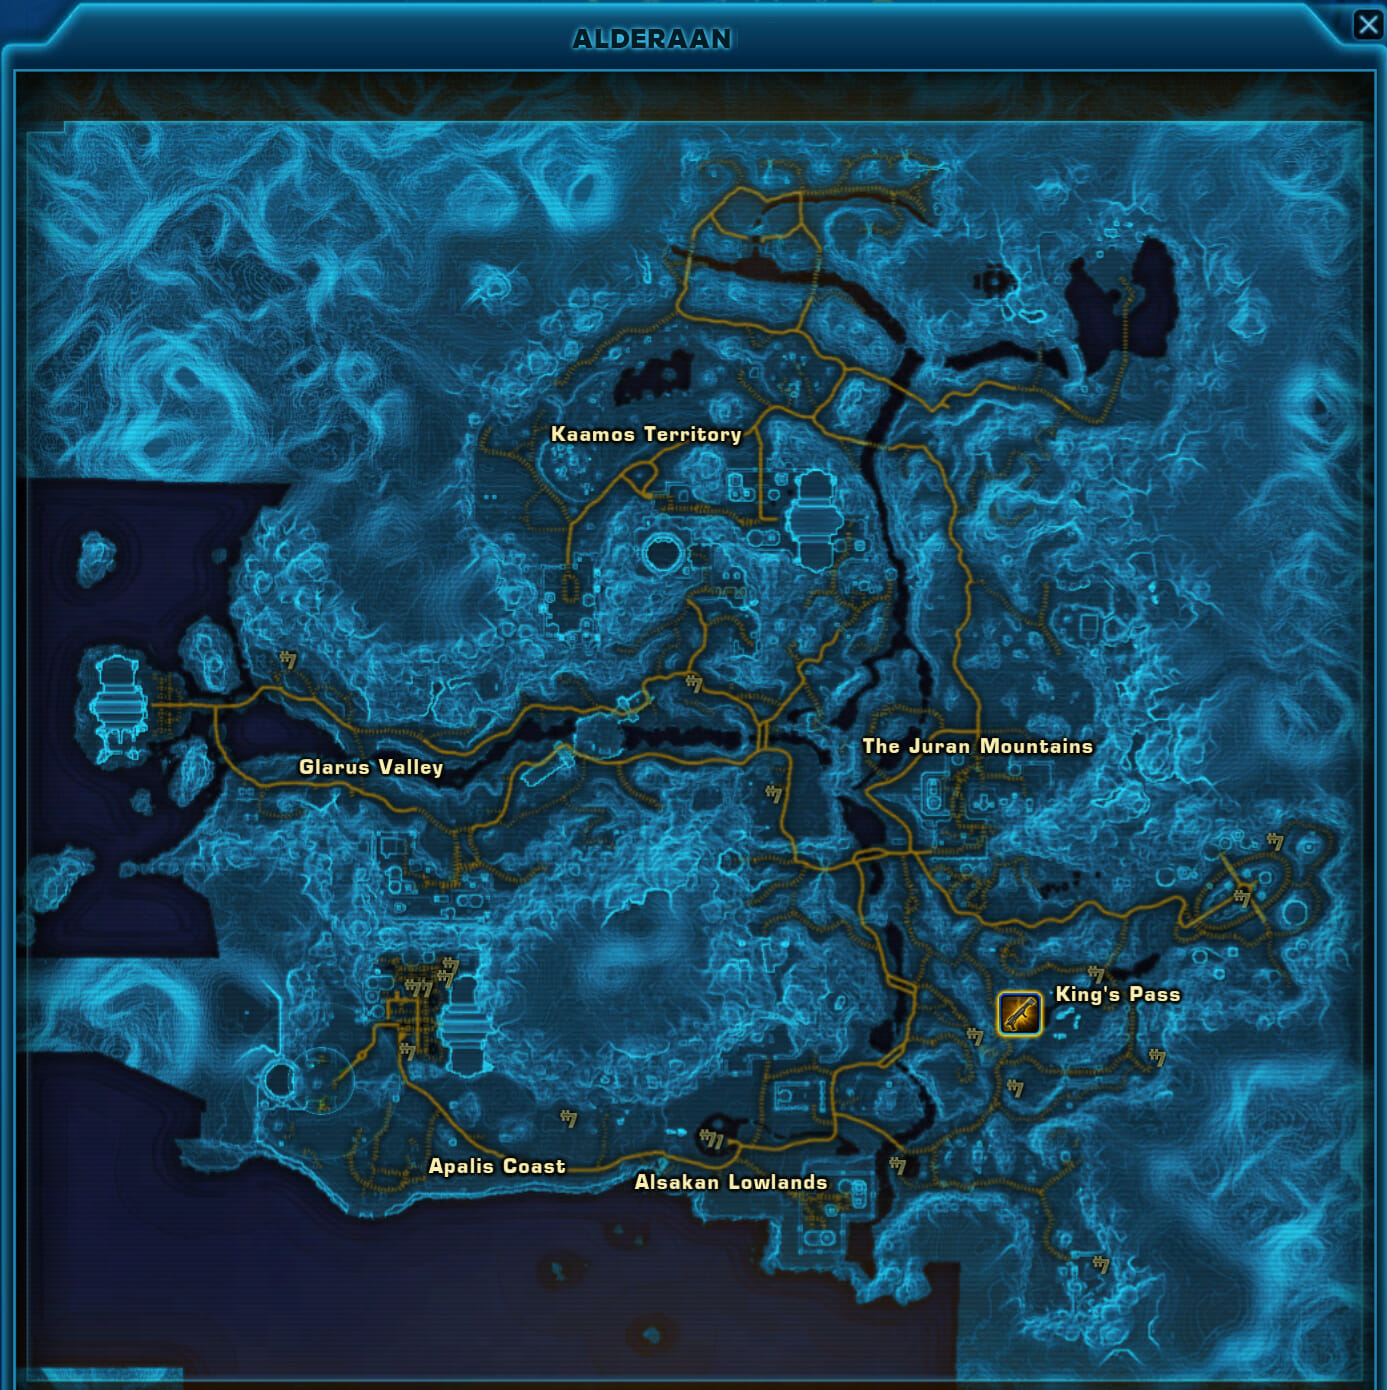
Alderaan regional game map: Juran Mountains, Glarus Valley and House territories
A real in-game world map with Juran Mountains east and Glarus Valley west. The yellow King's Pass marker belongs to a separate datacron guide, NOT any Sith Warrior mission.
Map image unavailable. Use the linked original source and the landmark list below.
Locations to recognize
House Alde and Gesselle's power generator: Juran Mountains
Castle Organa Central Tower: Glarus Valley
Choke Point: Dassel Pass, Glarus Valley, only if you agree to help Gesselle
King's Pass yellow symbol belongs to a separate datacron guide
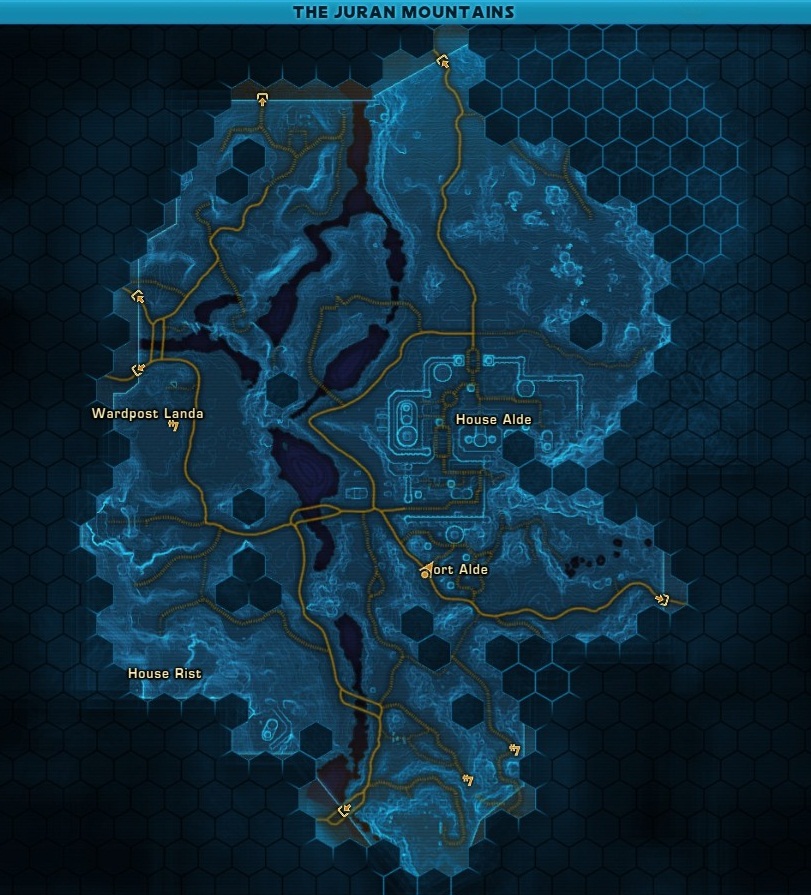
Juran Mountains: House Alde / Fort Alde map
The House Alde and Fort Alde area and surrounding approach roads are visible. Hexagon overlay and path relate to a reconnaissance droid, NOT to Lady Renata or Gesselle's power generator.
Map image unavailable. Use the linked original source and the landmark list below.
Locations to recognize
House Alde: find Lady Renata's estate
Separate Planetary Power Generator: Front Lines
Separate General Gesselle encampment: Front Lines
Do not treat a droid achievement mark as a class phase entrance
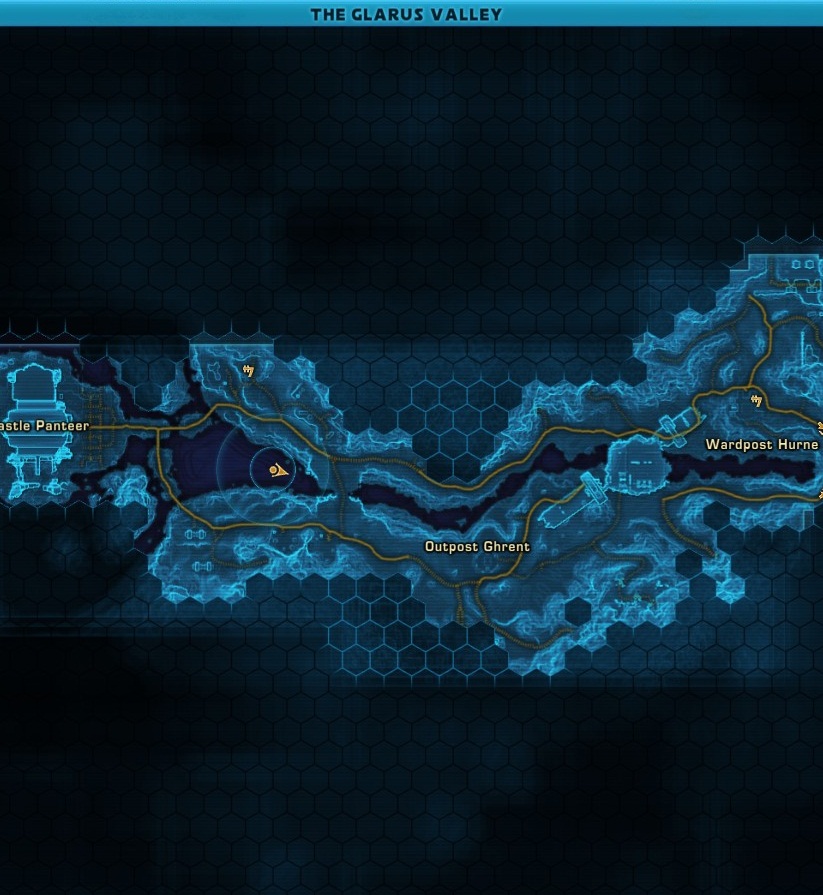
Glarus Valley: Outpost Ghrent, Castle Panteer and Wardpost Hurne
This shows part of Glarus Valley's road system. It does NOT show the interior of Castle Organa or Dassel Pass and must not be read as the exact class mission route.
Vengeance Juggernaut: how to clear fights while traveling
Your Origin Story sets the Alderaan missions. Vengeance changes how your Juggernaut fights, not which halls to visit. Equip an appropriate single lightsaber, keep a companion set to Healing if desired, and use your available damage abilities and defensive cooldowns against Windredd, Ulgo waves, Master Volryder and Kendoh's guards where those encounters occur. A story door or tower lift still requires the intended route; Force Charge is not a substitute.
By Imperial Dark Sector
MISSION 01 / 06 · Chapter 1 · Main story
Shake Down
Start the Alderaan investigation by speaking with Duke Kendoh. You must use the Fury's holoterminal after flying to Alderaan before going to the House Thul political chamber.
Start
Fury Galaxy Map
Finish
Duke Kendoh in the Thul Chamber of Politics
The route to follow
Fury: Alderaan→Ship holoterminal: Darth Baras→Imperial landing and local transit→Thul Chamber of Politics→Speak with Duke Kendoh→Complete Kendoh conversation
Select Alderaan from the Fury Galaxy Map
After completing the earlier Tatooine objective, use the Galaxy Map aboard your Fury and travel to Alderaan. This is the Sith Warrior class route, not a Republic travel guide.
Use your ship holoterminal before disembarking
On arrival, interact with the holoterminal aboard the Fury. Darth Baras provides the Alderaan assignment and identifies Duke Kendoh of House Thul as the local contact.
Leave your personal hangar for Imperial transit
Exit the Fury and its private hangar into the Imperial arrival area. Activate the full world map to orient yourself before taking the available Imperial speeder or shuttle toward House Thul.
Locate the Thul Chamber of Politics
The destination is a named interior of House Thul, not Castle Organa or Lady Renata's House Alde estate. Navigate to the House Thul objective marker and enter the correct political chamber.
Speak to Duke Kendoh
Interact with Duke Kendoh inside the Thul Chamber of Politics and complete the full confrontation. The mission record includes two Kendoh dialogue states before the next quest begins.
Check that the next quest is Knock Knock
Once Shake Down completes, keep the House Thul chamber available as your return point. Duke Kendoh's next lead sends you toward Lady Renata's estate in House Alde.
Cannot find the objective?
If the class marker remains on your ship, finish Darth Baras's holoterminal conversation first. If it points to a distant noble house, open the full map and confirm that your active objective reads Speak with Duke Kendoh, Thul Chamber of Politics.
Other activities: Planetary missions, datacrons and House Thul reputation errands do not advance this Sith Warrior class contact.
Quest stages and named Thul Chamber of Politics come from TORCommunity. The records do not substantiate exact room-side street turns, so no turn-by-turn route has been invented.
Follow Kendoh's lead to House Alde. You must reach Lady Renata's estate, face her protector Windredd, and return to Kendoh. House Alde and House Organa are not the same building.
Start
Duke Kendoh, Thul Chamber of Politics
Finish
Duke Kendoh after Lady Renata / Windredd encounter
The route to follow
Kendoh: Thul Chamber→Juran Mountains→House Alde, Lady Renata's estate→Confront Windredd→Defeat Windredd→Speak to Windredd→Return to Thul Chamber→Speak with Kendoh
Accept Duke Kendoh's House Alde lead
Talk to Duke Kendoh until the quest becomes Knock Knock. His lead is Lady Renata, who knew the Force-sensitive former handmaiden, rather than Jaesa's parents.
Travel toward House Alde in the Juran Mountains
Use the available Imperial travel points and the large region map to reach the House Alde grounds. Do not turn toward the distant Castle Organa objective; that belongs to a later quest.
Find Lady Renata's estate phase
Within House Alde, follow the active class-story marker to Lady Renata's estate entrance. Enter the quest area rather than treating the wider House Alde map label as the final destination.
Confront Windredd inside the estate
Lady Renata's bodyguard Windredd confronts you at the estate. Speak with him when the objective changes from Find Lady Renata to Confront Windredd.
Defeat Windredd
Fight Windredd as directed by the mission tracker. A healing companion is useful here if you are leveling in Vengeance without strong defensive gear.
Speak to Windredd after defeating him
Interact with Windredd again after the fight to finish the conversation. Leaving immediately after combat will leave the mission on its post-fight interaction.
Return to the Thul Chamber of Politics
Leave House Alde and use the nearest unlocked Imperial quick-travel or taxi connection toward House Thul. Enter the same Thul Chamber of Politics used in Shake Down.
Speak with Duke Kendoh again
Complete Kendoh's dialogue to receive Front Lines. The next destination is a planetary power generator in the Juran Mountains, not another room in Renata's estate.
Cannot find the objective?
House ALDE contains Lady Renata's estate. House THUL contains Kendoh's political chamber. When the marker seems far away after defeating Windredd, check whether it says Return to Duke Kendoh; do not keep exploring House Alde.
Other activities: No optional enemy-clearing objectives inside House Alde are needed beyond the tracked protector encounter and dialogue.
All six objective transitions are recorded by TORCommunity. Imperial transport availability can vary; precise interior floor turns are not supplied.
The generator maintains the force field around General Gesselle's encampment. First disable the facility, then leave for Gesselle's camp and breach its security door.
Start
Duke Kendoh after Knock Knock
Finish
General Gesselle Organa's command room
The route to follow
Thul Chamber of Politics→Juran Mountains: Planetary Power Generator→Infiltrate power facility→Disable generator→Gesselle's encampment→Breach security door→Speak to General Gesselle
Receive the generator sabotage assignment
Speak with Duke Kendoh after returning from House Alde. He explains that General Gesselle Organa's encampment is sealed behind a generator-powered force field.
Locate the Planetary Power Generator in Juran Mountains
Open the full Juran Mountains map and follow the Front Lines class marker to the Planetary Power Generator. This is a separate facility from House Alde or the later Castle Organa.
Enter the Planetary Power Generator facility
Approach the actual facility entrance and cross into its accessible interior. If a map circle looks unreachable across a ridge, follow the marked approach rather than forcing a direct mountain crossing.
Disable the generator with Kendoh's charges
Follow the room marker to the planetary generator and interact with the objective to plant the supplied explosives. The field will not disappear simply because you defeat nearby droids.
Leave the facility and move to Gesselle's camp
After the generator objective updates, exit back to the region and navigate to General Gesselle's Encampment in the Juran Mountains. It is a new objective site, not another generator room.
Enter the encampment through the disabled force field
Follow the accessible path into the camp now that its protective field has been disabled. Fight only enemies blocking your route unless you want the optional droid bonus.
Breach the security door into the command room
Locate the marked Security Door at Gesselle's encampment and interact with it to gain access. The required confrontation is inside the command room beyond this door.
Complete General Gesselle's conversation
Speak with General Gesselle. Your dialogue decisions determine whether the conditional Choke Point mission becomes available or you go directly toward Battle Organa.
Cannot find the objective?
Generator and camp are separate. If stuck outside a force field, go BACK to the Planetary Power Generator and use the charges. If you have reached the camp but cannot speak with Gesselle, find and BREACH the security door.
Other activities: Show of Power, defeating 15 generator droids, is a bonus and may be skipped. Choke Point is a conditional STORY branch only if you agree to defend Gesselle against Ulgo forces.
TORCommunity confirms each required area/objective, including the generator charge and security door. It does not provide an exact trail of left/right turns.
This mission is not mandatory for every Warrior. It appears if you agree to defend Gesselle's forces. You fight successive Ulgo waves in Dassel Pass, speaking with Lieutenant Dargus between attacks.
Start
General Gesselle after Front Lines IF you agree to defend her
Finish
Lieutenant Dargus in Dassel Pass after three Ulgo attack waves
The route to follow
Gesselle: accept assistance request→Travel to Glarus Valley→Dassel Pass→Speak to Lieutenant Dargus→Repel Ulgo wave 1→Report to Dargus→Repel Ulgo wave 2→Report to Dargus→Repel Ulgo wave 3→Final Dargus dialogue
Confirm your dialogue unlocked Choke Point
Review your class mission tracker after the Gesselle conversation. Choke Point appears only if you agreed to defend the Organa lines; if you do not have it, move to Battle Organa instead.
Travel from Juran Mountains to Glarus Valley
Leave Gesselle's camp and use the available Imperial route toward Glarus Valley. The target is Dassel Pass, a different map area from Gesselle's generator facility.
Find Lieutenant Dargus in Dassel Pass
Follow the Choke Point marker through the Glarus Valley toward Lieutenant Dargus. Talk to him once at the defense position to begin the successive wave objectives.
Defeat the first Ulgo attack wave
Fight the Ulgo forces attacking the position. Remain near the defensive area while combat is active; the next mission state requires speaking with Lieutenant Dargus again.
Speak with Dargus before the next wave
After the first wave is repelled, interact with Lieutenant Dargus. Do not leave Dassel Pass just because one attack ends; the objective sequence cycles through another defense.
Repel the second Ulgo attack
Fight the next Ulgo wave until the tracker advances. Use the Vengeance attacks unlocked at your level, and keep a healing companion active for sustained combat.
Return to Lieutenant Dargus again
Talk to Dargus a third time between attack waves. The mission database lists repeated dialogue steps, making the conversation essential rather than an optional epilogue.
Defeat the third Ulgo wave
Clear the remaining Ulgo attackers as the objective directs. Avoid traveling away mid-fight, because the final handoff triggers only after the staged attack completes.
Finish the final report to Dargus
Speak to Lieutenant Dargus after the third wave to finish Choke Point. Your story then resumes the Castle Organa portion, Battle Organa.
Cannot find the objective?
If no Choke Point mission appears, that is an intended dialogue outcome, not a navigation bug. If a wave stops advancing, speak to Lieutenant Dargus again; there are three attack waves, each separated by dialogue.
Other activities: Choke Point is conditional story content, distinct from routine repeatable Alderaan planetary missions. Its appearance depends on your response to Gesselle.
TORCommunity lists the three Ulgo waves and repeated Dargus conversations and identifies Glarus Valley's Dassel Pass.
Find Jaesa Willsaam's parents in Castle Organa Central Tower. The important navigation detail is the UPPER LEVEL: the objective is not in the castle's outer courtyard.
Start
General Gesselle conversation, or completed conditional Choke Point
Finish
Personal holocom after confronting Parvin Willsaam / Master Volryder
The route to follow
Glarus Valley→Castle Organa approach→Castle Organa Central Tower→Upper Level→Parvin Willsaam→Personal holocom / Master Volryder branch→Complete encounter and holocom
Confirm Battle Organa is the active quest
Finish Front Lines and, if chosen, Choke Point. Your next class-story marker is Castle Organa in the Glarus Valley, not the generator site in the Juran Mountains.
Travel to Glarus Valley and find Castle Organa
Use unlocked Imperial routes toward Glarus Valley, then follow the roads and the mission marker to Castle Organa. The Castle is a distinct estate from House Alde and House Thul.
Use the correct castle entrance
Approach the marked story access to Castle Organa, associated with a Security Door in the quest index. Pass into the Castle Organa interior when the class objective allows.
Navigate into the Central Tower
Inside the castle, follow the full local map's passage or lift connections toward the Central Tower. Do not assume the outer courtyard or the main ground-level hall is the parents' room.
Go to the Upper Level
Change floors in the Central Tower using the available stairs or lift until your map says Upper Level. The mission explicitly places the Willsaams in the tower's upper-level area.
Find and speak to Parvin Willsaam
Approach Jaesa's mother, Parvin Willsaam, and complete the required family dialogue. The subsequent action depends on your choices in this scene.
Use your personal holocom when prompted
If the objective changes to Use Your Personal Holocom, activate the character holocom and complete Darth Baras's dialogue before attempting to leave the phase.
Resolve Master Volryder's intervention if it occurs
If Master Volryder and Organa guards attack, defeat the required enemies, then use the personal holocom as the updated objective directs. Different paths lead to the same next story contact.
Prepare to return to the Thul Chamber of Politics
After the holocom and any encounter are complete, leave the Central Tower and return via the unlocked Imperial route toward House Thul. The next mission is Deal with Kendoh.
Cannot find the objective?
The Willsaam parents are on the UPPER LEVEL of Castle Organa CENTRAL TOWER. A marker on another floor will not guide you there directly. Enter the tower and use the accessible floor transition, not the outdoor castle battlements.
Other activities: This is required story content. The Master Volryder encounter and holocom interaction vary with dialogue, but there is no need to complete unrelated Castle Organa planetary missions.
Central Tower / Upper Level and the branching Volryder/holocom objectives are directly documented by TORCommunity. Exact lift coordinates within the tower have not been independently established.
Return to the same Thul political chamber used at the start of Alderaan. Depending on your dialogue, confront FimmRess and Sith Guardians, potentially Duke Kendoh, then return to your Fury.
Start
After Battle Organa and personal holocom
Finish
Fury ship holoterminal; Chapter 1 finale begins
The route to follow
Leave Castle Organa→Return to Thul Chamber of Politics→Confront Duke Kendoh→Defeat FimmRess and Sith Guardians if triggered→Confront or defeat Kendoh (choice-dependent)→Return to Fury→Ship holoterminal
Leave Castle Organa after the holocom message
Once Battle Organa advances to Deal with Kendoh, exit the castle's Central Tower and make for the nearest unlocked Imperial transport connection. Do not search for Kendoh inside Castle Organa.
Return to House Thul's political chamber
Use quick travel and accessible taxis to reach House Thul, then enter the Thul Chamber of Politics. This is the SAME meeting room where Shake Down began.
Confront Duke Kendoh
Talk to Kendoh about his accusations and follow the available dialogue choices. Do not leave after his first response; the confrontation can initiate a guard fight.
Defeat FimmRess and the Sith Guardians if hostile
If your objective changes to Defeat FimmRess and the Sith Guardians, fight the guards in the chamber and stay there until the quest tracker updates.
Resolve Kendoh's personal outcome
After the guard fight, interact with Kendoh again or, on the hostile branch, defeat him if the game requires it. The quest database records both branches.
Find your way back to the Fury
Once the objective reads Use Your Ship's Holoterminal, leave the political chamber and return to the Imperial landing facility. Board your own Fury, not another ship.
Use the Fury holoterminal to finish Alderaan
Interact with the ship holoterminal and complete the report to Darth Baras. This moves you into the Chapter 1 finale missions, starting with The Plan is Working!.
Cannot find the objective?
If the quest says Confront Duke Kendoh after a fight, speak to him again. If it says Use Your Ship's Holoterminal, stop searching Alderaan: return to the Fury. A personal holocom is NOT interchangeable with the ship holoterminal.
Other activities: Two outcomes are possible in Kendoh's confrontation; this walkthrough does not presume you killed him or that he survives in every playthrough.
TORCommunity confirms the Thul Chamber, FimmRess/Sith Guardians, optional Kendoh combat, and Fury holoterminal end step.
Finish the ship holoterminal step in Deal with Kendoh. The next story sequence begins with The Plan is Working! and continues with The Padawan Exposed. Those are ship-and-mission story events, not another Alderaan castle objective.