SPONSORED / AMAZON
Shop this game
Related games, collectibles and accessories. Check platform and availability on Amazon.
As an Amazon Associate I earn from qualifying purchases.
60-SECOND GAME BRIEF / START HERE
Know the game in three moves
- 01 / YOUR ROLEWho you play
Kay Vess
- 02 / INFORMATIONWhat to know next
Learn the movement and combat controls, then search each space for a clear route forward.
- 03 / GAME STYLEWhat to expect
Open-world action-adventure
FIELD MANUAL / START PLAYING
Your first mission briefing
Practical orientation for this particular title. Instructions are not presented as a verified step-by-step walkthrough or as a substitute for edition-specific controls.
Use Nix for distractions and scouting before committing to a hostile stealth route.
Keep track of syndicate reputation before accepting jobs in territory controlled by another faction.
Explore for alternate entrances and routes when direct combat attracts too much attention.
PLAYER ORIENTATION / YOUR FIRST SESSION
How to approach the game
Know your next objective
Learn the movement and combat controls, then search each space for a clear route forward. Switch abilities or characters when an obstacle cannot be passed with the current toolset.
What to pay attention to
Distinguish the main story route from optional collection and replay challenges, which may open only after earning new abilities.
Your role
The playable perspective recorded for this title is Kay Vess. Its story context is Kay Vess navigating syndicate politics between Episodes V and VI.
Controls and available objectives can vary by game version.
PLAYER GUIDE / GAME-SPECIFIC DIRECTIONS
Star Wars Outlaws: 21 main missions and 2 mandatory Expert quests
Find your exact main-story quest and its next objective. The full path has 21 main missions plus two Expert quests required for progression: The Mechanic on Toshara and The Scavenger on Akiva. Kijimi, Tatooine and Akiva recruitment missions may be played in different orders. Gunsmith unlocks once after the first crew lead. Follow the labeled continuation links rather than assuming every numbered entry is your next mission.
- 01 / PICK THE JOB
Use the journal and map together
Open the journal to distinguish the main story from side contracts, intel leads and discoveries. Select the job you intend to do, then use the map to identify its destination. Fast travel becomes useful as areas are opened. A distracting nearby objective does not necessarily advance the active mission.
- 02 / BEFORE ENTERING
Check the controlling syndicate
Pyke, Crimson Dawn, Hutt and Ashiga territories are not interchangeable. Reputation changes how guards and merchants treat Kay. A good reputation may permit entry to areas that otherwise require sneaking. Low reputation can turn ordinary travel into hostile territory. Review your standing before taking a contract that angers another faction.
- 03 / USE NIX
Scout patrols, alarms and alternate doors
Before moving into a guarded compound, crouch and watch patrol paths. Send Nix to identify or distract opponents, retrieve items, sabotage equipment or interfere with alarms. The most obvious entrance is not always the only route. Look for vents, side passages and other approaches rather than repeatedly running into the same patrol.
- 04 / CHOOSE YOUR APPROACH
Stealth remains useful, but not compulsory everywhere
Later game updates expanded combat options in syndicate districts. If an encounter escalates, reposition and use Kay's blaster, gadgets and found weapons. An alarm or hostile reputation may still complicate escape. Reassess the mission objective instead of assuming that defeating every guard completes the contract.
Story mission finder: Canto Bight, Toshara, three recruitment branches and the finale
Entries 1–9 cover Canto Bight and Toshara, including required Expert quest The Mechanic. Entries 10–19 cover three flexible recruitment branches on Kijimi, Tatooine and Akiva. To continue Akiva's Viper, complete The Scavenger Expert quest and obtain the Hydrorepulsor. Entries 20–23 are the fixed ending. Finish all three crew routes before Legacy. If Gunsmith is already completed, continue your active planet rather than repeating it.
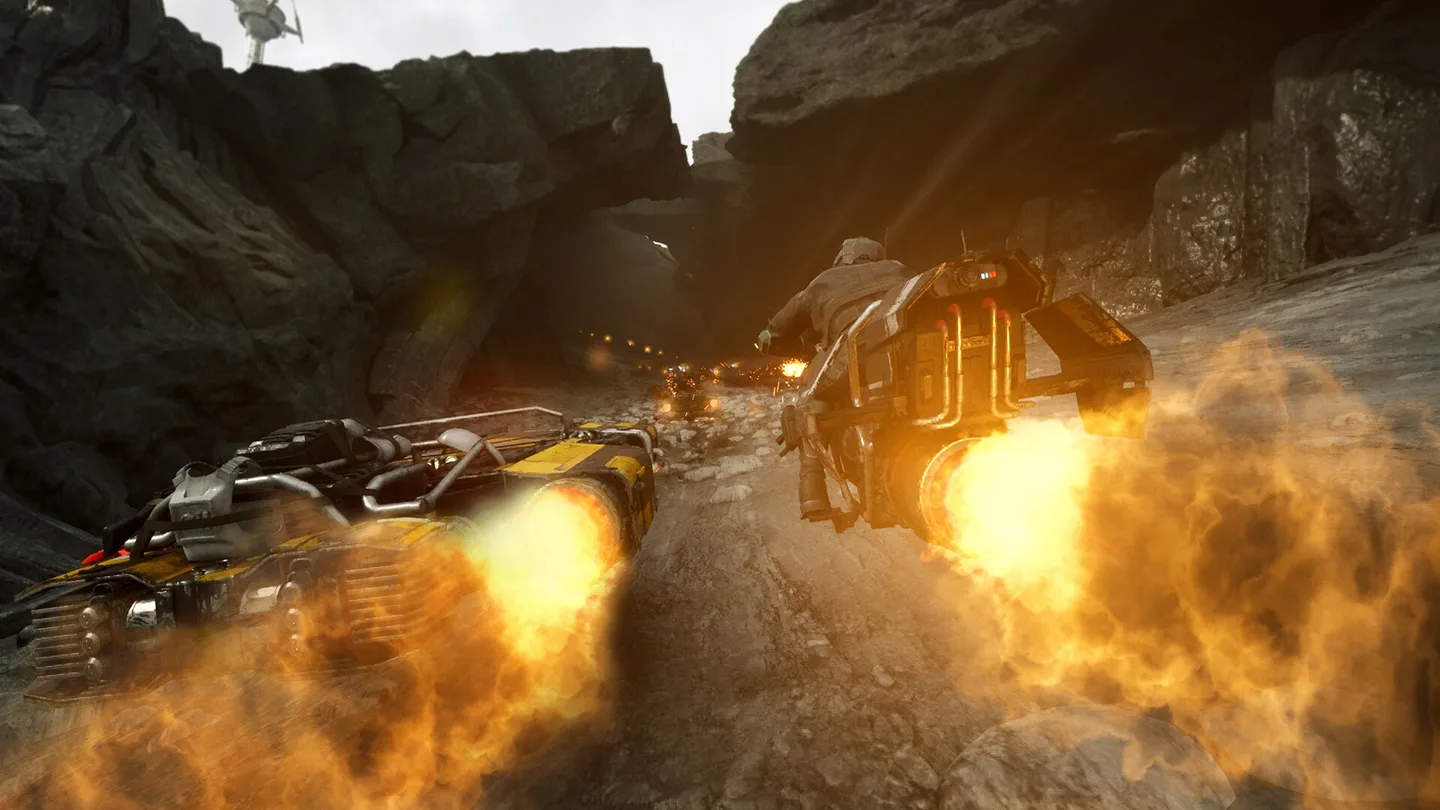
See official Outlaws gameplay screenshots ↓ (game-wide art, not mission-specific images).
Showing 23 of 23 missions
No missions match. Try a shorter title or clear your search.
- MISSION 1 OF 23
01 · Beginnings — Canto Bight
Go downstairs from Kay's room in the Broken Hoof and speak with Bram. Find Preeban's shop to repair the data spike, then follow the mission marker into the Sixth Kin-controlled club to obtain the forged identicard. Use Nix to distract guards, inspect vents for alternate access, and return to Bram after leaving the club.
Canto Bight / WAYFINDINGBefore starting: Start story with Bram and Nix
Your next objective: Meet Bram at the Broken Hoof, repair Preeban's data spike, then find the identicard.
Continue to next objective →↑ BACK TO MISSION INDEXROOM-BY-ROOM: WHERE TO GO NEXT
Broken Hoof and Preeban's shopLeave Kay's room, speak to Bram downstairs, and follow the first objective to Preeban. Finish the data-spike repair interaction before following the city marker toward the Sixth Kin district.
Sixth Kin entranceWhen a watched doorway blocks your approach, check the nearby corner and low opening instead of repeatedly walking into the guards. Use Nix to distract a single sentry while moving behind cover.
Club identicard objectiveStay crouched and follow the current item marker through the guarded rooms. Collect the forged identicard from the marked objective, then return through the accessible passage and report back to Bram.
- MISSION 2 OF 23
02 · Outlaws — escape Cantonica
Accept the high-risk contract from Bram and follow the marked route into Sliro's estate. Use Nix and available vents to avoid or disable guards, then reach the estate vault. During the escape, move through the corridors and hangar to board the Trailblazer. The mission ends when Kay leaves Canto Bight aboard the ship.
Canto Bight / WAYFINDINGBefore starting: Finish Beginnings
Your next objective: Follow barrier cables through Sliro's estate and escape with the Trailblazer.
RELATED DOSSIERSKay Vess dossier →Continue to next objective →← EARLIER OBJECTIVE↑ BACK TO MISSION INDEXROOM-BY-ROOM: WHERE TO GO NEXT
Estate perimeter on Canto BightFollow the main estate marker to its western perimeter. Use the available cliff and climbing path to bypass exposed security near the main entrance; Nix can distract patrolling guards while Kay moves between cover.
First energy barrierUse Nix Sense to follow the cable from the red energy barrier to its nearby power control. Enter the side room and deactivate the supply before continuing; a blaster shot at the barrier itself is not the required solution.
Second and third barriersFor the next barrier, search the upper level near the bar for the connected switch. On later locked access, follow the cable toward its terminal and slice the control instead of searching for an unrelated keycard.
Vault and estate escapeReach the vault objective and complete the scripted interaction, then follow the vent route out of the mansion. On the way to the stolen ship, bypass isolated guards or fight when the alarm state forces combat, and board the Trailblazer.
- MISSION 3 OF 23
03 · Crashed — reach Mirogana on Toshara
After the Trailblazer crashes, speak with the mechanic Waka near the ship. Recover control of the speeder and follow the main road toward Mirogana, the city marked in the objective tracker. Ignore distant exploration markers for now. Enter the city to begin working for Danka and the local syndicates.
Toshara / WAYFINDINGBefore starting: Escape Cantonica
Your next objective: Locate Waka, recover the speeder and reach Mirogana by road.
Continue to next objective →← EARLIER OBJECTIVE↑ BACK TO MISSION INDEXROOM-BY-ROOM: WHERE TO GO NEXT
Trailblazer crash siteLeave the wrecked ship and speak with Waka about the damage. Follow the current recovery markers around the crash area rather than leaving Toshara to explore unrelated leads.
Speeder accessReach the usable speeder and practice boost and brakes in open terrain. The first job is traveling to Mirogana, not clearing the region's Imperial checkpoints.
Mirogana city entryFollow the road and city marker to the gates. Once inside, look for the selected story contact; Danka's broker work is the path into Underworld, while optional market activities can wait.
- MISSION 4 OF 23
04 · Underworld — Pyke territory on Toshara
Find Danka in Mirogana and accept the assignment connected with the Pyke Syndicate. Mark Underworld as the active quest, then reach the Pyke stronghold from the indicated district. Watch patrol movements, use Nix to distract guards, and locate the required information. After escaping, speak with the quest contact to resolve the first important syndicate decision.
Toshara / WAYFINDINGBefore starting: Meet Danka
Your next objective: Reach the Pyke district and find the terminal; try the vent if reputation blocks its gate.
RELATED DOSSIERSNix dossier →Continue to next objective →← EARLIER OBJECTIVE↑ BACK TO MISSION INDEXROOM-BY-ROOM: WHERE TO GO NEXT
Pyke District northeast entranceTravel toward Mirogana's northeastern Pyke quarter near the Imperial outpost. If your reputation is poor, the main gate guard refuses entry; use the low vent just before the entrance.
District lower corridorExit the vent in a crouch. Let the two patrolling Pykes descend their stairs, then follow at a distance behind crates and along the left wall, timing crossings between cover gaps.
Climbing route into Gorak's strongholdPass the guard kneeling by the route, climb the nearby yellow wall grate and cross the upper ledge to a lockpickable door. Grapple across the chamber and climb the next ladder into the stronghold.
Stronghold surveillance and shield generatorsMark guards with the electrobinoculars. Stay outside camera sight lines, use Nix to distract guards near the first exposed power core, and switch it off. Cross to the upper roof section and deactivate the second power core to remove the energy barrier.
Gorak's tower terminalEnter the accessible tower, use its lift and slice the terminal containing Gorak's information. After the alarm, use the elevator-side escape path, wall grates and vents to reach the exterior, then report the intelligence to Danka.
- MISSION 5 OF 23
05 · New Tricks — blaster upgrades and reputation
Return to Danka, inspect the new work opportunity, and follow the direction toward Jaunta's Hope for the blaster parts. Install the required blaster upgrade when prompted. The reputation screen becomes important here: a friendly faction can permit direct access to territory, whereas a hostile faction requires a safer route. Review your journal before selecting False Flag.
Toshara / WAYFINDINGBefore starting: Finish Underworld
Your next objective: Find blaster parts around Jaunta's Hope and consider syndicate standing.
Continue to next objective →← EARLIER OBJECTIVE↑ BACK TO MISSION INDEXROOM-BY-ROOM: WHERE TO GO NEXT
Contact for blaster partAfter Danka's job, use the objective to locate the merchant and identify the ion blaster component that cannot simply be purchased. Check the nearby intel lead if the shopkeeper will not offer the part.
Pyke safehouse side entranceDo not force the exposed main gate. From the Pyke-controlled area, find the alley route toward the security camera, have Nix disable the connected camera switch, and unlock the nearby wall vent to reach the safehouse.
Recover and install componentInside, locate the marked blaster part and leave through a safe passage. Return to a workbench or the instructed contact and install Ion mode; it lets Kay disrupt compatible electronics before False Flag.
- MISSION 6 OF 23
06 · False Flag — Imperial orbital station
Repair the Trailblazer sufficiently to take off from Toshara and follow the marked orbital objective. Reach the Imperial station using the approach shown by the map, work through its guarded rooms, and locate the relevant data vault. The framing choice affects which syndicate takes the blame. Return to Toshara after escaping the station.
Toshara orbit / WAYFINDINGBefore starting: Finish New Tricks
Your next objective: Infiltrate the Imperial fuel station and locate the data vault.
Continue to next objective →← EARLIER OBJECTIVE↑ BACK TO MISSION INDEXROOM-BY-ROOM: WHERE TO GO NEXT
Trailblazer departure and orbital cargoAfter the ship is repaired, speak with Waka at the Trailblazer and take off. Follow the orbital cargo objective before heading to the Imperial Fueling Station; complete the cargo collection rather than landing prematurely.
Imperial Fueling Station exteriorUse the marked approach to the station and dock. Inside, follow the quieter service side instead of walking directly into every group of stormtroopers. Stay behind cargo as officers pass.
Camera and alarm hallwayUse Nix to sabotage the nearby alarm panel and distract a soldier while Kay passes. Avoid the security camera's cone; wait for two officers to walk away before crossing the hallway.
Control room and upper routeFrom the guarded hall, turn through the side doorway and access the computer near the control-room window. Use its door function to open the path to a ladder, climb up and pick the next lock.
Imperial data vaultFollow the newly available upper rooms to the objective terminal and slice the vault data. Choose the target faction deliberately because this frame-up affects criminal-syndicate reputation.
Leave the stationRetrace the now-accessible halls or follow the updated escape objective to the Trailblazer. Defend the ship during the orbital getaway and return to Toshara to advance the main quest.
- MISSION 7 OF 23
07 · The Mechanic — required Expert quest
Before Waka will advance The Wreck, complete Selo Rovak's Expert quest for the speeder upgrade. Follow the Speeder Mechanic intel lead to Jaunta's Hope and speak with her through the indicated meeting route. Recover the atmospheric accelerator and finish the speed-boost training. This Expert quest is required for story progress even though it is not labeled a main quest.
Toshara / WAYFINDINGBefore starting: Complete False Flag; required Expert quest before The Wreck
Your next objective: Meet Selo Rovak, collect the accelerator and practice speeder boost.
Continue to next objective →← EARLIER OBJECTIVE↑ BACK TO MISSION INDEXROOM-BY-ROOM: WHERE TO GO NEXT
Prerequisite and Waka in MiroganaFinish the Mechanic Expert mission and unlock speeder Speed Boost first. Meet Waka at Mirogana's market; his briefing points to the Class Eleven Power Core at the Imperial Comm Station in Boulder Forest.
Northwest Comm Station perimeterDo not drive up to the heavily protected main gate and AT-ST. From the southwest rock passage, follow the exterior ledges, avoid patrolling probe droids, and use the grappling crossing to enter above the compound.
Station technicians and security officeUse cover against the technicians and disable the camera's power panel. The upper station consoles can remove turret or ray-shield obstacles. At the west-side security office, send Nix to operate the door button and take the Class Eleven Power Core.
The Castellan shipwreck caveRide the speeder into the old-shipwreck tunnel after Waka sends coordinates. Insert the stolen power core into the door panel, then use the indicated overhead electrical target to open the route into the wreck.
Climb the wreck and restore reactor powerCross the ship exterior with the grappling points, wall grates and squeeze-through opening to enter the hull. Follow the internal path toward the disabled reactor; activate the highlighted power mechanisms before attempting to reach the bridge.
Ship's bridge and escapeOnce the reactor is online, follow the new bridge objective to the navigation computer. Defeat the attackers when they interrupt the retrieval, collect the nav computer and escape the ship through the marked exit. Return to Mirogana and speak to Jaylen and ND-5 aboard the Trailblazer.
- MISSION 8 OF 23
08 · The Wreck — Imperial communications station and shipwreck
Talk to Waka about the missing nav computer. Infiltrate the Imperial communications station to recover the needed power core, then follow the mission trail to the wrecked High Republic vessel. Restore the shipwreck's internal power, work toward its bridge, secure the navigation computer and escape. Return to the Trailblazer to unlock the next chapter.
Toshara / WAYFINDINGBefore starting: Finish The Mechanic first
Your next objective: Follow the comm-station route into the High Republic wreck and collect the nav computer.
Continue to next objective →← EARLIER OBJECTIVE↑ BACK TO MISSION INDEXROOM-BY-ROOM: WHERE TO GO NEXT
Trailblazer preparationMake sure the stolen navigation computer has been installed and the required ship conversation with Jaylen and ND-5 has finished. Otherwise the galaxy-map travel choice remains unavailable.
Hyperspace and recruitment optionsEnter the pilot seat, use the ship's navigation controls, and select Kijimi, Tatooine or Akiva according to your preferred recruit. These three branches can be completed in another order.
Choose the next playable pathFor Ank go to The Safecracker; for Hoss begin The Heavy; for Gedeek start The Droidsmith. If another branch has already been completed, do not repeat Gunsmith merely because the route index lists it.
- MISSION 9 OF 23
09 · Hyperspace — choose the next crew-recruitment planet
Speak to Jaylen and ND-5 after the nav computer is installed. Use the Trailblazer's holotable to leave Toshara by hyperspace. The story now offers three recruitment routes: Kijimi for Ank, Tatooine for Hoss, and Akiva for Gedeek. You can visit these worlds in a different order. Complete all needed crew routes before starting Legacy.
Trailblazer / WAYFINDINGBefore starting: Recover and install nav computer
Your next objective: Choose Kijimi, Tatooine or Akiva freely; the three crew paths are not sequential.
Start Kijimi / Ank →Start Tatooine / Hoss →Start Akiva / Gedeek →← EARLIER OBJECTIVE↑ BACK TO MISSION INDEXROOM-BY-ROOM: WHERE TO GO NEXT
Jaunta's Hope leadFollow the Speeder Mechanic Expert intel to the Jaunta's Hope area. Speak with the relevant local contact and use the Expert quest tracker rather than searching the abandoned shipwreck early.
Find Selo RovakFollow the marked path to Selo's workshop and speak with her about the atmospheric accelerator. Work through the component-retrieval objective to provide what her speeder modification requires.
Test Speed BoostInstall or receive the upgraded speeder equipment and complete the training prompts for Speed Boost. When the Expert objective finishes, return to The Wreck at Waka's Mirogana contact.
- MISSION 10 OF 23
10 · The Safecracker — begin Ank's Kijimi route
Land on Kijimi and follow the mission to the Ashiga Clan and the lead on Ank. Travel through the indicated streets and hot-spring or guarded areas while investigating the relic and clan politics. Deliver the required object to the queen. If Gunsmith has not triggered yet, visit ND-5 before proceeding to Breakout.
Kijimi / WAYFINDINGBefore starting: Finish Hyperspace
Your next objective: Begin Ank's recruitment through Kijimi City's Ashiga contacts.
Install Power Bolt, if not already done →Already have Power Bolt? Continue Kijimi →← CHOOSE ANOTHER CREW↑ BACK TO MISSION INDEXROOM-BY-ROOM: WHERE TO GO NEXT
Land on Kijimi and find the Ashiga contactFrom the city landing zone, follow the Ashiga and Ank information toward the marked local contact. Keep a watch on faction standing when crossing Ashiga and Crimson Dawn territory.
Reach the Wellspring bathhouseFollow the objective toward the Wellspring, scout patrols and use quiet side entrances to reach the relic chambers. When energy barriers block progress, examine connected power conduits and deactivate the exposed controls.
Recover the relic and exitCollect the highlighted relic. After the forced combat begins, clear the agents in your way and use the terrace route to a lockpickable bathhouse door.
Bathhouse vent to the queenUse the vent across from the chest inside the bathhouse to leave the Wellspring. Take the recovered relic to Queen Ashiga at the southern district contact; the follow-up Ank rescue occurs in Breakout.
- MISSION 11 OF 23
11 · Gunsmith — unlock the Power Bolt configuration
When ND-5 contacts Kay after the first major crew-recruitment lead, return to the Trailblazer and speak to him. Use the ship's blaster workbench to assemble the Power Bolt module. This short main quest can trigger after The Safecracker, The Heavy, or The Droidsmith, depending on which planet you visited first. Do not repeat it on later planets.
Trailblazer / WAYFINDINGBefore starting: Reach your first crew lead; Gunsmith is a one-time step
Your next objective: Speak to ND-5 about the Power Bolt upgrade, then return to your active branch.
RELATED DOSSIERSND-5 dossier →Continue Kijimi after The Safecracker →Continue Tatooine after The Heavy →After The Droidsmith: unlock Hydrorepulsor →← CHOOSE ANOTHER CREW↑ BACK TO MISSION INDEXROOM-BY-ROOM: WHERE TO GO NEXT
Return to ND-5 aboard the TrailblazerGunsmith triggers once, after whichever initial recruitment lead you followed first. Speak to ND-5 when the ship contact activates and open the blaster workbench.
Assemble Power Bolt modeFollow the Power Bolt upgrade instruction on the workbench and finish its assembly step. The new blaster configuration destroys cracked walls and opens otherwise blocked story routes.
Continue your original recruitment branchGo back to the branch you were already pursuing: Breakout after The Safecracker, Partners after The Heavy, or the Akiva Expert step after The Droidsmith. Do not look for three separate copies of Gunsmith.
- MISSION 12 OF 23
12 · Breakout — rescue Ank from the factory
Return to Kijimi and contact the Ashiga lead for the factory rescue mission. Infiltrate the marked industrial area using vents, alternate entrances and Nix distractions if a guarded doorway is blocked. Find Ank inside, complete the escape objectives, and follow the journal to the next Kijimi story quest, The Hive.
Kijimi / WAYFINDINGBefore starting: Finish The Safecracker
Your next objective: Find the factory, work its fans and access controls, then rescue Ank.
Continue Kijimi →← EARLIER OBJECTIVE↑ BACK TO MISSION INDEXROOM-BY-ROOM: WHERE TO GO NEXT
Meet Krisk and Qi'raAfter the initial Kijimi recruitment lead and Power Bolt unlock, find Krisk and Qi'ra in the marked cantina. Collect the factory access card before heading to the southwestern Ashiga weapons works.
Factory perimeter and hangarEnter the southwestern factory through its gate and tunnel. In the large hangar, the right-side crate path gives better cover for isolating guards. The current objective is to reach the interior rooms, not collect all storage chests.
Ank behind a window: stop the fanWhen Ank is visible through a window and a spinning fan blocks the route, climb the left wall to the upper balcony. Direct Nix to activate the fan power switch on the far side of the room, then cross through the stopped fan.
Factory corridors and rescueContinue through the marked factory corridors and electrical barriers, using Power Bolt on cracked obstructions if the route indicates one. Reach Ank, handle the enemies that interrupt the escape, and follow her out of the building.
Next Kijimi objectiveAfter Ank is free, listen to her request to complete her remaining job. The Kijimi story continues in The Hive, not directly to the final mansion heist.
- MISSION 13 OF 23
13 · The Hive — finish the Kijimi recruitment branch
Follow the Kijimi objective involving the Ashiga Clan queen and rival leadership. Move through the areas marked in the journal and secure the requested objective while supporting Ank's escape and recruitment. The final choice affects the clan leadership and related syndicate standing. Then use the Trailblazer to start another unfinished recruitment route.
Kijimi / WAYFINDINGBefore starting: Rescue Ank from the factory
Your next objective: Finish the Ashiga stronghold and caverns, then complete remaining crew missions.
Choose another crew route →All crew recruited? Start Legacy →← EARLIER OBJECTIVE↑ BACK TO MISSION INDEXROOM-BY-ROOM: WHERE TO GO NEXT
Meet Ank and Qi'ra at the Ashiga quarterTravel to the marked Ashiga Clan district contact in southwestern Kijimi. Speak with Ank and Qi'ra, and collect Ank's explosive before entering the crack in the wall toward the underground caverns.
Kijimiko Caverns climbing forkIn the caverns, take the climbing wall at the left fork rather than the short loot passage to the right. Cross the suspended walkway, grapple over the gap and continue to the machinery rooms.
Stronghold power conduitsUse Nix Sense to trace the cables and find each powered mechanism. In the tall grate-and-fan shaft, direct Nix to deploy the ladder to reach the final upper conduit; shoot the exposed electrical target and slice the nearby control room's terminal.
Cryochamber and Origin StrandAfter the alarm, fight through the Ashiga defenders and their explosive insect pets. Return to the previously locked eastern route, drop into the air duct and reach the Cryochamber. Clear Crimson Dawn agents and collect the Origin Strand.
Escape to the throne roomLeave through the northern red doorway, turn right, climb the adjacent wall and enter the upper vent. Follow the shaft and ladder back to the throne room. The Queen or Krisk choice affects faction reputation; Ank joins the heist crew afterward.
- MISSION 14 OF 23
14 · The Heavy — find Hoss on Tatooine
Land on Tatooine and locate the sheriff at Wayfar as ND-5 directs. Follow the information about the captive mercenary Hoss into the Tusken-held area. Use cover and Nix to reach the pearl without alerting every sentry, then return it to the Tuskens to arrange Hoss's release. If your first recruitment, complete Gunsmith before Partners.
Tatooine / WAYFINDINGBefore starting: Finish Hyperspace; the Hoss branch has flexible order
Your next objective: Follow the Mos Eisley leads and continue the palace story.
First recruitment? Do Gunsmith →Already have Power Bolt? Continue Tatooine →← CHOOSE ANOTHER CREW↑ BACK TO MISSION INDEXROOM-BY-ROOM: WHERE TO GO NEXT
Wayfar and the sheriffLand on Tatooine and travel to Wayfar. Speak with the local sheriff about Hoss's disappearance and track the Tusken lead instead of heading immediately to Mos Eisley.
Tusken territory and the pearlUse the marked desert route toward the Tusken area, move behind rocks and tents when sentries patrol, and use Nix to scout or distract guards. Retrieve the requested pearl or barter objective without attacking every Tusken.
Release Hoss and set up the next meetingReturn the item to the Tusken contact to secure Hoss's release. Follow the story marker back to civilization, then meet Hoss at Mos Eisley to start Partners. If Gunsmith activates meanwhile, speak with ND-5 before proceeding.
- MISSION 15 OF 23
15 · Partners — Jabba's Palace and Nix
Meet Hoss at Mos Eisley and follow the story into Jabba's Palace. Once Nix has been taken, track the infiltration route through the palace's guarded areas and ventilation access. Recover Nix, then deal with the rancor encounter and the escape. Continue to Jabba's Favor rather than assuming the Tatooine storyline is complete.
Tatooine / WAYFINDINGBefore starting: Finish The Heavy
Your next objective: Infiltrate Jabba's Palace, rescue Nix and escape the rancor arena.
RELATED DOSSIERSNix dossier →Continue Tatooine →← EARLIER OBJECTIVE↑ BACK TO MISSION INDEXROOM-BY-ROOM: WHERE TO GO NEXT
Mos Eisley meeting and hidden palace approachMeet Hoss at the indicated Mos Eisley cantina. After Nix is taken, follow the mission marker into the cave approach to Jabba's palace. Leave the speeder at the crevice, squeeze through and follow the climbing route.
Palace wall grappleMove past isolated exterior sentries or hang from the stone bridges to stay unseen. At the tower wall, use the grappling point to climb inside the palace.
Stealth without NixWhile Nix is missing, do not rely on Nix Sense or distraction commands. Heavy halberd guards are not vulnerable to ordinary stealth takedowns; avoid them, keep clear of alarm panels and use vents when direct doors are watched.
Menagerie door keycardIn the guarded corridor, use the vent to the left of the metal grate to bypass the exposed path. Knock out the isolated guard holding the access card, collect it yourself and return to open the locked door.
Kitchen and cell-side switchesMove through the kitchen vent and pull the nearby lever to open the next door. Later, wait until the patrolling guard turns away before pulling the second switch that opens the cell on the opposite side. Check the small orange door for the remaining keycard.
Rescue NixEnter the menagerie, defeat the guards and beasts and open Nix's cage near the door. With Nix restored, follow the exit toward the forced palace combat and hangar.
Rancor hangar gate puzzleWhen the rancor charges, shoot the barrel on the rail above it, then stand near the large steel gate and dodge aside when its red charge marker appears. Repeat the barrel-and-charge sequence. After the second impact, send Nix to pull the high wall lever to restart the rail. A third gate impact ends the fight.
- MISSION 16 OF 23
16 · Jabba's Favor — Fort Sunfire
After leaving the palace, listen for the contact directing Kay to Fort Sunfire. Use the journal marker to reach the Imperial installation, find the information connected with Jabba's spy, and escape the compound. Follow the speeder chase markers back out of the area. This finishes the main Tatooine recruitment chain; other syndicate jobs remain optional.
Tatooine / WAYFINDINGBefore starting: Finish Partners
Your next objective: Complete the Fort Sunfire and Jabba's Favor objectives to finish Hoss's branch.
Choose another crew route →All crew recruited? Start Legacy →← EARLIER OBJECTIVE↑ BACK TO MISSION INDEXROOM-BY-ROOM: WHERE TO GO NEXT
Contact for Jabba's FavorAfter Partners, follow the main journal objective connected to Jabba's intelligence request. The required identity is hidden in Imperial files, not in another Tusken camp.
Fort Sunfire perimeterApproach the marked Imperial fort, watch patrol paths and use a side or higher route rather than entering the most heavily guarded gate. Disable accessible alarms before crossing open yards.
Fort terminals and the spy recordFind the indicated Imperial terminal and retrieve the identity of Jabba's spy. Use Nix for nearby switches or distraction and avoid chasing optional base chests before the mission objective updates.
Speeder getawayLeave the installation through the escape route, mount the speeder and follow the chase markers. Focus on reaching the end of the pursuit, then return to the Hutt storyline's marked handoff.
- MISSION 17 OF 23
17 · The Droidsmith — track Gedeek on Akiva
Land at Myrra and visit the Alcazar cantina to locate Surat Nuat. Speak with him about Gedeek, then follow the available intel toward Imperial Research Station 57. Enter through the route opened by the mission, deal with its defenses and meet Gedeek. If Gunsmith has not been completed on another planet, return to ND-5 when he calls.
Akiva / WAYFINDINGBefore starting: Finish Hyperspace; Akiva branch order is flexible
Your next objective: Meet Surat Nuat at the Alcazar and reach Imperial Research Station 57.
First recruitment? Do Gunsmith →Gunsmith finished? Start The Scavenger →← CHOOSE ANOTHER CREW↑ BACK TO MISSION INDEXROOM-BY-ROOM: WHERE TO GO NEXT
Myrra and Alcazar cantinaAfter landing on Akiva, go to Myrra's Alcazar cantina. Speak with the bartender and proceed to the back to find the person who can help locate Surat Nuat.
Surat and Research Station 57Speak with Surat about the Imperial engineer Gedeek, then track the lead toward Research Station 57. Treat the station as a guarded Imperial facility and look for its accessible exterior climbing or service route.
Facility access and turret controlsInside Research Station 57, remain low around patrols and security cameras, and use the linked terminals to disable the relevant turret or security lock before crossing the defended section.
Find Gedeek and escapeFollow the objective deeper into the engineering rooms, locate Gedeek and finish the required conversation and droid-system actions. Leave the facility along the newly accessible route; Gedeek's later Viper work requires the Scavenger upgrade.
- MISSION 18 OF 23
18 · The Scavenger — required Akiva Expert quest
After The Droidsmith, follow the Temmin's Family intel in your journal toward Sashin, then track the Off Scrapping lead through Mount Selasa to Temmin Wexley. He temporarily fits the speeder with a Hydrorepulsor. Ride downriver toward the lake, locate Surat Nuat's shuttle and retrieve the stolen durasteel struts. Return to Temmin for the permanent water-travel upgrade. Then resume Viper; its route across Akiva's waterways is not accessible without this Expert quest.
Akiva / WAYFINDINGBefore starting: Finish The Droidsmith; Hydrorepulsor required for Viper
Your next objective: Find Temmin, recover the struts and upgrade the speeder for deep-water travel.
RELATED DOSSIERSTemmin Wexley dossier →Hydrorepulsor installed? Continue Viper →← EARLIER OBJECTIVE↑ BACK TO MISSION INDEXROOM-BY-ROOM: WHERE TO GO NEXT
Sashin and Temmin's Family intelFollow the Expert lead toward Sashin, then continue on the Off Scrapping trail to meet Temmin Wexley around Mount Selasa. This quest is an upgrade prerequisite, not an alternate version of Viper.
Temporary HydrorepulsorSpeak with Temmin and receive the temporary speeder modification for water travel. Test it on the specified water route rather than trying to cross Akiva's lake beforehand.
Find Surat's shuttle and strutsRide across the water toward the marked shuttle location and investigate the wrecked equipment. Retrieve the stolen durasteel struts required for the permanent modification.
Permanent upgrade and Viper continuationReturn to Temmin to complete The Scavenger and fit the permanent Hydrorepulsor. Only after this upgrade should you resume Viper's river crossing and Kassina Outpost objective.
- MISSION 19 OF 23
19 · Viper — Akiva's droid threat
After completing The Scavenger Expert quest, return to Gedeek and track Viper on the journal and Akiva map. The Hydrorepulsor allows Kay's speeder to cross deep water toward Kassina Outpost. Follow the water route, enter the Imperial facility, sabotage its Viper-droid development systems and defeat the active droids. Check the objective again after each sabotage stage before leaving the outpost.
Akiva / WAYFINDINGBefore starting: Finish The Scavenger and install Hydrorepulsor
Your next objective: Cross waterways to Kassina Outpost and disable the Viper droid systems.
Choose another crew route →All crew recruited? Start Legacy →← EARLIER OBJECTIVE↑ BACK TO MISSION INDEXROOM-BY-ROOM: WHERE TO GO NEXT
Gedeek's contacts and crashed A-wingTravel west of Sashin toward the Sneaky Hollow ledges, climb toward the crashed A-wing and investigate it. A stronger Viper probe droid attacks; use Ion mode to remove its shield before damaging it with regular blaster attacks.
Travel to Kassina OutpostWith the Hydrorepulsor installed, use the speeder to cross the water route toward Kassina Outpost. If the speeder cannot travel on water, finish The Scavenger and return here instead of searching for a nonexistent land bridge.
Imperial facility approachStudy the guards and security droids at the outpost, enter through the available service or guarded access, and move toward the Viper production machinery indicated by the journal.
Sabotage Viper systemsUse the marked terminals and machinery controls to disable the Imperial droid program. Re-read the updated objective after each action: the task changes from finding the system to stopping its output and escaping.
Escape with Gedeek's mission completeOnce the major droid threats are defeated and the facility objective is marked finished, take the indicated exit and contact Gedeek. Continue an unfinished crew branch or return to the ship when all recruitment stories are complete.
- MISSION 20 OF 23
20 · Legacy — Akiva droid factory and ND-5
Once Ank, the Tatooine recruit and Gedeek have been secured, return to the Trailblazer for the next main objective. Head to the ruined droid factory on Akiva to find the vital part for ND-5. Work with the Rebel contact encountered on the way, follow the path to the component, and return to the crew before starting the final missions.
Akiva / WAYFINDINGBefore starting: Finish all three recruitment branches
Your next objective: Follow the droid factory route and repair ND-5 before the finale.
RELATED DOSSIERSND-5 dossier →Start final story sequence →← CHOOSE ANOTHER CREW↑ BACK TO MISSION INDEXROOM-BY-ROOM: WHERE TO GO NEXT
Myrra and Temmin's apartmentAfter the three recruitment chains are complete, return to Akiva and visit Temmin's apartment in eastern Myrra. Speak with him and Gedeek about the part needed to stabilize ND-5.
Old droid factory tunnelEnter the indicated tunnel system. At the flooded chamber, turn left and follow the yellow direction arrows painted on the walls; they identify the usable passage through the dark factory approach.
Blast and cut blocked entriesUse Power Bolt on marked cracked walls and follow Gedeek when he cuts an obstructing grate. Later he gives Kay the Fusioncutter; use it on compatible barred passages instead of searching the map for a new door.
Restore factory powerAt the Separatist droid factory, trace the power conduits and operate the controls needed to restart the disabled machinery. Check which platform or locked room becomes available after power returns.
Rebels and ND-5 componentContinue to the factory or Hutt-controlled objective to free the captured allies and recover the component needed for ND-5. Follow the resulting story back to the crew rather than treating the entire factory as a collectible dungeon.
- MISSION 21 OF 23
21 · The Truth — Riko and the station data
After Legacy, speak to Jaylen and then Riko, Kay's mother, at the rendezvous near Lake Amari. Follow her station infiltration route to obtain the codes to Sliro's estate, using Nix and terminals to bypass security. Reach the required data and escape with Riko. Starting this mission commits Kay to the final story sequence until the campaign concludes.
Akiva / WAYFINDINGBefore starting: Finish Legacy; fixed final sequence begins
Your next objective: Meet Riko near Lake Amari and retrieve estate access codes.
Continue the heist →← EARLIER OBJECTIVE↑ BACK TO MISSION INDEXROOM-BY-ROOM: WHERE TO GO NEXT
Riko's shuttle and point of no returnMeet Riko near Lake Amari, speak with her at the Imperial shuttle, and finish any open-world preparations before agreeing to start The Truth. This choice locks free exploration until the finale concludes.
ISB station hangar and security cameraLeave the shuttle through the right-side service route, using moving carts as cover. Send Nix to deactivate the camera through the control in the adjacent glass-walled room; break the left lock to continue.
Conveyor and two ion capacitorsIn the computer room, slice the marked terminal and go toward the droid conveyor. Silently disable the technicians, enter the shaft beneath the conveyor, then shoot the two capacitors with Ion mode so the bridge becomes usable.
Viper droid memory roomFollow the left perimeter around the crowded droid-control hall to avoid officers and rotating Viper cameras. Use Nix Sense to find their connected terminals; the target memory-wipe terminal is in the far right-hand wing.
Elevator to Sliro's roomsAfter deleting the droid data, return to Riko's elevator, then move through the next hallway while guards walk away. Use smoke canisters and the vent route to reach the passage outside Sliro's quarters.
Dual lever and the codesSend Nix to open the side room, then have him operate one lever while Kay pulls the other. Destroy the connected power source, enter Sliro's chamber and retrieve the codes through the required computer and the objective terminal.
Station escape to shuttleAvoid the densely guarded corridor by entering a side vent. Cross to the ladder, follow the upper conference-room shaft and marked hangar traversal with yellow climbing surfaces, then reunite with Riko and board the shuttle.
- MISSION 22 OF 23
22 · The Heist — Sliro's Canto Bight estate
Speak with ND-5 when the crew is assembled, then follow the team through service passages into Sliro's estate. Regroup with Gedeek, clear access for Asara, pass the guarded hangar and locate the vault. Plant Ank's charges and protect Riko during the breach. Follow the casino escape and disable barriers to reach the Trailblazer.
Canto Bight / WAYFINDINGBefore starting: Finish The Truth
Your next objective: Enter Sliro's estate, guard Riko at the vault and escape the casino.
RELATED DOSSIERSRiko Vess dossier →Continue to Revelator finale →← EARLIER OBJECTIVE↑ BACK TO MISSION INDEXROOM-BY-ROOM: WHERE TO GO NEXT
Start the heist with ND-5After completing The Truth, speak to ND-5 on the Trailblazer. Follow the crew's service approach; when the first guarded area becomes hostile, clear it and regroup with Gedeek.
Asara and mansion entryClear the marked route for Asara and wait for the hatch to open. Follow the team into the mansion rather than seeking the old opening used during the early Canto Bight mission.
Hangar and route to the vaultMove through the hangar's defended platforms and locate the service route that leads toward the vault. Watch for energy barriers, cameras and locked doors; activate the linked terminals instead of trying to walk through the active field.
Vault breach and Ank's chargeOnce inside the vault area, place Ank's explosive where prompted. Protect Riko while she slices the safe and fight off the intruders during the forced holdout.
Casino breach and energy barriersAfter the confrontation, use the scripted wall breach to reach the casino. Follow the escape path through the gaming floor and disable the barrier power using the indicated controls before the path to the ship becomes accessible.
Escape to the TrailblazerLeave through the newly opened route, keep moving past hostile Zerek Besh forces, and board the Trailblazer when the objective prompts it. The subsequent mission is Revelator.
- MISSION 23 OF 23
23 · Revelator — rescue ND-5 and finish the story
After The Heist, infiltrate the Imperial Star Destroyer with Gedeek while wearing the provided disguise. Keep to the objective markers through the control rooms, escape ND-5 when he becomes hostile, and restore the needed power cores. Complete the trap and final encounter, then survive the space-combat escape sequence and conclude the main campaign.
Star Destroyer / WAYFINDINGBefore starting: Finish The Heist
Your next objective: Escort Gedeek, avoid ND-5 in the power rooms, then finish the space escape.
RELATED DOSSIERSND-5 dossier →END OF STORY ROUTE← EARLIER OBJECTIVE↑ BACK TO MISSION INDEXROOM-BY-ROOM: WHERE TO GO NEXT
Stormtrooper disguise and Gedeek escortEnter the Imperial Star Destroyer with Gedeek under the provided prisoner-escort disguise. Follow his pace, answer the questioning officer and reach the security-control area without straying too far from the escort.
Camera control and Sliro's bridgeGo upstairs to disable the control-room camera at its terminal, then join Sliro's escort to the bridge. When the cover is blown, immediately take the vent to the right to escape ND-5's initial pursuit.
Lower scaffolds and central emitterKeep moving along the linear traversal path and descend the climbable wall grates from the large overlook. Jump between ledges, cross into the vent, and activate the central-emitter console. The emitter cannot run until two power generators are restarted.
First core: three manual leversUse the northern passage and western ladder to enter the first power-core room. Activate its computer, then operate the three manual levers around the core. ND-5 appears after the first lever; distract him on one side of the machinery before operating the others.
Second core and ND-5 trapReach the other generator using the marked ventilation route. Activate its computer and levers while avoiding ND-5's sight line. Return to the central emitter after both cores are active and use the console to trap ND-5.
Mechanics bay and return to TrailblazerAfter the story scene, follow Asara out, use Nix on the required button, and take the stairway and lift toward the mechanics area. Defeat the hostile guards or sprint through the marked escape corridor until you reach the Trailblazer.
Final ship fight and Star Destroyer systemsIn space, survive the fighter waves and destroy the indicated Gozanti ship. On the Star Destroyer, target the two shield-generator domes beside the bridge, then shoot the exposed reactor at the rear after the shields fall. Complete the escape and ending.
If you get stuck
- Mission marker seems unrelated to the current task
- Re-select the intended job in the journal, then inspect its map objective and any separate intel leads.
- Guards refuse entry to a district
- Check your reputation with that group and look for side entrances or another mission that changes your standing.
- Stealth attempts repeatedly fail
- Use Nix to spot patrols and alarms. For applicable updated encounters, consider a combat route instead of following outdated guides that insist on stealth.
OUTLAWS / OPTIONAL MISSIONS & BOTH RELEASED STORY PACKS
Find the job you actually want to play
Select a path below and jump straight to its next useful objective. The main story mission finder is above; these are separate optional and downloadable-content routes.
Start Wild Card after A Message, then complete The High Roller before The Game.
OPEN WILD CARD WALKTHROUGH ↓STORY PACK 01 / SABACC & INTRIGUE
Wild Card — the Morenia trail
Four central missions are listed in story order. A Message starts this arc, and The High Roller is a separate Expert requirement before The Game can start. The Morenia is not a returnable free-roam zone after its chapter.
01 / Renpalli Station and Toshara orbit Wild Card
BEFORE YOU START Complete A Message and own/install Wild Card.
FOLLOW THIS ROUTE Eavesdrop in the Renpalli cantina for Morenia clues. Track the cruiser shuttle, survive EMP mines, then return to the signal beacon to finish decryption between fighter waves.
IF STUCK The High Roller Expert quest must also be completed before you can enter the Morenia in the next chapter.
REWARD OR UNLOCK Unlock Anoat Sector as a hyperspace destination.
02 / Anoat Sector / Morenia casino ship The Game
BEFORE YOU START Complete Wild Card and The High Roller Expert lead.
FOLLOW THIS ROUTE Jump to Anoat, meet the beacon, enter the casino and speak to ND-5. Use passenger records, rooms, Sabacc information and Nix's theft abilities to reach the tournament and uncover its real purpose.
IF STUCK If the bouncer will not admit Kay, gather passenger-list and master-key clues instead of retrying the front door.
REWARD OR UNLOCK Casino story advances to Toshara; this ship cannot be revisited.
03 / Toshara / Starfaller outpost Double Down
BEFORE YOU START Finish The Game aboard the Morenia.
FOLLOW THIS ROUTE Reach the outpost north of Jaunta's Hope at the lower approach, recover Imperial key codes from two camps and use speeder boost through the wind tunnel. Enter the shipwrecker workshop, shoot the door conduit with ion power and find Aksali.
IF STUCK The second camp is through the western wind tunnel; reaching the taller cliffs near the same map marker does not advance the mission.
REWARD OR UNLOCK Track Thorden and the Okala V map.
04 / Toshara / Thorden's fortress All In
BEFORE YOU START Finish the Double Down pursuit on Toshara.
FOLLOW THIS ROUTE Follow the upper spaceport infiltration route and use cover against defending droids. During the AT-ST showdown, lure its fire into four protected power-conduit grates; shoot the exposed conduits, then board the escape shuttle.
IF STUCK The boss fight is about opening the hangar: destroy the four conduits instead of trying to defeat the AT-ST through direct damage.
REWARD OR UNLOCK 3,000 credits and an Imposter Die major charm in the Trailblazer delivery box.
STORY PACK 02 / HONDO & KHEPI
A Pirate's Fortune — from Akiva to the tomb
Complete Revelator first and make sure the DLC is installed. Look for the noise aboard the Trailblazer to begin A Pirate's Plight. After Brave the Unknown, install the new Ion Shock configuration at the workbench during the brief The Captain's Share interlude.
01 / Trailblazer / Akiva islands A Pirate's Plight
BEFORE YOU START Complete the base-game main story and own/install A Pirate's Fortune.
FOLLOW THIS ROUTE Investigate a beeping object beside the ship's bunks. Follow Hondo's message, investigate Qorvino, inspect the datapad inside the island ruin, and dig at the small three-palm island marked on its map.
IF STUCK If the DLC quest never appears, finish Revelator first and verify that the purchased story pack is installed.
REWARD OR UNLOCK Bottled Nebula Cloud major charm.
02 / Khepi nebula / pirate brig and tomb Brave the Unknown
BEFORE YOU START Find Qorvino's buried map during A Pirate's Plight.
FOLLOW THIS ROUTE Navigate the ion nebula; after capture, use Nix to open your cell and rescue Hondo. Reclaim the blaster from the tavern, tools from the forge and an ion shield from the generator room. Disable the landing-pad turret via its conduits and escape.
IF STUCK Get your blaster first. Power the lift by following the nearby cables and their switch rather than fighting inside the generator room endlessly.
REWARD OR UNLOCK Ion Shock Kit; install the new configuration at the Trailblazer workbench in The Captain's Share.
03 / Achra Station / Kijimi orbit No Prey, No Pay
BEFORE YOU START Finish Brave the Unknown and the short The Captain's Share workbench step.
FOLLOW THIS ROUTE Speak with Hondo in Achra Station, fly to Kijimi orbit, look below the marked smoking wreckage for the cargo and complete the smuggling exchange and Raider-ship theft.
IF STUCK After this chapter, meet Reess Passik in Hauler's Keep to start Miyuki Trade League cargo contracts.
REWARD OR UNLOCK Unlock Miyuki Trade League broker access after meeting Reess Passik.
04 / Tatooine / Wayfar and Hondo's hideout Lost Treasures
BEFORE YOU START Complete No Prey, No Pay.
FOLLOW THIS ROUTE Fly to Tatooine, land at Wayfar and follow Hondo's new coordinates to the west. Use the ramp and grapple point to reach him and navigate the hideout's trap-filled passages to obtain his half of the key.
IF STUCK The obvious front door is not the solution: use the alternate climbing route and inspect each suspicious floor section for traps.
REWARD OR UNLOCK Acquire Hondo's key fragment for the tomb heist.
05 / Khepi Tomb / Rokana Raider vessel Dead Man's Tale
BEFORE YOU START Complete Lost Treasures and confirm readiness with Hondo.
FOLLOW THIS ROUTE Fight in the stolen Raider ship and use assault mode when extra firepower is more important than mobility. Reach Stinger's generator-room quarters, operate the computer to open the exit for allies, escape to the landing pad and board the rescue ship.
IF STUCK The temporary ship changes handling between flight modes. In the finale, prioritize the marked escape path and generator access over optional enemies.
REWARD OR UNLOCK Modified Power Converter charm, Raider Gear Set and Merqaal Corsair Nix accessory.
EXPERTS / POWER BEFORE THE FIGHT
Which abilities actually gate your next mission?
Do not confuse a story-critical Expert with optional ability training. The Mechanic and The Scavenger unlock base-campaign routes; The High Roller blocks the Morenia part of Wild Card until complete.
- MAIN-STORY GATE
The Mechanic
Toshara / Selo Rovak — Speeder boost must be unlocked before The Wreck.
See prerequisite / walkthrough ↗ - MAIN-STORY GATE
The Scavenger
Akiva / Temmin Wexley — Hydrorepulsor unlocks the waterways needed for Viper.
See prerequisite / walkthrough ↗ - WILD CARD GATE
The High Roller
Lando Calrissian — Finish this Expert lead alongside Wild Card before jumping to Morenia.
See prerequisite / walkthrough ↗ - OPTIONAL
The Hotfixer
Tatooine / Teeka — Optional abilities support Sabacc preparation, space travel and trading.
See prerequisite / walkthrough ↗ - OPTIONAL
The Gunslinger
Quint — Optional blaster-combat abilities when difficult gunfights are slowing progress.
See prerequisite / walkthrough ↗ - OPTIONAL
The Veteran
MT-7 — Optional abilities for survivability, advanced slicing and Nix combat tricks.
See prerequisite / walkthrough ↗
SYNDICATES / TRADE-OFFS YOU CAN CONTROL
Compare the four reputations before you take a job
Reputation changes access, vendor terms and how guards react. Good and Excellent reputation offer benefits; the full faction-themed outfit and matching Nix look are rewards for maximum Excellent. Use the journal to identify the job's client and likely opposing faction.
| FACTION | HOW THEY WORK | WHEN TO FAVOR THEM | REWARDS |
|---|---|---|---|
| Pyke Syndicate | Spice, bribes and Imperial contacts | Good standing makes Pyke-controlled travel and commerce easier. Betrayals in contested jobs can reduce standing with a rival. | Imperial Disguise set at maximum Excellent; lower positive tiers yield earlier cosmetics and gifts. |
| Crimson Dawn | Information, secrecy and covert missions | Supports stealth-oriented rewards; accepting a rival's deal can create new obstacles in Crimson Dawn districts. | Crimson Reign set at maximum Excellent; earlier rewards include blaster skin and a minor charm. |
| Hutt Cartel | Outer Rim muscle and explosives | Useful for Tatooine errands; poor standing can complicate travel near Hutt-controlled positions. | Boonta Brawler set at maximum Excellent; early tiers award blaster-related upgrades or cosmetics. |
| Ashiga Clan | Melitto hive and Kijimi weapons | Useful when navigating Kijimi and its optional restricted districts; check the journal before siding with either local interest. | Kijimi Explorer set at maximum Excellent; earlier rewards include materials and cosmetics. |
If a contract boosts one faction but harms a second, prioritize the reputation tier that opens the territory or vendor you need next. Do not assume every contract offers a neutral resolution.
Optional side jobs: Syndicate vaults and keycards stay restricted even at good reputation. The Season Pass adds the separate Jabba's Gambit job connected to ND-5 and Jabba; it is not one of the 21 required main-story missions.
GEAR / TRAVEL / SMUGGLING
Upgrade for the obstacle in front of you
Boost before The Wreck
Complete The Mechanic with Selo Rovak on Toshara. After The Droidsmith on Akiva, complete The Scavenger with Temmin to install the Hydrorepulsor and cross deep water.
Mechanic route → Scavenger route →Recover, defend, specialize
After Brave the Unknown, the Pirate's Fortune equipment system introduces new passive modules. The Miyuki Splice Core unlocks a second passive slot. Shield Booster assists survival; Precision Optics emphasizes ship weak points. Choose a module for the contract rather than copying one fixed build.
Upgrade locations ↗Smuggling contracts after No Prey, No Pay
Meet Reess Passik in Hauler's Keep after the third Pirate's Fortune mission. Cargo type and quantity change danger and rewards: timed cargo limits travel, suspicious cargo attracts stronger enemies, and other loads test ion resistance or hull survival. A contract fails if you jump to the wrong destination.
Cargo and rewards guide ↗Quick reward path: One completed Miyuki contract unlocks the Power Flux Emitter; load-specific contract goals award passive modules. Claim newly awarded items from the Trailblazer's delivery crate.
GAMEPLAY / OFFICIAL SCREENSHOTS
See the game in action
Select an image to enlarge it. These are actual gameplay images from this game's official Steam store listing. Screenshots can reflect a later PC edition.
Source: Official Steam game page ↗. Images © their respective rights holders.
01 · Orientation
What the game is
Outlaws centers criminal reputation, contracts, infiltration, gambling, smuggling, and mobility across competing syndicate territories. Kay Vess experiences the Galactic Civil War largely from outside the Rebel–Imperial binary, making local underworld power the central political system.
IDS places the game in the Age of Rebellion era and records its continuity as Canon.
02 · Publication file
Release, studio, and platform context
Star Wars Outlaws was developed by Massive Entertainment and published by Ubisoft. Its primary release platforms in the IDS record are PlayStation 5; Xbox Series; Windows; later Switch 2.
Star Wars Outlaws is cataloged as a released Star Wars game. Later ports, remasters, backward-compatible versions, or storefront reissues remain attached to this core record unless they substantially alter the underlying work.
IDS stores the game itself as one work rather than creating separate records for every port, storefront release, compatibility update, or remaster. Platform history still matters, but the archive avoids inflating a single game into several supposedly different titles.
03 · Story
Narrative and player position
The current IDS story label is Kay Vess navigating syndicate politics between Episodes V and VI. The playable role is recorded as Kay Vess.
Rather than reducing the game to plot summary, IDS tracks what position the player occupies in the galaxy. Playing as Kay Vess changes which institutions, conflicts, and social relationships the game can make visible.
04 · Gameplay systems
How Star Wars becomes playable
Action-adventure systems combine traversal, combat, environmental puzzles, character abilities, and exploration so that story spaces become navigable rather than purely cinematic.
IDS classifies the title as Open-world action-adventure. That label is useful because genre changes what parts of Star Wars become legible: a strategy game foregrounds institutions and logistics, an RPG foregrounds identity and relationships, and an action game often foregrounds bodies, movement, combat, and environmental navigation.
05 · Place
Worlds, routes, and environments
Major locations in the current record include Toshara; Kijimi; Tatooine; Akiva; Canto Bight. Those places matter because games convert fictional geography into routes, obstacles, hubs, battlefields, workplaces, ruins, or social spaces the player must navigate.
Interactive scale can reveal details that screen media pass over quickly: how far locations are from one another, which areas are restricted, where people gather, what infrastructure connects spaces, and how movement is shaped by vehicles, architecture, terrain, enemies, or local authority.
06 · Institutions
Power, organizations, and social systems
The story context is Kay Vess navigating syndicate politics between Episodes V and VI. That places the player inside or alongside institutions whose authority is usually encountered through missions, ranks, restricted spaces, enemies, allies, contracts, or rules.
Games are especially useful for IDS because institutions become operational systems. A faction can control checkpoints, issue objectives, distribute equipment, reward loyalty, restrict movement, organize training, or shape reputation. Those mechanics make political power experiential rather than only descriptive.
07 · People
Characters and playable roles
The current playable-role record is Kay Vess. IDS uses this field as a route into the characters, crews, military roles, factions, or created player identities through which the game is experienced.
Games often make character identity interactive. Abilities, dialogue choices, party membership, equipment, reputation, and mission access can determine how a player experiences relationships that screen media presents from the outside.
FIELD ROSTER / 2024 / CANON
Every major player in the heist
Follow Kay's crew, the Zerek Besh leadership and the bounty hunter pursuing them. These are full character dossiers with illustrated story histories, timeline and interactive relationship analysis. Late-game story spoilers appear inside character files.

Kay Vess
Open dossier →
Nix
Open dossier →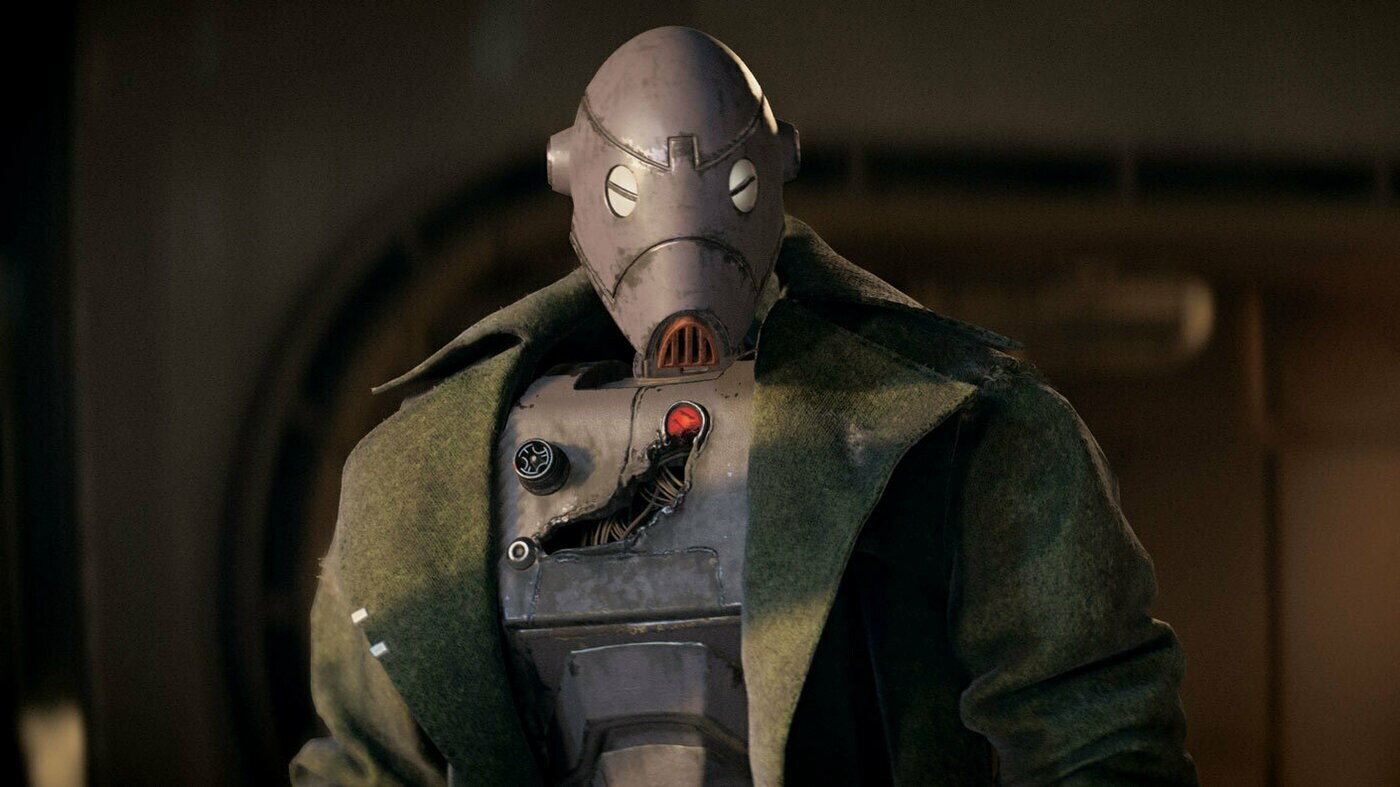
ND-5
Open dossier →
Jaylen Vrax
Open dossier →
Sliro Barsha
Open dossier →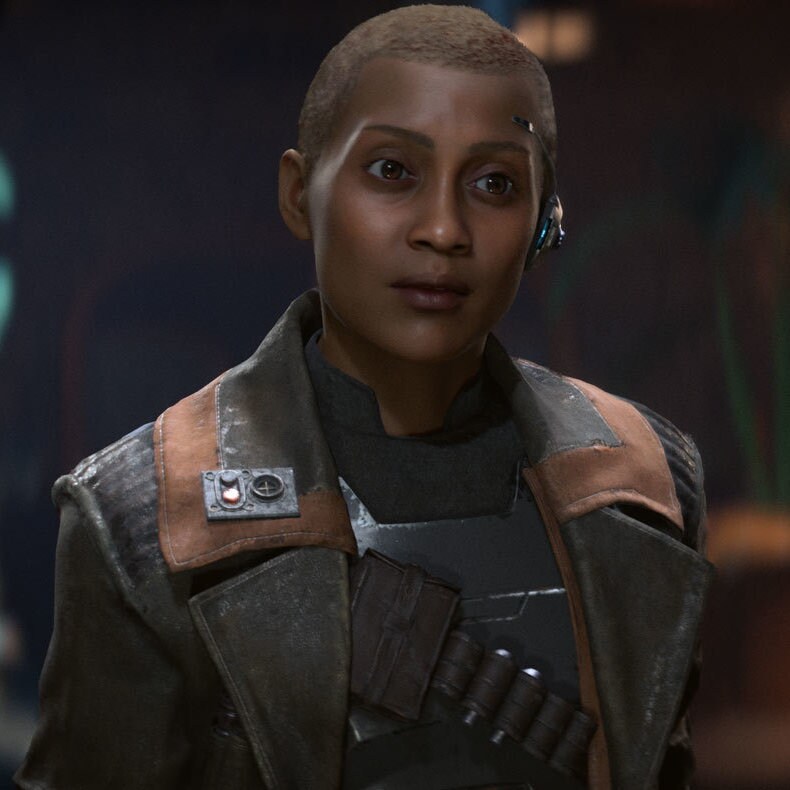
Vail Tormin
Open dossier →
Riko Vess
Open dossier →
Ank Parako
Open dossier →
Gedeek Obaz
Open dossier →
Asara Deyn
Open dossier →
Danka Orsato
Open dossier →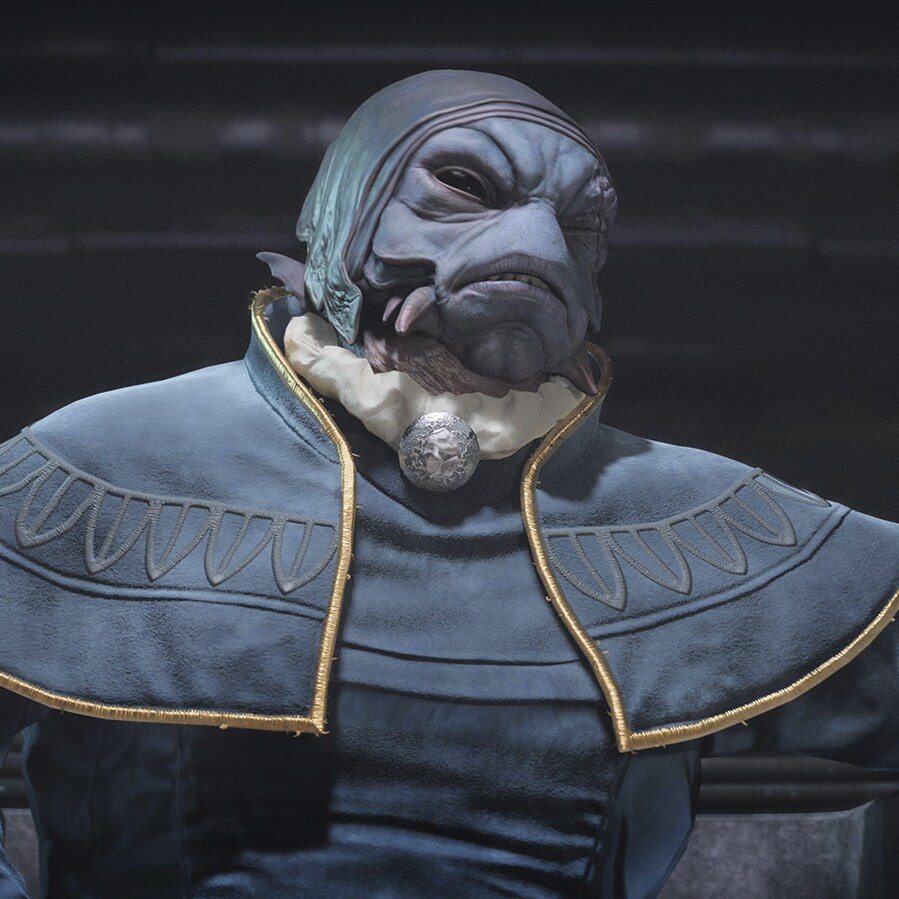
Gorak Palas
Open dossier →
Eleera Soi
Open dossier →
Queen Ashiga
Open dossier →
Krisk Ashiga
Open dossier →Continue with the Star Wars Outlaws game guide or browse People of the Galaxy.
EXPANSION FIELD FILES / 2024–2025
The story packs · Meet the new powers
Wild Card: a corrupt Imperial governor and a droid-operated hyperspace casino. A Pirate’s Fortune: Hondo Ohnaka faces a pirate captain whose crew votes under the Rokana Code. Wild Card also introduces the Starfallers and their leader Aksali Noll. Each opens a full dossier with source notes, history, and interactive analysis.
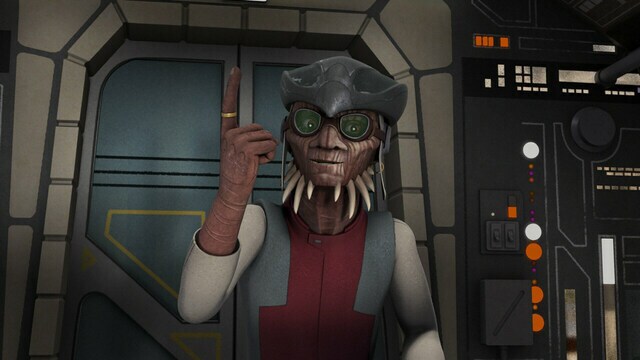
Hondo Ohnaka
Open dossier →
Aksali Noll
Open dossier →
Governor Thorden
Open dossier →
EY-E9
Open dossier →
Stinger Tash
Open dossier →Research the Starfallers as an organization, including how their Morenia contract with the Empire led to betrayal. Hondo and Stinger belong to A Pirate’s Fortune; Aksali and the Starfallers belong to Wild Card.
FACTION DOSSIERS / PIRACY AND TRADE
Meet the syndicates and their rivals
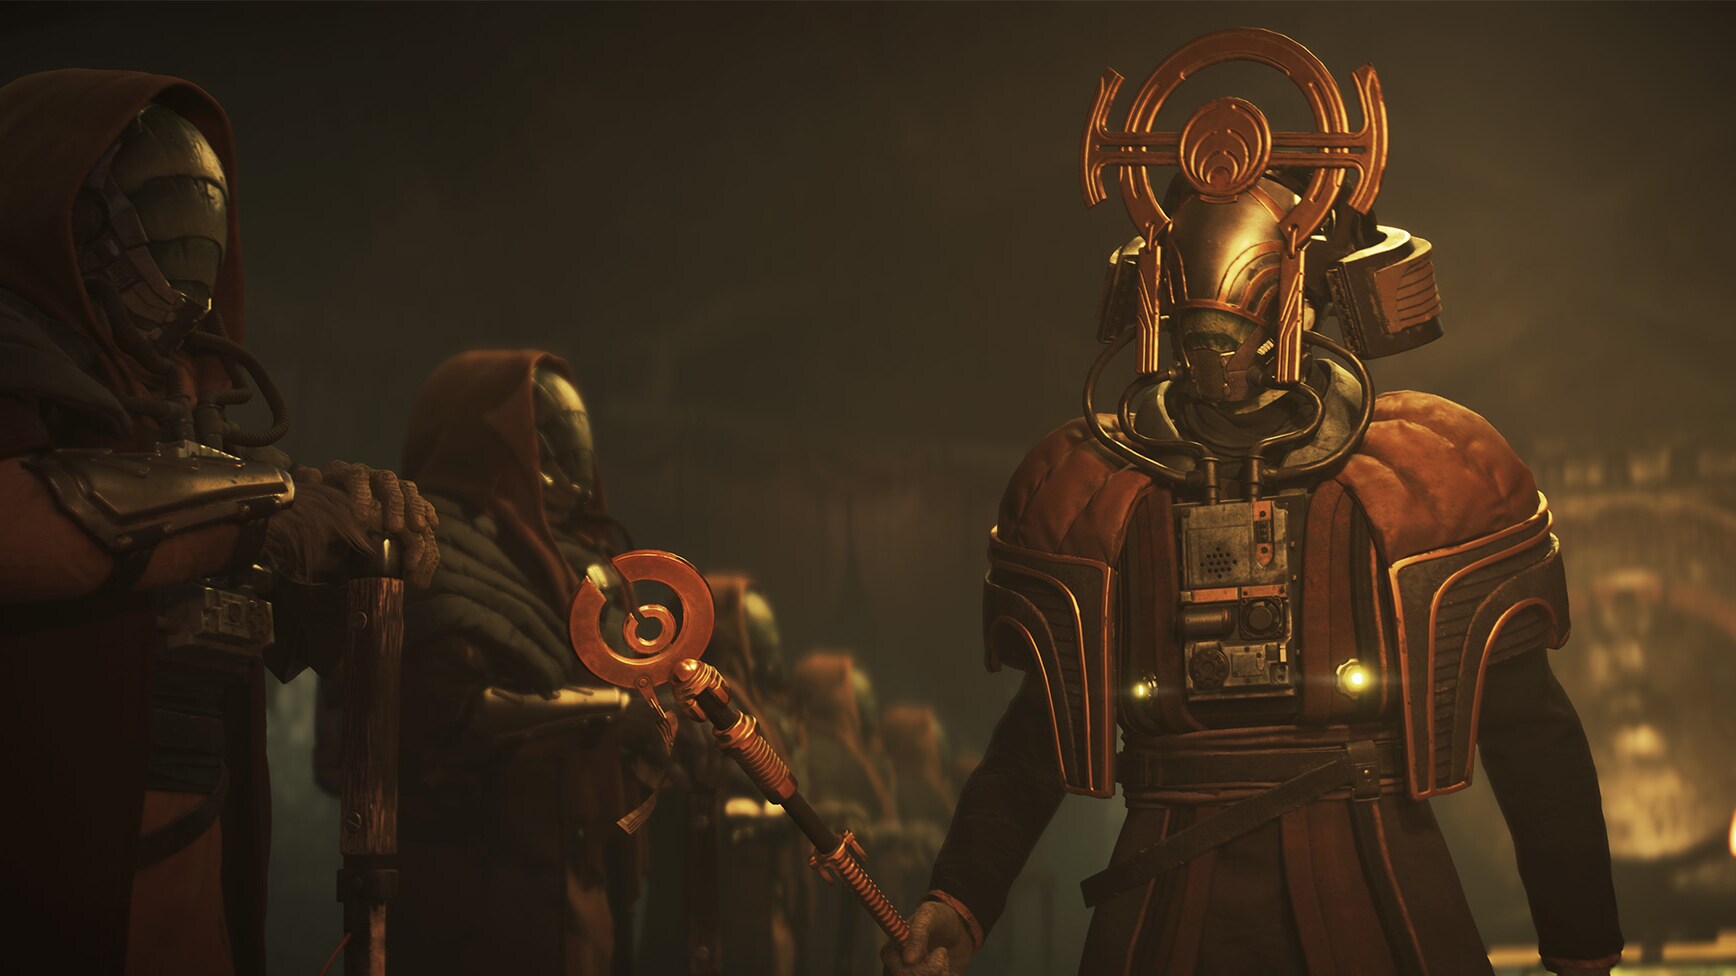
Explore the Ashiga succession crisis on Kijimi, then compare it with the voting pirates and commercial networks operating in Khepi. Read the Kijimi planetary dossier for the larger geography, culture and chronology. Each file contains sourced histories and interactive analysis.


08 · Anthropology
Anthropological analysis
The strongest IDS entry point is the relationship between open-world action-adventure mechanics and the story context described as Kay Vess navigating syndicate politics between Episodes V and VI. The player does not only learn about the setting; the player is required to act through a particular set of rules.
That distinction matters anthropologically. Interactive media can make hierarchy, labor, mobility, violence, ritual, reputation, resource management, or identity into repeatable behaviors. IDS therefore reads games as designed social systems as well as narrative texts.
09 · Source record
Verify the game
IDS separates release facts from independently written summaries and analysis. External links are retained as verification sources, but the substantive game description now lives inside IDS instead of requiring the visitor to leave the archive.
GO DEEPER / CONNECT THE ARCHIVE
Keep exploring Star Wars games
Star Wars Outlaws belongs to a wider catalog of interactive Star Wars stories. Follow a neighboring game or trace characters, places and factions through the IDS archives.

KEEP EXPLORING / MORE STAR WARS GAMES