
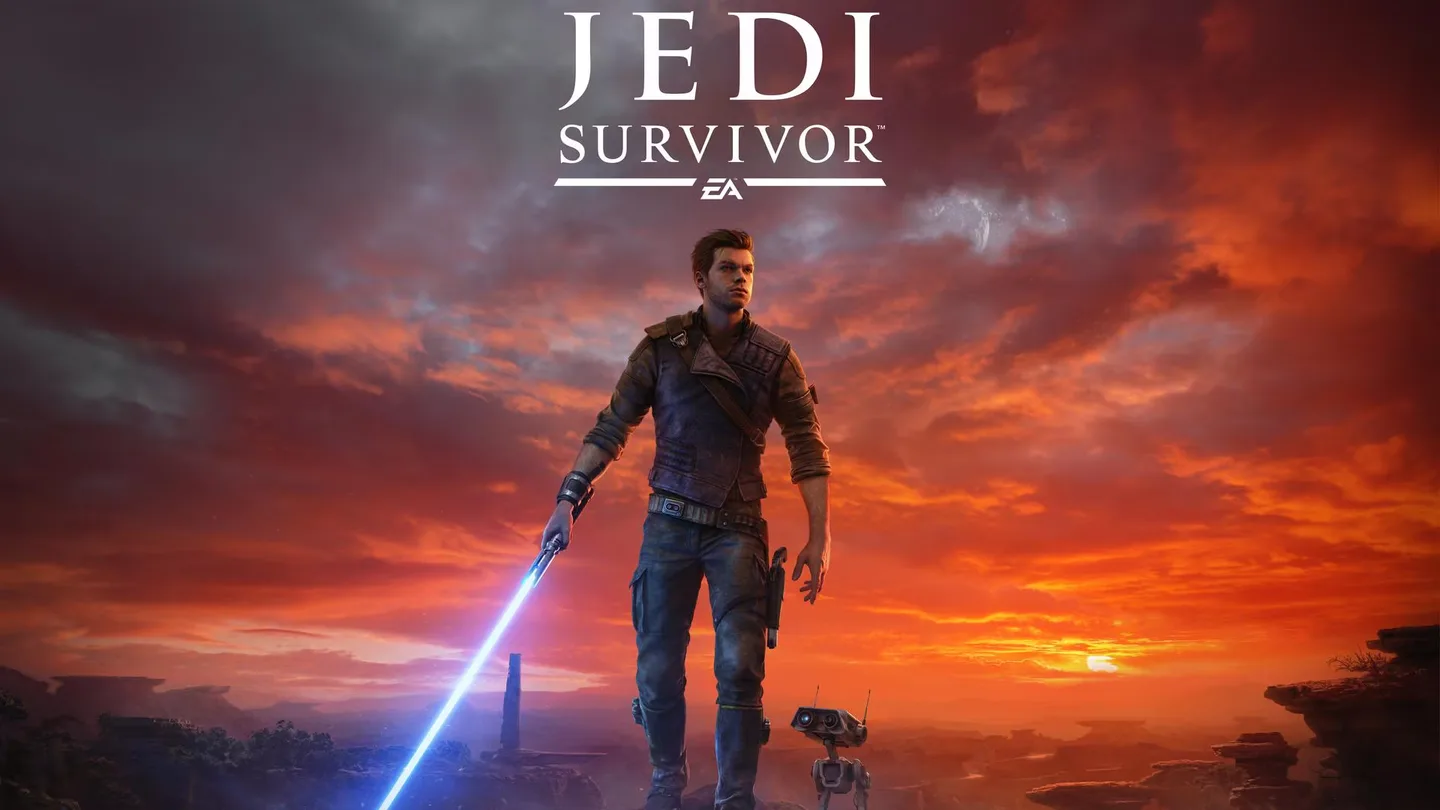
SPONSORED / AMAZON
Shop this game
Related games, collectibles and accessories. Check platform and availability on Amazon.
As an Amazon Associate I earn from qualifying purchases.
60-SECOND GAME BRIEF / START HERE
Know the game in three moves
- 01 / YOUR ROLEWho you play
Cal Kestis
- 02 / INFORMATIONWhat to know next
Learn the movement and combat controls, then search each space for a clear route forward.
- 03 / GAME STYLEWhat to expect
Action-adventure
FIELD MANUAL / START PLAYING
Your first mission briefing
Practical orientation for this particular title. Instructions are not presented as a verified step-by-step walkthrough or as a substitute for edition-specific controls.
On Koboh, use the map, meditation points and visible traversal routes to separate the main objective from optional exploration.
FIELD ROSTER · FULL BIOGRAPHIES
Meet the people behind the missions
Read character-specific histories, canon sources, social analysis and interactive evidence files. Late-game spoilers are labeled in the dossiers.
 High Republic witnessZee (ZN-A4)Explore character dossier →
 Bounty broker and bossCaij VandaExplore character dossier →
 Koboh's unofficial mayorDoma DendraExplore character dossier →
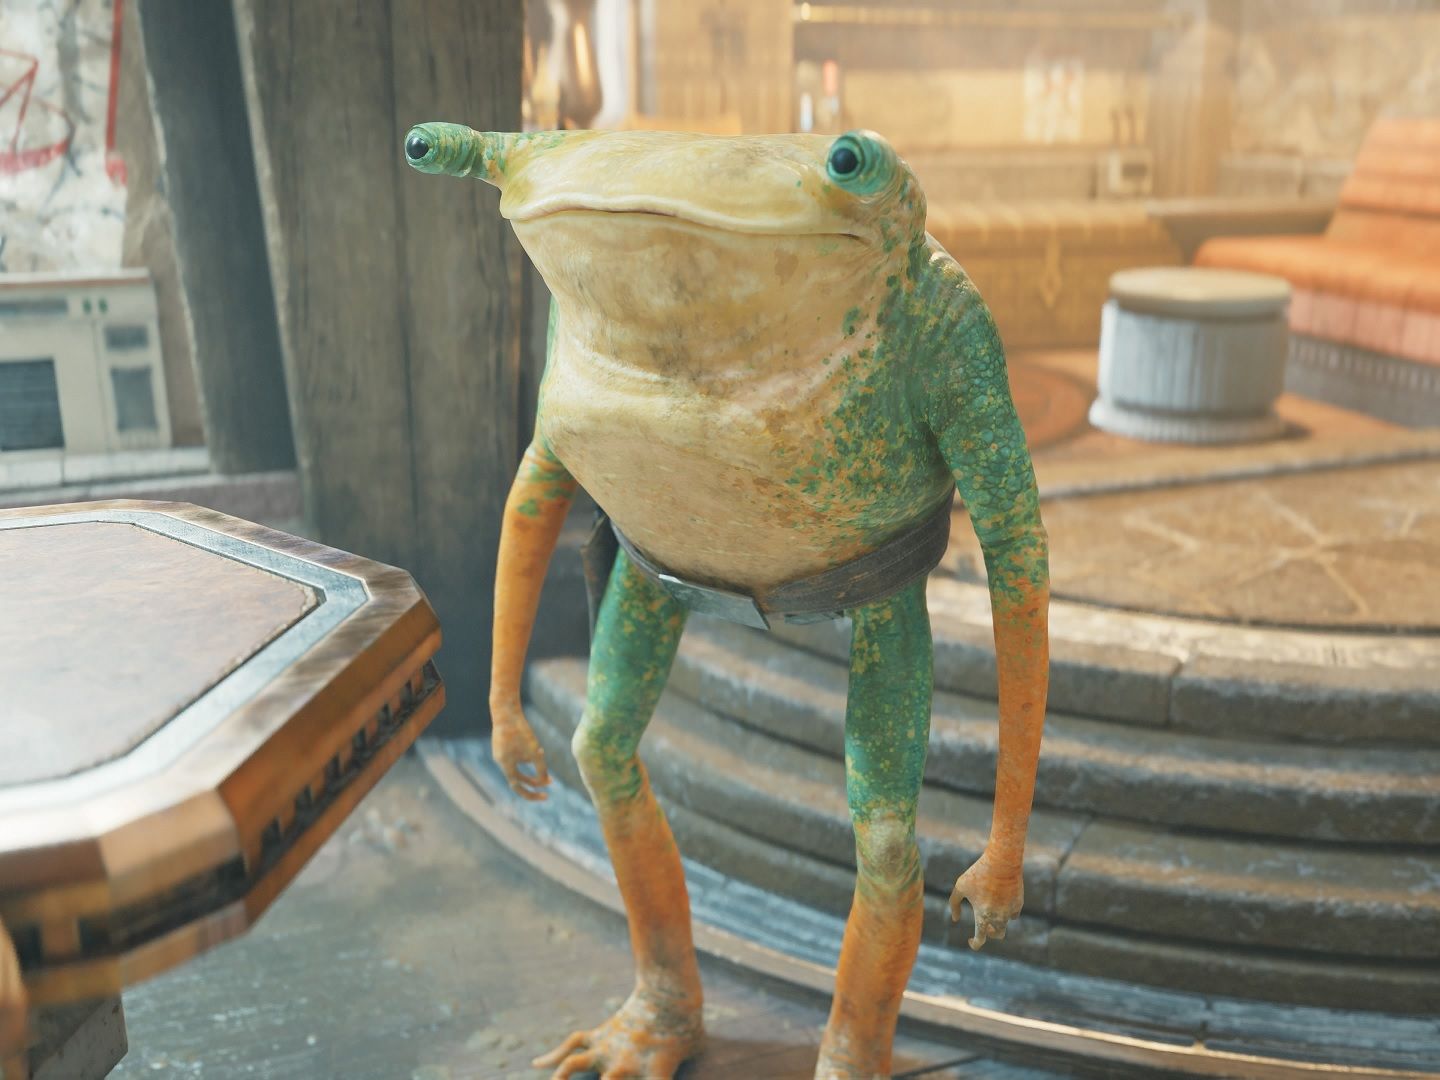 Outpost local and rescued civilianTurgleExplore character dossier →
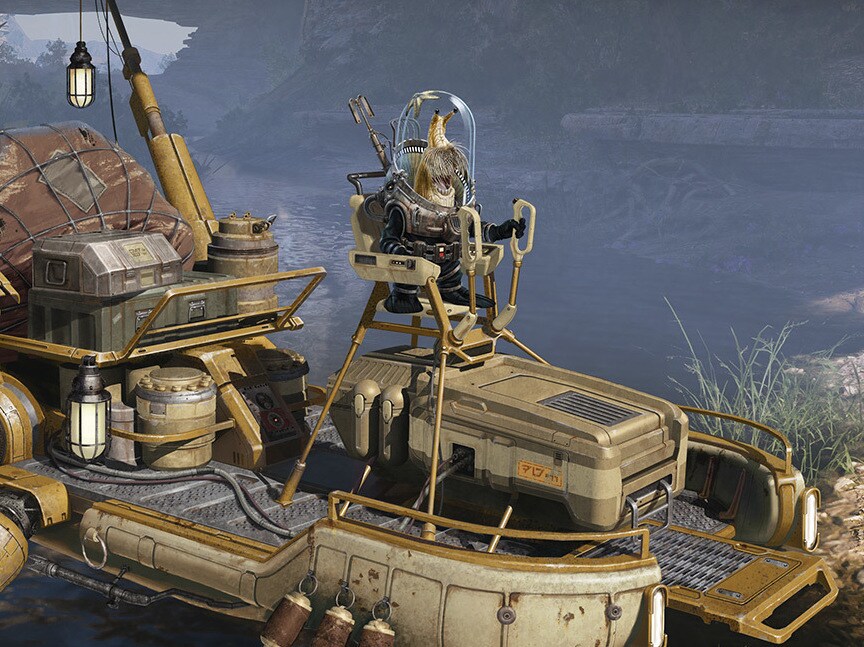 Aquarium recruit and twelve-fish guideSkoova StevExplore character dossier →
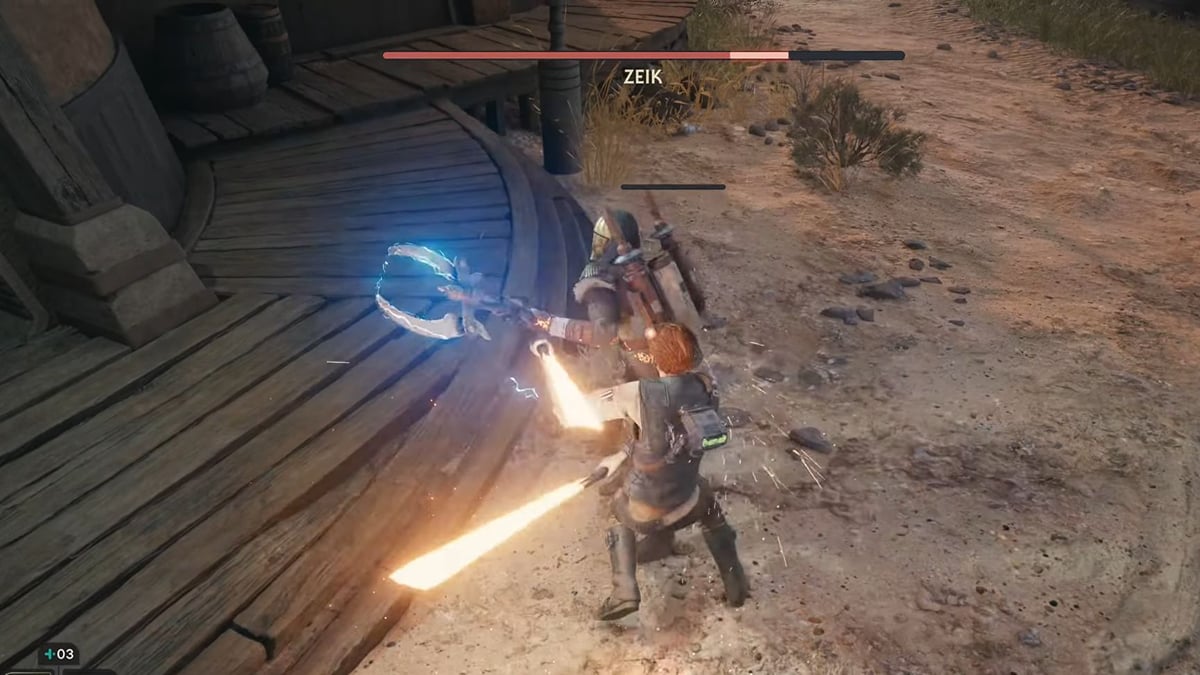 Bedlam Raider early bossZeikExplore character dossier →
 High Republic chamber researcherToaExplore character dossier →
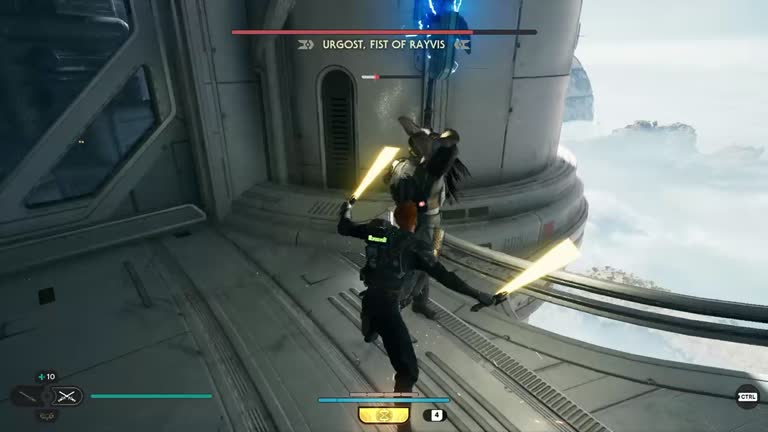 BEDLAM RAIDER - OBSERVATORY BOSSUrgost, Fist of RayvisExplore character dossier →
 HAXION BROOD - FIRST BOUNTYKorej LimExplore character dossier →
Practice parrying and switch lightsaber stances based on the enemy and your preferred pace.
Return to earlier routes after gaining abilities rather than assuming every obstacle can be cleared on first arrival.
PLAYER ORIENTATION / YOUR FIRST SESSION
How to approach the game
Know your next objective
Learn the movement and combat controls, then search each space for a clear route forward. Switch abilities or characters when an obstacle cannot be passed with the current toolset.
What to pay attention to
Distinguish the main story route from optional collection and replay challenges, which may open only after earning new abilities.
Your role
The playable perspective recorded for this title is Cal Kestis. Its story context is Cal Kestis, Tanalorr, and High Republic legacies.
Controls and available objectives can vary by game version.
PLAYER GUIDE / GAME-SPECIFIC DIRECTIONS
Jedi: Survivor: all 23 story chapters and where to go next
Follow Cal Kestis from the Coruscant operation to the final destination. These 23 journal subchapters are separate from Rumors and collectibles. Each entry identifies the relevant world, the main task and what leads toward the next story beat. The order of some Koboh and Shattered Moon research objectives can vary.
- 01 / FIND YOUR DESTINATION
Separate the main route from optional discoveries
Track the current narrative objective, inspect the holomap and identify available routes from the nearest meditation point. Koboh and other worlds include side passages, rumors, collectibles and traversal puzzles. Do not assume every branch is necessary for the active story mission.
- 02 / PRACTICE COMBAT
Match stances and timing to the opponent
Different lightsaber stances provide different tradeoffs in range, speed and defense. Learn the pattern of an unfamiliar enemy before committing a long attack. Practice parrying and evasion, then adjust your equipped stances at meditation points as your abilities and preferences develop.
- 03 / UNLOCK MOVEMENT
Treat some blocked routes as future objectives
Cal's Force and traversal abilities grow during the campaign. If a door, gap or obstacle clearly requires a technique not yet available, mark its location and continue the accessible story route. Return after learning additional movement skills rather than spending time trying to force an early crossing.
- 04 / RETURN TO THE HUB
Use settlements to organize exploration
Koboh's settlement areas and returning characters provide context and opportunities beyond the main objective. Revisit them between major story journeys, check unlocked travel shortcuts, and compare newly accessible paths against places you passed earlier. The game rewards deliberate revisits.
The 23 main-story subchapters, from The Heist to A New Path
Find the chapter title shown in your story progress. Check the active objective on the holomap at every transition. For the paired research trips on Koboh and Shattered Moon, complete whichever destination you selected first and then investigate the other before returning to Jedha. A shortcut that requires a future ability is not a mandatory route now.
Koboh and Shattered Moon research destinations can be completed in either order. This follows the six named story chapters, not every optional Rumor. View official gameplay screenshots ↓ (general game media, not screenshots of specific missions).
Showing 23 of 23 missions
No missions match. Try a shorter title or clear your search.
- MISSION 1 OF 23
1.1 · The Heist — Coruscant
Start with Cal's Imperial operation on Coruscant. Follow the team through the undercity and rooftop routes to the Senator's yacht, use BD-1 and wall-run paths when the direct walkway ends, and complete the operation before taking the escape route.
NEXT MISSION → 1.2 · The Escape — Coruscant↑ BACK TO MISSION INDEXSTORY ROUTE / THREE OBJECTIVES TO FOLLOW NEXT
START / CoruscantStart the Coruscant infiltration in the Undercity. Follow Bode and the team to Senator Sejan's yacht.
FOLLOW THE ROUTEFollow the rooftops and renovation-site yellow climb surfaces, using BD-1 interaction points where the direct path ends.
NEXT / The EscapeAfter the yacht sequence, follow the new escape objective through the industrial route, not toward the earlier capture area.
- MISSION 2 OF 23
1.2 · The Escape — Coruscant
After the operation turns hostile, follow the main rooftop and industrial traversal route toward the Mantis. Use meditation points to reset and consult the holomap when the path changes elevation. The Ninth Sister encounter is part of this opening sequence.
NEXT MISSION → 1.3 · Alone — travel to Koboh← PREVIOUS MISSION↑ BACK TO MISSION INDEXSTORY ROUTE / THREE OBJECTIVES TO FOLLOW NEXT
START / CoruscantLeave the senator's area via the marked roof route and activate nearby meditation points for retries.
FOLLOW THE ROUTEAt Undercity Meats, cross suspended machinery and the area with hostile Imperials; use platform routes instead of pursuing optional enemies.
NEXT / Alone / Koboh travelDefeat the Ninth Sister by watching her unblockable attacks, then follow the hangar objective to the Mantis.
- MISSION 3 OF 23
1.3 · Alone — travel to Koboh
After leaving Coruscant, return to the Mantis and use the holotable to travel to Koboh. Continue past the crash site and Derelict Dam, following the main route through the Southern Reach toward Rambler's Reach.
NEXT MISSION → 2.1 · Pyloon's Saloon — find Greez← PREVIOUS MISSION↑ BACK TO MISSION INDEXSTORY ROUTE / THREE OBJECTIVES TO FOLLOW NEXT
START / KobohUse the Mantis holotable after your Coruscant escape, choose Koboh and prepare to follow the marked crash approach.
FOLLOW THE ROUTEFrom the Gorge Crash Site, travel through Derelict Dam and Southern Reach. If the dam blocks the road, follow the orange/yellow traversable ledges and use roller-mine interactions along the story path.
NEXT / Pyloon's SaloonContinue past Rambler's Reach toward the settlement; do not try to open green barriers or late-game locked chambers now.
- MISSION 4 OF 23
2.1 · Pyloon's Saloon — find Greez
Reach Rambler's Reach Outpost and speak with Greez inside Pyloon's Saloon. Go through the door by the kitchen and downstairs to the basement meditation point, then interact with the bed to advance the story.
NEXT MISSION → 2.2 · The Key to Tanalorr — Koboh tunnels and forest← PREVIOUS MISSION↑ BACK TO MISSION INDEXSTORY ROUTE / THREE OBJECTIVES TO FOLLOW NEXT
START / Koboh / Rambler's ReachFind Pyloon's Saloon beside the town square and speak to Greez before following any optional Rumors.
FOLLOW THE ROUTEUse the door behind the kitchen and descend to the basement meditation point. Rest at the bed to advance the night scene.
NEXT / The Key to TanalorrAfter the story scene, follow the new basement/tunnel objective rather than heading back to the landing pad.
- MISSION 5 OF 23
2.2 · The Key to Tanalorr — Koboh tunnels and forest
Explore the Smuggler's Tunnels beneath the saloon and the Chamber of Duality. Follow the leads out toward the Forest Array and use the available path through the Basalt Rift. Check the map for an uphill or alternate traverse rather than forcing inaccessible doors.
NEXT MISSION → 2.3 · Fallen Jedi — Forest Array← PREVIOUS MISSION↑ BACK TO MISSION INDEXSTORY ROUTE / THREE OBJECTIVES TO FOLLOW NEXT
START / Koboh / Smuggler's TunnelsEnter the Smuggler's Tunnels under Pyloon's Saloon and use the Chamber of Duality orb device to help Zee.
FOLLOW THE ROUTEOn emerging, track the Forest Array objective through Basalt Rift; locate the main slope and climb/vine route if a locked door appears unreachable.
NEXT / Fallen JediUse relter travel and the meditation path to reach the Forest Array complex, keeping optional High Republic chambers for a later return.
- MISSION 6 OF 23
2.3 · Fallen Jedi — Forest Array
Cross the Forest Array machinery and work through its beam and climbing puzzles to reach the chamber associated with Dagan Gera. After the confrontation, travel back toward the Mantis and review the new Tanalorr research objective.
Koboh / Forest ArrayAFTER THIS: A New Home / Jedha
BOSS / PUZZLE: Dagan Gera I: prioritize reading regular swing timings, keep stamina for a parry and avoid chasing him through cinematic breaks.
Verified walkthrough source ↗NEXT MISSION → 3.1 · A New Home — Jedha← PREVIOUS MISSION↑ BACK TO MISSION INDEXSTORY ROUTE / THREE OBJECTIVES TO FOLLOW NEXT
START / Koboh / Forest ArrayCross the Forest Array bridges and follow its beam machinery to the rehabilitation wing. Direct contact with Koboh matter will block progress.
FOLLOW THE ROUTEUse BD-1's Koboh grinder where introduced to lay flammable trails from a working beam to the obstructing matter, then enter the chamber.
NEXT / A New Home / JedhaFace Dagan Gera's first encounter; maintain stamina for parries and evade obvious unblockables. Once it ends, return toward the Mantis and take the Jedha lead.
- MISSION 7 OF 23
3.1 · A New Home — Jedha
Use the Mantis galaxy map to fly to Jedha. Follow Merrin's assistance through the desert route toward Cere Junda's Hidden Path base, then speak with Cere and Cordova in the Archive to receive the next leads.
NEXT MISSION → 3.2 · The Nightsister — Jedha aftermath← PREVIOUS MISSION↑ BACK TO MISSION INDEXSTORY ROUTE / THREE OBJECTIVES TO FOLLOW NEXT
START / JedhaFly to Jedha on the Mantis, then follow the desert approach from the landing position to the rendezvous.
FOLLOW THE ROUTELet Merrin's escort and the current objective define the accessible route across the sand and ruins; skip optional crypts in the detours.
NEXT / The Nightsister / JedhaEnter Cere's Hidden Path Archive and speak with Cere and Eno Cordova before leaving for Tanalorr research.
- MISSION 8 OF 23
3.2 · The Nightsister — Jedha aftermath
After meeting Merrin, use her help with the desert traversal sections and follow the main story marker to the next objective. The Jedha hub and its optional puzzles are separate from the required route.
NEXT MISSION → 3.3 · Reunion — choose the next investigation← PREVIOUS MISSION↑ BACK TO MISSION INDEXSTORY ROUTE / THREE OBJECTIVES TO FOLLOW NEXT
START / Jedha / ArchiveMeet Merrin and Cere in the Archive and read the newly assigned main investigation in the journal.
FOLLOW THE ROUTEUse the Jedha meditation network to return to the Mantis after the required conversations; do not confuse the desert Rumors with Cordova's research leads.
NEXT / Reunion / two research worldsCheck the holotable for paired Koboh and Shattered Moon research locations; either can be visited first.
- MISSION 9 OF 23
3.3 · Reunion — choose the next investigation
Return to the Mantis and review the leads to Dagan's past. Investigate the required Koboh and Shattered Moon locations; if the galaxy map offers both, either can be visited first. Keep the active research objective selected.
Shattered Moon or KobohAFTER THIS: On the Trail / finish paired research
Verified walkthrough source ↗NEXT MISSION → 3.4 · On the Trail — finish both research routes← PREVIOUS MISSION↑ BACK TO MISSION INDEXSTORY ROUTE / THREE OBJECTIVES TO FOLLOW NEXT
START / Shattered Moon or KobohUse the Mantis holotable to choose the first of two research sites; their mission order is flexible.
FOLLOW THE ROUTEFor the moon, descend from the landing pad elevator and follow pipes and grapples into the Automated Forge. On Koboh, approach the Stone Spires by Riverbed Watch and a relter glide.
NEXT / On the Trail / finish paired researchAfter collecting the first High Republic device, check the journal and travel to the other unfinished research world before reporting to Cordova.
- MISSION 10 OF 23
3.4 · On the Trail — finish both research routes
On Koboh, follow the Stone Spires and research-site objective; on Shattered Moon, use the automated forge and research-laboratory path. Finish the outstanding destination, then fly to Jedha and present the research to Cordova in the Archive.
Koboh / Stone Spires or Shattered MoonAFTER THIS: The Hidden Path / Pilgrim's Sanctuary
BOSS / PUZZLE: The Stone Spires puzzle requires rotating the beam, moving its orb between sockets, and opening an updraft; don't jump into a blocked fumarole.
Verified walkthrough source ↗NEXT MISSION → 4.1 · The Hidden Path — Jedha← PREVIOUS MISSION↑ BACK TO MISSION INDEXSTORY ROUTE / THREE OBJECTIVES TO FOLLOW NEXT
START / Koboh / Stone Spires or Shattered MoonIf you went to the Shattered Moon first, finish the Koboh Stone Spires objective now; otherwise finish the moon forge.
FOLLOW THE ROUTEAt Devastated Settlement, move an orb into its amplifier, aim the beam at Koboh matter covering an updraft, and ride the relter from fumarole to fumarole. At the Shattered Moon, follow the active automated-forge lab objective.
NEXT / The Hidden Path / Pilgrim's SanctuaryCollect the device from the final research room, then travel back to Cordova at Jedha's Archive to report both discoveries.
- MISSION 11 OF 23
4.1 · The Hidden Path — Jedha
Return to Jedha and begin the journey toward the Pilgrim's Sanctuary. Follow Merrin through the desert and ruins, using the map to distinguish the main route from nearby optional tomb puzzles.
Jedha / Pilgrim's SanctuaryAFTER THIS: Abyss Compass / Brother Armias
BOSS / PUZZLE: The Air Dash learned during this journey is required for wind-gapped platforms; ordinary double jumps will not bridge them.
Verified walkthrough source ↗NEXT MISSION → 4.2 · Abyss Compass — Sanctuary and contact codes← PREVIOUS MISSION↑ BACK TO MISSION INDEXSTORY ROUTE / THREE OBJECTIVES TO FOLLOW NEXT
START / Jedha / Pilgrim's SanctuaryBring the research to Cordova on Jedha and accept the next Hidden Path contact mission.
FOLLOW THE ROUTEFollow Merrin from the Archive through desert ruins toward the Trailhead Pantheon and Pilgrim's Sanctuary. Use newly acquired Air Dash to cross windy gaps and timed wall runs.
NEXT / Abyss Compass / Brother ArmiasReach the Sanctuary Temple meditation point and continue inside to locate Brother Armias; return routes will use new charm abilities later.
- MISSION 12 OF 23
4.2 · Abyss Compass — Sanctuary and contact codes
Enter the Pilgrim's Sanctuary and find Brother Armias. After obtaining the contact codes, use the newly learned air dash and Merrin-assisted routes to escape; carry the codes back to Cere's Archive.
Jedha / Pilgrim's SanctuaryAFTER THIS: The Lucrehulk / rescue Zee
BOSS / PUZZLE: Passing through a green barrier refreshes jump and dash; do not try this before the Magicked Charm story unlock.
Verified walkthrough source ↗NEXT MISSION → 4.3 · The Lucrehulk — Koboh← PREVIOUS MISSION↑ BACK TO MISSION INDEXSTORY ROUTE / THREE OBJECTIVES TO FOLLOW NEXT
START / Jedha / Pilgrim's SanctuaryEnter the temple and defeat the Imperials in the large interior room; note the green barrier for your return.
FOLLOW THE ROUTEDive through the underwater corridor and solve the sanctuary door by positioning the moving panels, then Force Push the completed passage to meet Brother Armias.
NEXT / The Lucrehulk / rescue ZeeAfter receiving the contact codes, follow Merrin's escape. Use her Magicked Charm to Dash through green gates, chain refreshed jumps, and cross the drill-droid gauntlet back to Cere.
- MISSION 13 OF 23
4.3 · The Lucrehulk — Koboh
Fly to Koboh to investigate the Bedlam Raiders' Lucrehulk. Enter the wreck through the accessible approach, move through its cargo and industrial decks, and follow the objective to the held captive rather than exploring every side platform.
NEXT MISSION → 4.4 · Freeing Zee — Lucrehulk core← PREVIOUS MISSION↑ BACK TO MISSION INDEXSTORY ROUTE / THREE OBJECTIVES TO FOLLOW NEXT
START / Koboh / LucrehulkReturn to Koboh after the Jedha contact-code mission and follow the objective to the crashed Separatist Lucrehulk.
FOLLOW THE ROUTEApproach through the Bedlam Raider-controlled swamps and enter the ship's open hull via the indicated grapple and climbing areas.
NEXT / Freeing ZeeInside, use available BD-1 interactions and hangar lifts to progress through cargo sections toward the captured Zee rather than clearing every side passage.
- MISSION 14 OF 23
4.4 · Freeing Zee — Lucrehulk core
Push deeper into the Lucrehulk to rescue Zee. Use BD-1's available tools and the lift, grapple and traversal systems to reach the command areas. Complete the major Dagan encounter and exit toward the Mantis.
Koboh / Lucrehulk coreAFTER THIS: Rayvis Defeated / moon pursuit
BOSS / PUZZLE: Dagan Gera II: his double-bladed saber can punish long commitments; parry short strings, retaliate briefly, and evade unblockables.
Verified walkthrough source ↗NEXT MISSION → 5.1 · Rayvis Defeated — Shattered Moon← PREVIOUS MISSION↑ BACK TO MISSION INDEXSTORY ROUTE / THREE OBJECTIVES TO FOLLOW NEXT
START / Koboh / Lucrehulk coreUse the lower industrial passages, lift systems and traversal grates to reach Zee's confinement area.
FOLLOW THE ROUTEFree Zee, then follow the upper command-deck escape route as enemies and new barriers appear. The main-story Dagan encounter follows deeper inside.
NEXT / Rayvis Defeated / moon pursuitFor Dagan Gera's second duel, preserve stamina to parry saber strings and avoid the double-blade special; after victory, return to the Mantis for the Shattered Moon lead.
- MISSION 15 OF 23
5.1 · Rayvis Defeated — Shattered Moon
Travel to the Shattered Moon and enter the facility's upper industrial route to find Rayvis. Use the upgraded Ascension Cable movement where required and prepare for the two-phase boss fight before advancing.
Shattered Moon / array facilityAFTER THIS: Compass Acquired / Observatory
BOSS / PUZZLE: Rayvis: expect two health phases; the second is faster. Don't spend all stamina attacking during his uninterrupted combos.
Verified walkthrough source ↗NEXT MISSION → 5.2 · Compass Acquired — Koboh Observatory← PREVIOUS MISSION↑ BACK TO MISSION INDEXSTORY ROUTE / THREE OBJECTIVES TO FOLLOW NEXT
START / Shattered Moon / array facilityReturn to the moon facility; this visit follows the earlier research trip and opens a new route toward Rayvis.
FOLLOW THE ROUTETravel through its huge active beam apparatus, watching for moving cover. Use the upgraded Ascension Cable when the wider grapple points are introduced.
NEXT / Compass Acquired / ObservatoryDefeat Rayvis in two phases: his second phase accelerates the combos. Heal between attack sequences, avoid unblockables and strike after a complete string.
- MISSION 16 OF 23
5.2 · Compass Acquired — Koboh Observatory
Return to Koboh, cross the Fogged Expanse and climb toward the Observatory. Use BD-1's Electro Dart to power compatible devices and continue upward. Finish the Dagan Gera confrontation and retrieve the compass.
Koboh / Fogged Expanse / ObservatoryAFTER THIS: Betrayal / Cordova
BOSS / PUZZLE: Dagan Gera III: follow his weapon changes and Force illusions. Parry stable strings, avoid red lunges, and use Bode's assistance when available.
Verified walkthrough source ↗NEXT MISSION → 5.3 · Betrayal — return to Jedha← PREVIOUS MISSION↑ BACK TO MISSION INDEXSTORY ROUTE / THREE OBJECTIVES TO FOLLOW NEXT
START / Koboh / Fogged Expanse / ObservatoryTravel from Pyloon's Saloon through Mountain Ascent; Dash through green gates using Merrin's Charm, then follow Fogged Expanse and Imperial Post 8L-055.
FOLLOW THE ROUTEAfter the Post, ascend via Summit Ridge balloons. Power the Observatory Platform device with BD-1's Electro Dart, pass rotating structures and beat Urgost before entering the Diagnostics Corridor.
NEXT / Betrayal / CordovaComplete the rotating-room platform puzzles and fight Dagan Gera at the top. Retrieve the compass, then fly to Jedha to see Cordova.
- MISSION 17 OF 23
5.3 · Betrayal — return to Jedha
Bring the repaired compass to Cordova at Cere's Archive on Jedha. Advance the story conversation, then follow the new emergency objective instead of returning to optional exploration.
Jedha / Hidden Path ArchiveAFTER THIS: Siege / Imperial assault
BOSS / PUZZLE: The Bode chase is scripted into the story; a loss of health here is not solved by diverting into open-world exploration.
Verified walkthrough source ↗NEXT MISSION → 5.4 · Siege — Jedha and the Archive← PREVIOUS MISSION↑ BACK TO MISSION INDEXSTORY ROUTE / THREE OBJECTIVES TO FOLLOW NEXT
START / Jedha / Hidden Path ArchiveDeliver the recovered compass to Cordova and speak with the group in the Archive.
FOLLOW THE ROUTEWhen the betrayal occurs, follow the newly highlighted pursuit objective. The story temporarily changes from exploration to an urgent chase.
NEXT / Siege / Imperial assaultDo not travel to side collectibles; progress toward the emergency encounter, then continue the Archive defense sequence.
- MISSION 18 OF 23
5.4 · Siege — Jedha and the Archive
Follow the defense of Cere's base during the Imperial assault. The sequence changes playable perspective; use the encounter's provided combat abilities and press forward through the Archive battle until the chapter ends.
Jedha / ArchiveAFTER THIS: Kata Akuna / Nova Garon
BOSS / PUZZLE: Darth Vader: manage Cere's defensive timing, watch for distinct grab/unblockable cues and use short, safe attacks.
Verified walkthrough source ↗NEXT MISSION → 6.1 · Kata Akuna — Nova Garon lead← PREVIOUS MISSION↑ BACK TO MISSION INDEXSTORY ROUTE / THREE OBJECTIVES TO FOLLOW NEXT
START / Jedha / ArchiveFollow the assault objective and the playable-perspective change to Cere's defense of the Archive.
FOLLOW THE ROUTEWork through attacking Imperial forces toward the central Archive. Keep a defensive pace and heal when the scripted waves permit.
NEXT / Kata Akuna / Nova GaronThe Darth Vader fight is the major encounter. Read the red unblockables, control distance during throws and avoid rushing his final-phase counters.
- MISSION 19 OF 23
6.1 · Kata Akuna — Nova Garon lead
After the Jedha events, track the missing character to the Imperial installation on Nova Garon. Use the hangar and base corridors to reach the officers' area; follow the trail and interact with the required terminals.
NEXT MISSION → 6.2 · Wrath — escape Nova Garon← PREVIOUS MISSION↑ BACK TO MISSION INDEXSTORY ROUTE / THREE OBJECTIVES TO FOLLOW NEXT
START / Nova GaronReturn to the Mantis after Jedha and travel to Nova Garon to pursue Bode.
FOLLOW THE ROUTEEnter the Imperial installation through the hangar approach, use its stealth/control corridors and find the officers' quarters to uncover Kata's whereabouts.
NEXT / Wrath / Nova Garon escapeWatch objective changes inside the officers' area, including terminals and clues; the pursuit leads into an escape sequence, not an optional bounty.
- MISSION 20 OF 23
6.2 · Wrath — escape Nova Garon
Complete the confrontation and escape the Imperial base. Follow the active departure objective back to the Mantis and return to Koboh for the last route to Tanalorr.
NEXT MISSION → 6.3 · The Arrays — Koboh Control Center← PREVIOUS MISSION↑ BACK TO MISSION INDEXSTORY ROUTE / THREE OBJECTIVES TO FOLLOW NEXT
START / Nova Garon / escapeFinish the officers' quarters objective and follow the emergency escape marker through Imperial security.
FOLLOW THE ROUTEThe combat and escape can be intensive: use the available Force and dark-side story abilities during the locked encounters.
NEXT / The Arrays / Koboh Control CenterReach the Mantis departure objective and return to Koboh. The next required step is the Alignment Control Center, not Tanalorr directly.
- MISSION 21 OF 23
6.3 · The Arrays — Koboh Control Center
Travel to the Alignment Control Center on Koboh and complete the array-alignment objective. If the entry is blocked, inspect the holomap for the unlocked route and use the movement upgrades gained during earlier chapters.
Koboh / Alignment Control CenterAFTER THIS: The Abyss / Tanalorr jump
BOSS / PUZZLE: At the array rings, activating the terminal reveals three locking devices; manually pull each apart to open the bridge.
Verified walkthrough source ↗NEXT MISSION → 6.4 · The Abyss — travel to Tanalorr← PREVIOUS MISSION↑ BACK TO MISSION INDEXSTORY ROUTE / THREE OBJECTIVES TO FOLLOW NEXT
START / Koboh / Alignment Control CenterFrom the Rambler's Reach Landing Pad, pass the Nekko stables and find the large white door set into the nearby rock.
FOLLOW THE ROUTERide its lift to the Alignment Control Center meditation point. Clear Imperial combat waves, activate the large spinning-ring terminal, then pull the three exposed locking devices apart with the Force.
NEXT / The Abyss / Tanalorr jumpCross the new bridge, use the terminal beside the white room and let Zee help align the arrays. Return to the Mantis for the last journey.
- MISSION 22 OF 23
6.4 · The Abyss — travel to Tanalorr
Return to the Mantis after the arrays are aligned and plot the Abyss crossing. Follow the available final travel sequence rather than searching the Koboh field areas for another Star Map or collectible.
NEXT MISSION → 6.5 · A New Path — final confrontation← PREVIOUS MISSION↑ BACK TO MISSION INDEXSTORY ROUTE / THREE OBJECTIVES TO FOLLOW NEXT
START / Koboh orbit / AbyssConfirm every array-alignment device has activated in Koboh's control room before you return to the Mantis and leave.
FOLLOW THE ROUTEReturn to the Mantis and set the final path to Tanalorr. Continue through the scripted Abyss navigation rather than looking for a new open-world temple.
NEXT / A New Path / final bossAfter landing, follow the Tanalorr path to the final confrontation; this checkpoint is a voyage, not a new room puzzle on Koboh.
- MISSION 23 OF 23
6.5 · A New Path — final confrontation
Land on Tanalorr, follow the accessible path to the final encounter with Bode and resolve the fight. After the ending, optional world exploration remains available; the main story route is complete.
TanalorrAFTER THIS: MAIN STORY COMPLETE / continue optional exploration
BOSS / PUZZLE: Bode: expect a multi-part encounter; Force-assisted stagger opportunities let Cal resume offense, but save stamina for dodges and deflections.
Verified walkthrough source ↗END OF ROUTE← PREVIOUS MISSION↑ BACK TO MISSION INDEXSTORY ROUTE / THREE OBJECTIVES TO FOLLOW NEXT
START / TanalorrFollow the available route from the landing zone, pausing at meditation points before the final arena.
FOLLOW THE ROUTEFind Bode and Kata. In the boss encounter, stay away from unblockable grapples, use Force opportunities to stagger Bode, and avoid spending all stamina on uninterrupted swings.
NEXT / MAIN STORY COMPLETE / continue optional explorationComplete the conclusion, then use unlocked travel and the holomap for optional rumors and collectibles; those are not required main-story steps.
If you get stuck
- A route on the map does not seem reachable
- Look for a nearby alternate level, climbing surface or existing shortcut. The path may instead require a traversal ability unlocked later.
- A boss defeats Cal repeatedly
- Change stances at a meditation point and focus on reading attack timing before adding damage. Repeated dodging without observing the pattern rarely solves the encounter.
- Too many map markers
- Prioritize the currently tracked story goal; treat collectibles, rumors and optional routes as separate tasks.
EXPLORATION / COMPLETION ROUTES / RETURN VISITS
Finish the galaxy. Know what you still need.
This is a searchable 69-milestone exploration planner spanning five map upgrades, seven Jedi Chamber objectives, 13 legendary foes, 15 Force Tears, 12 fish, ten garden plant varieties and seven helpful optional activities. It is not an item-by-item inventory of the game's hundreds of chests, data scans and seed pods. Use the unlocked map terminals and in-game regional counters for a literal 100% area sweep.
Showing 69 of 69 milestones
Your checkmarks are saved only in this browser on this device. They are planning notes, not a connection to your game save.
No milestones match. Clear filters or try a different area.
- Map upgrade
Map Upgrade — Chests
Koboh / Phon'Qi Caverns
ABILITY / UNLOCK: Force Lift; green barrier dash recommended
WHERE TO GO: From Foothill Falls glide to the abandoned shack, open the basement hatch and clear Phon'Qi Caverns. Slice the terminal after the Raider encounters; it reveals chests, stim canisters and BD-1 slice upgrades.
ILLUSTRATED WALKTHROUGH ↗ - Map upgrade
Map Upgrade — Essences
Koboh / Alignment Control Center
ABILITY / UNLOCK: Complete all seven High Republic chamber objectives
WHERE TO GO: Use BD-1 at the terminal beside the seven chamber status monitors; all seven lights must be activated before it reveals essences, perks, perk slots and skill points.
ILLUSTRATED WALKTHROUGH ↗ - Map upgrade
Map Upgrade — Seed Pods
Koboh / Pyloon's Saloon Rooftop Garden
ABILITY / UNLOCK: Recruit Pili Walde and grow one of each 10 unique species
WHERE TO GO: Find Pili on Jedha's Blustery Mesa; plant all ten seed species on the cantina rooftop and let them grow to unlock the BD-1 garden terminal.
ILLUSTRATED WALKTHROUGH ↗ - Map upgrade
Map Upgrade — Treasures
Jedha / Wayfinder's Tomb / Arid Flats
ABILITY / UNLOCK: Air Dash and upgraded Ascension Cable helpful; three ruins puzzles
WHERE TO GO: Solve Path of Restoration, Path of Persistence and Path of Conviction to open Wayfinder's Tomb. Slice the tomb terminal to reveal Priorite Shards, Jedha Scrolls and Data Discs.
ILLUSTRATED WALKTHROUGH ↗ - Map upgrade
Map Upgrade — Databanks
Nova Garon / Central Command / Denvik's Office
ABILITY / UNLOCK: Progress the main story to Nova Garon
WHERE TO GO: During the late-story Denvik scene, inspect the terminal near the office window to reveal Force echoes and scannable databank entries.
ILLUSTRATED WALKTHROUGH ↗ - Jedi chamber
Chamber of Duality
Koboh / Smuggler's Tunnels / Pyloon's Saloon
ABILITY / UNLOCK: Main story Chapter 2; first chamber
WHERE TO GO: Descend below the cantina in the Smuggler's Tunnels, meet Zee and use Force Pull to move the bridge orb and align the crossing to collect the reward.
ILLUSTRATED WALKTHROUGH ↗ - Jedi chamber
Chamber of Reason
Koboh / Basalt Rift
ABILITY / UNLOCK: Chamber of Duality key; Toa's optional Rumor
WHERE TO GO: From the Rift Passage side path, swing over the broken bridge to the chamber. Shift orbs between sockets to construct temporary bridges and ascend to the perk.
ILLUSTRATED WALKTHROUGH ↗ - Jedi chamber
Chamber of Clarity
Koboh / Untamed Downs
ABILITY / UNLOCK: Nekko mount and Chamber of Duality key
WHERE TO GO: Ride a Nekko to the upper downs entrance. Force Pull and Push movable stone blocks, then combine them with climbing walls to reach the final meditation reward.
ILLUSTRATED WALKTHROUGH ↗ - Jedi chamber
Chamber of Fortitude
Koboh / Corroded Silo / Southern Reach
ABILITY / UNLOCK: Force Lift and green barrier dash; Nekko access
WHERE TO GO: Raise the silo rooftop hatch, descend through the silo and use combat and lift interactions to reach the lower chamber and its challenge.
ILLUSTRATED WALKTHROUGH ↗ - Jedi chamber
Chamber of Connection
Koboh / Viscid Bog
ABILITY / UNLOCK: Force Lift to reach swamp passages
WHERE TO GO: Use crossing ziplines above the Bog, descend to the hidden entrance, then connect BD-1's Koboh matter trail to beam fire and open the internal barriers.
ILLUSTRATED WALKTHROUGH ↗ - Jedi chamber
Chamber of Detachment
Koboh / Mountain Ascent / waterfall
ABILITY / UNLOCK: Green barrier dash and Koboh Grinder
WHERE TO GO: Near the Mee Fish pool, go behind the waterfall and pass the barrier; arrange the moving block and energy orb to solve the lift puzzle and reach the chamber perk.
ILLUSTRATED WALKTHROUGH ↗ - Jedi chamber
Ambidexterity Perk objective
Koboh / Devastated Settlement / Stone Spires
ABILITY / UNLOCK: Relter gliding and BD-1 Koboh Grinder
WHERE TO GO: Aim a Stone Spires beam at the vines on the lower hidden ledge. Glide there, carry its fire with BD-1's Koboh Grinder and burn through the matter to claim the perk.
ILLUSTRATED WALKTHROUGH ↗ - Legendary enemy
D-L1T
Coruscant / Hangar 2046-C
ABILITY / UNLOCK: BD-1 Electro Dart
WHERE TO GO: Open the dart-controlled door near the hangar lift to enter the Security Droid's corridor.
LOCATION GUIDE & SOURCES ↗ - Legendary enemy
Frenzied Jotaz
Coruscant / Undercity Meats
ABILITY / UNLOCK: BD-1 Electro Dart
WHERE TO GO: Use Electro Dart on the powered mechanism securing the heavy doors near the meditation route.
LOCATION GUIDE & SOURCES ↗ - Legendary enemy
Urgost, Fist of Rayvis
Koboh / Observatory Understructure
ABILITY / UNLOCK: Chapter 5 story progression
WHERE TO GO: Fight this enemy on the story path ascending toward the Observatory; revisit your Tactical Guide afterward.
LOCATION GUIDE & SOURCES ↗ - Legendary enemy
Gorocco Matriarch
Koboh / Derelict Dam
ABILITY / UNLOCK: Force Lift; Roller Mine door route
WHERE TO GO: Use a Roller Mine to break the dam's destructible wall, climb to the heavy door, then Force Lift into the arena.
LOCATION GUIDE & SOURCES ↗ - Legendary enemy
Vile Bilemaw
Koboh / Fogged Expanse
ABILITY / UNLOCK: Return after Observatory approach unlocks
WHERE TO GO: Follow the far curved section and mudslide into its secluded battle arena.
LOCATION GUIDE & SOURCES ↗ - Legendary enemy
Rancor
Koboh / Sodden Grotto
ABILITY / UNLOCK: Access Sodden Grotto from Rambler's Reach
WHERE TO GO: Explore to the lowest cavern beneath the mine; rest before entering the boss arena.
LOCATION GUIDE & SOURCES ↗ - Legendary enemy
Golden Skriton
Jedha / Desert Ridge / Anchorite Base
ABILITY / UNLOCK: Reach Jedha desert free exploration
WHERE TO GO: From Anchorite Base travel toward the leftmost section of Desert Ridge for the open-sand boss.
LOCATION GUIDE & SOURCES ↗ - Legendary enemy
The Mire Terror
Koboh / Viscid Bog
ABILITY / UNLOCK: Force Lift for submerged platforms
WHERE TO GO: From the long Bog lift, raise the three stone platforms with Force Lift and cross to the secluded arena.
LOCATION GUIDE & SOURCES ↗ - Legendary enemy
Spawn of Oggdo
Koboh / Fort Kah'Lin
ABILITY / UNLOCK: Reach the Raider fort towers
WHERE TO GO: Climb the watchtowers to the circular central platform; it drops into the boss pit. Open the poncho chest after defeating it.
LOCATION GUIDE & SOURCES ↗ - Legendary enemy
Sutaban Alpha
Jedha / Crypt of Uhrma
ABILITY / UNLOCK: Crypt switch-door puzzle; green barrier dash
WHERE TO GO: At the crypt door pull the switches numbered 1, 4, 6 and 7 (upper row then lower row). Continue past the barrier to the cavern.
LOCATION GUIDE & SOURCES ↗ - Legendary enemy
The Massiff
Koboh / Yurt Barracks
ABILITY / UNLOCK: Force Lift door access
WHERE TO GO: Get beneath the elevated guard room, climb the side grate, then Lift the locked door beside the Essence.
LOCATION GUIDE & SOURCES ↗ - Legendary enemy
Beetu Deetu
Koboh / Southern Reach
ABILITY / UNLOCK: Visit the Southern Reach meditation area
WHERE TO GO: Walk forward from the meditation point; this battle droid drops into the path.
LOCATION GUIDE & SOURCES ↗ - Legendary enemy
E3-VE3
Koboh / Untamed Downs
ABILITY / UNLOCK: Green barrier dash; Bygone Settlement route
WHERE TO GO: Ride a Nekko into Untamed Downs, follow the mountain's left opening and dash through the green barrier.
LOCATION GUIDE & SOURCES ↗ - Force tear
Fractured Malice
Coruscant / Rooftops
ABILITY / UNLOCK: Force Lift
WHERE TO GO: Take the route away from Renovation Site 4733, follow pipes and Lift the sealed door for the Rancor challenge.
LOCATION GUIDE & SOURCES ↗ - Force tear
Fractured Burden
Koboh / Gorge Crash Site
ABILITY / UNLOCK: Force Lift
WHERE TO GO: Step on and immediately off the nearby elevator, Lift the exposed floor plate and descend to the three-enemy challenge.
LOCATION GUIDE & SOURCES ↗ - Force tear
Fractured Agility
Koboh / Boiling Bluff / Derelict Dam
ABILITY / UNLOCK: Upgraded Ascension Cable; aerial balloon route
WHERE TO GO: Position the grapple balloon and follow the high approach to Derelict Dam's upper ledge for the timed course.
LOCATION GUIDE & SOURCES ↗ - Force tear
Fractured Momentum
Koboh / Smuggler's Tunnels
ABILITY / UNLOCK: Merrin's green barrier dash
WHERE TO GO: From the cantina tunnels, pass the first green gate, wall-run and dash through the next barrier.
LOCATION GUIDE & SOURCES ↗ - Force tear
Fractured Delusion
Koboh / Hunter's Quarry
ABILITY / UNLOCK: Ascension Cable and local cave access
WHERE TO GO: Grapple to the quarry weather equipment behind Doma's shop and enter the side cave to unlock the encounter.
LOCATION GUIDE & SOURCES ↗ - Force tear
Fractured Duality
Koboh / Pyloon's Saloon Rooftop
ABILITY / UNLOCK: Access saloon garden / tower vines
WHERE TO GO: Climb the rooftop tower using its vines; finish the Double-Bladed Stance combat challenge.
LOCATION GUIDE & SOURCES ↗ - Force tear
Fractured History
Koboh / Doma's Shop / Fort Kah'Lin
ABILITY / UNLOCK: Defeat Spawn of Oggdo first
WHERE TO GO: After the Fort Kah'Lin boss, interact with the small Oggdo figure beside Doma's shop to unlock the double-Oggdo encounter.
LOCATION GUIDE & SOURCES ↗ - Force tear
Fractured Resolve
Koboh / Swindler's Wash
ABILITY / UNLOCK: Reach the lower river path
WHERE TO GO: Follow the low stream to the waterfall and search the shallow cave behind it for the platforming course.
LOCATION GUIDE & SOURCES ↗ - Force tear
Fractured Punishment
Koboh / Devastated Settlement
ABILITY / UNLOCK: Stone Spires updrafts active; Relter
WHERE TO GO: Glide counterclockwise from Devastated Settlement over the updrafts to the platform by the large golden cube.
LOCATION GUIDE & SOURCES ↗ - Force tear
Fractured Power
Koboh / Marl Cavern / Fogged Expanse
ABILITY / UNLOCK: Upgraded Ascension Cable balloon traversal
WHERE TO GO: From Fogged Expanse travel through Marl Cavern via the balloons for the Crossguard-only combat Tear.
LOCATION GUIDE & SOURCES ↗ - Force tear
Fractured Tradition
Jedha / Monastery Walls
ABILITY / UNLOCK: Reach Monastery Walls; grapple climbing
WHERE TO GO: Ascend the left high ridge, grapple to the ledge and jump over pillars to reach the single-saber fight.
LOCATION GUIDE & SOURCES ↗ - Force tear
Fractured Determination
Jedha / Desert Ridge / Anchorite Base
ABILITY / UNLOCK: Merrin's green barrier dash
WHERE TO GO: From Anchorite Base inspect the two green-lit passages to the west on the Holomap; follow the accessible barrier route.
LOCATION GUIDE & SOURCES ↗ - Force tear
Fractured Dexterity
Jedha / Blustery Mesa / Crypt of Uhrma
ABILITY / UNLOCK: Jedha wind-jump access
WHERE TO GO: From the crypt meditation point climb the stairs, wall-run through the wind and turn toward the side ledge.
LOCATION GUIDE & SOURCES ↗ - Force tear
Fractured Cunning
Jedha / Timeworn Bridge
ABILITY / UNLOCK: Merrin's green barrier dash
WHERE TO GO: From Timeworn Bridge go up and around the cliff, squeeze through the opening and dash beyond the green gate.
LOCATION GUIDE & SOURCES ↗ - Force tear
Fractured Endurance
Shattered Moon / Automated Forge
ABILITY / UNLOCK: Return to upper forge traversal
WHERE TO GO: Climb the electrified grates, wall-run and use the swing pole instead of the zipline for the B1-droid encounter.
LOCATION GUIDE & SOURCES ↗ - Fish
See Fish
Koboh / Foothill Falls
ABILITY / UNLOCK: Recruit Skoova Stev
WHERE TO GO: Talk to Skoova by the Foothill Falls pond after meeting him so the aquarium record is registered.
LOCATION GUIDE & SOURCES ↗ - Fish
Frilled Newt
Koboh / Gorge Crash Site
ABILITY / UNLOCK: Recruit Skoova Stev
WHERE TO GO: Return to the crash site pond near the meditation point and talk with Skoova.
LOCATION GUIDE & SOURCES ↗ - Fish
Fingerlip Garpon
Koboh / Rambler's Reach Outpost
ABILITY / UNLOCK: Recruit Skoova Stev
WHERE TO GO: From Rambler's Reach Outpost, walk behind the house nearest the stables and find Skoova fishing beside the river.
LOCATION GUIDE & SOURCES ↗ - Fish
Barbed Hookfish
Koboh / Smuggler's Tunnels
ABILITY / UNLOCK: Recruit Skoova Stev
WHERE TO GO: Descend into the water-filled cavern under Pyloon's Saloon; speak with Skoova beside the pool.
LOCATION GUIDE & SOURCES ↗ - Fish
Blue-Finned Crayfish
Koboh / Nekko Pools
ABILITY / UNLOCK: Nekko mount unlocked
WHERE TO GO: From Nekko Pools ride a Nekko uphill toward Bygone Settlement; Skoova is near the area border just beyond the mount-access gate.
LOCATION GUIDE & SOURCES ↗ - Fish
Big-Mouth Faa
Koboh / Rift Passage
ABILITY / UNLOCK: Reach Rift Passage route
WHERE TO GO: From the Rift Passage meditation point, look at the small pool near the passage entrance and speak to Skoova.
LOCATION GUIDE & SOURCES ↗ - Fish
Blinding Rayfish
Koboh / Devastated Settlement
ABILITY / UNLOCK: Relter gliding / Stone Spires
WHERE TO GO: Glide from the Grand Courtyard toward the isolated stone pillar and its pond to meet Skoova.
LOCATION GUIDE & SOURCES ↗ - Fish
Glottsamcrab
Koboh / Viscid Bog
ABILITY / UNLOCK: Reach Viscid Bog
WHERE TO GO: Near the Viscid Bog meditation point, search the water beside the small settler hut marked with a Rumor for Skoova's boat.
LOCATION GUIDE & SOURCES ↗ - Fish
Mee Fish
Koboh / Mountain Ascent
ABILITY / UNLOCK: Access Mountain Ascent
WHERE TO GO: Find Skoova at the small pool near the waterfall and Chamber of Detachment.
LOCATION GUIDE & SOURCES ↗ - Fish
Viscid Lurker
Koboh / Phon'Qi Caverns
ABILITY / UNLOCK: Force Lift and cavern access
WHERE TO GO: After exploring Phon'Qi Caverns and passing the acid creatures and explosive droids, descend to the lower water pool to meet Skoova.
LOCATION GUIDE & SOURCES ↗ - Fish
Snakefish
Jedha / Arid Flats / Anchorite Base
ABILITY / UNLOCK: Reach Jedha desert
WHERE TO GO: From Anchorite Base circle right around the rock wall and meet Skoova beside the water.
LOCATION GUIDE & SOURCES ↗ - Fish
Fantailed Laa
Jedha / Crypt of Uhrma
ABILITY / UNLOCK: Solve Crypt of Uhrma puzzle
WHERE TO GO: Open the crypt switch door, enter the lower hidden passage and find Skoova at the water below.
LOCATION GUIDE & SOURCES ↗ - Garden seed
Bluebell Squish
Koboh / Wild seed patches / Cantina rooftop
ABILITY / UNLOCK: Recruit Pili on Jedha
WHERE TO GO: Cut a seed-bearing plant marked by bright green fireflies; return to the rooftop garden and grow at least one of this species. Any color variant qualifies.
LOCATION GUIDE & SOURCES ↗ - Garden seed
Cactus Ball
Koboh / Wild seed patches / Cantina rooftop
ABILITY / UNLOCK: Recruit Pili on Jedha
WHERE TO GO: Cut a seed-bearing plant marked by bright green fireflies; return to the rooftop garden and grow at least one of this species. Any color variant qualifies.
LOCATION GUIDE & SOURCES ↗ - Garden seed
Crimson Jelly Spire
Koboh / Wild seed patches / Cantina rooftop
ABILITY / UNLOCK: Recruit Pili on Jedha
WHERE TO GO: Cut a seed-bearing plant marked by bright green fireflies; return to the rooftop garden and grow at least one of this species. Any color variant qualifies.
LOCATION GUIDE & SOURCES ↗ - Garden seed
Fire Pineapple
Koboh / Wild seed patches / Cantina rooftop
ABILITY / UNLOCK: Recruit Pili on Jedha
WHERE TO GO: Cut a seed-bearing plant marked by bright green fireflies; return to the rooftop garden and grow at least one of this species. Any color variant qualifies.
LOCATION GUIDE & SOURCES ↗ - Garden seed
Goldenlight Moss
Koboh / Wild seed patches / Cantina rooftop
ABILITY / UNLOCK: Recruit Pili on Jedha
WHERE TO GO: Cut a seed-bearing plant marked by bright green fireflies; return to the rooftop garden and grow at least one of this species. Any color variant qualifies.
LOCATION GUIDE & SOURCES ↗ - Garden seed
Koboh Spiker
Koboh / Wild seed patches / Cantina rooftop
ABILITY / UNLOCK: Recruit Pili on Jedha
WHERE TO GO: Cut a seed-bearing plant marked by bright green fireflies; return to the rooftop garden and grow at least one of this species. Any color variant qualifies.
LOCATION GUIDE & SOURCES ↗ - Garden seed
Palm Fruit Shell
Koboh / Wild seed patches / Cantina rooftop
ABILITY / UNLOCK: Recruit Pili on Jedha
WHERE TO GO: Cut a seed-bearing plant marked by bright green fireflies; return to the rooftop garden and grow at least one of this species. Any color variant qualifies.
LOCATION GUIDE & SOURCES ↗ - Garden seed
Pine Fern
Koboh / Wild seed patches / Cantina rooftop
ABILITY / UNLOCK: Recruit Pili on Jedha
WHERE TO GO: Cut a seed-bearing plant marked by bright green fireflies; return to the rooftop garden and grow at least one of this species. Any color variant qualifies.
LOCATION GUIDE & SOURCES ↗ - Garden seed
Spine Fluff
Koboh / Wild seed patches / Cantina rooftop
ABILITY / UNLOCK: Recruit Pili on Jedha
WHERE TO GO: Cut a seed-bearing plant marked by bright green fireflies; return to the rooftop garden and grow at least one of this species. Any color variant qualifies.
LOCATION GUIDE & SOURCES ↗ - Garden seed
Tuber Maw
Koboh / Wild seed patches / Cantina rooftop
ABILITY / UNLOCK: Recruit Pili on Jedha
WHERE TO GO: Cut a seed-bearing plant marked by bright green fireflies; return to the rooftop garden and grow at least one of this species. Any color variant qualifies.
LOCATION GUIDE & SOURCES ↗ - Side activity
Recruit Skoova Stev
Koboh / Rambler's Reach / Foothill Falls
ABILITY / UNLOCK: Early Koboh free exploration
WHERE TO GO: Speak to Skoova by Foothill Falls; revisit his fishing locations for all 12 aquarium records.
LOCATION GUIDE & SOURCES ↗ - Side activity
Recruit Pili Walde
Jedha / Blustery Mesa / Pyloon's Saloon
ABILITY / UNLOCK: Jedha Chapter 4 access
WHERE TO GO: Speak with Pili during Jedha traversal. Find her on the cantina rooftop on Koboh to begin all 10 seed species.
LOCATION GUIDE & SOURCES ↗ - Side activity
Talk to Toa about Jedi Chambers
Koboh / Basalt Rift / Prospector routes
ABILITY / UNLOCK: Complete story Chamber of Duality
WHERE TO GO: Visit Toa in Basalt Rift; her Rumors highlight optional chamber locations. Finding a chamber yourself also works.
LOCATION GUIDE & SOURCES ↗ - Side activity
Complete three Jedha ruins paths
Jedha / Arid Flats / Wayfinder's Tomb
ABILITY / UNLOCK: Air Dash and Ascension Cable upgrades
WHERE TO GO: Finish Restoration, Persistence and Conviction, then revisit the sealed central tomb for Treasure Map Upgrade.
LOCATION GUIDE & SOURCES ↗ - Side activity
Holotactics and visitors
Koboh / Rambler's Reach / Pyloon's Saloon
ABILITY / UNLOCK: Recruit Bhima and Tulli
WHERE TO GO: Find and recruit the Holotactics players through the Boiling Bluff lead, then take on Pyloon's Saloon tabletop battles for rewards.
LOCATION GUIDE & SOURCES ↗ - Side activity
Bounty hunter contract chain
Koboh / Pyloon's Saloon / bounty board
ABILITY / UNLOCK: Advance story until Caij's assignments unlock
WHERE TO GO: Check in with Caij as the story opens bounty targets; finish her chain separately from the 13 Legendary Adversaries.
LOCATION GUIDE & SOURCES ↗ - Side activity
Revisit each planet after major movement upgrades
Multi-world / Holomap sector completion
ABILITY / UNLOCK: Finish story progression for Air Dash, Electro Dart, Force Lift and updated cable
WHERE TO GO: Switch planet layers on the Holomap and follow map-upgrade symbols for chests, treasures, scans and essences; no map upgrade marks Force Tears or fish.
LOCATION GUIDE & SOURCES ↗
Illustrated puzzle help without misleading screenshots
The room-by-room sources linked above have actual puzzle screenshots and map images. The general Jedi: Survivor game gallery contains authentic game-wide media, not pictures verified to be from these exact locations. For the Chamber of Reason, track this sequence:
Open photographed chamber entrances and solutions ↗ Open illustrated map-upgrade routes ↗
GAMEPLAY / OFFICIAL SCREENSHOTS
See the game in action
Select an image to enlarge it. These are actual gameplay images from this game's official Steam store listing. Screenshots can reflect a later PC edition.
Source: Official Steam game page ↗. Images © their respective rights holders.
01 · Orientation
What the game is
Survivor expands Cal Kestis's story through frontier settlement, resistance networks, High Republic ruins, and the search for Tanalorr as a refuge beyond Imperial reach. The hub design gives Koboh a community life that changes as characters arrive and relationships develop.
IDS places the game in the Reign of the Empire era and records its continuity as Canon.
02 · Publication file
Release, studio, and platform context
Star Wars Jedi: Survivor was developed by Respawn Entertainment and published by Electronic Arts. Its primary release platforms in the IDS record are PlayStation 5; Xbox Series; Windows; later PS4 / Xbox One.
Star Wars Jedi: Survivor is cataloged as a released Star Wars game. Later ports, remasters, backward-compatible versions, or storefront reissues remain attached to this core record unless they substantially alter the underlying work.
IDS stores the game itself as one work rather than creating separate records for every port, storefront release, compatibility update, or remaster. Platform history still matters, but the archive avoids inflating a single game into several supposedly different titles.
03 · Story
Narrative and player position
The current IDS story label is Cal Kestis, Tanalorr, and High Republic legacies. The playable role is recorded as Cal Kestis.
Rather than reducing the game to plot summary, IDS tracks what position the player occupies in the galaxy. Playing as Cal Kestis changes which institutions, conflicts, and social relationships the game can make visible.
04 · Gameplay systems
How Star Wars becomes playable
Action-adventure systems combine traversal, combat, environmental puzzles, character abilities, and exploration so that story spaces become navigable rather than purely cinematic.
IDS classifies the title as Action-adventure. That label is useful because genre changes what parts of Star Wars become legible: a strategy game foregrounds institutions and logistics, an RPG foregrounds identity and relationships, and an action game often foregrounds bodies, movement, combat, and environmental navigation.
05 · Place
Worlds, routes, and environments
Major locations in the current record include Koboh; Jedha; Coruscant; Tanalorr. Those places matter because games convert fictional geography into routes, obstacles, hubs, battlefields, workplaces, ruins, or social spaces the player must navigate.
Interactive scale can reveal details that screen media pass over quickly: how far locations are from one another, which areas are restricted, where people gather, what infrastructure connects spaces, and how movement is shaped by vehicles, architecture, terrain, enemies, or local authority.
06 · Institutions
Power, organizations, and social systems
The story context is Cal Kestis, Tanalorr, and High Republic legacies. That places the player inside or alongside institutions whose authority is usually encountered through missions, ranks, restricted spaces, enemies, allies, contracts, or rules.
Games are especially useful for IDS because institutions become operational systems. A faction can control checkpoints, issue objectives, distribute equipment, reward loyalty, restrict movement, organize training, or shape reputation. Those mechanics make political power experiential rather than only descriptive.
07 · People
Characters and playable roles
The current playable-role record is Cal Kestis. IDS uses this field as a route into the characters, crews, military roles, factions, or created player identities through which the game is experienced.
Games often make character identity interactive. Abilities, dialogue choices, party membership, equipment, reputation, and mission access can determine how a player experiences relationships that screen media presents from the outside.
08 · Anthropology
Anthropological analysis
The strongest IDS entry point is the relationship between action-adventure mechanics and the story context described as Cal Kestis, Tanalorr, and High Republic legacies. The player does not only learn about the setting; the player is required to act through a particular set of rules.
That distinction matters anthropologically. Interactive media can make hierarchy, labor, mobility, violence, ritual, reputation, resource management, or identity into repeatable behaviors. IDS therefore reads games as designed social systems as well as narrative texts.
09 · Source record
Verify the game
IDS separates release facts from independently written summaries and analysis. External links are retained as verification sources, but the substantive game description now lives inside IDS instead of requiring the visitor to leave the archive.
GO DEEPER / CONNECT THE ARCHIVE
Keep exploring Star Wars games
Star Wars Jedi: Survivor belongs to a wider catalog of interactive Star Wars stories. Follow a neighboring game or trace characters, places and factions through the IDS archives.


KEEP EXPLORING / MORE STAR WARS GAMES